The Pimax Crystal VR Headset was the first dual 4K resolution VR headset to hit the market. With insane resolution and displays capable of up to 120 frames per second, the Pimax Crystal VR does not only pitch itself as the best VR headset on the market, but it may even be a must for taking your home flight simulation to the next level.
The Pimax Crystal is the world’s highest-resolution VR Headset. With a total resolution of 8K pixels (4K per eye), it is the closest anyone will get to sitting in the cockpit of a real aircraft. FSNews was graciously loaned Pimax’s current flagship product, and I have had the opportunity to test this headset thoroughly. Keep reading until the end to see my final thoughts and whether I recommend the Pimax Crystal.
Disclaimer: Pimax does not influence this review in any way, shape, or form. All opinions are purely my own.
Review Setup
I will briefly detail my background and flight simulator hardware to provide context for this review. I undertook flight simulation as a hobby in early 2020 with MSFS 2020 on an Xbox One S and a controller. Since then, I have upgraded to a desktop PC and various flight simulation peripherals. Recently, I have begun to shift to mil-sim genre flight simulation games, such as DCS, to more closely reflect my real-world experience. As a Mechanical Engineer with an Aerospace focus, I have a unique perspective on the fundamentals and the intricate details behind all things aviation.
The hardware used for this review includes the Thrustmaster HOTAS Warthog Flight Stick and Throttle Quadrant. At the time of writing, I still do not own a rudder setup. As such, I use the slider axis on the Throttle Quadrant for nose wheel steering and aircraft requiring rudder manipulation. The PC used for this setup falls under extremely high-end specifications; compare your system specifications in order to contextualize performance. My PC specifications:
- Graphics: RTX 4090 Suprim (Liquid Cooled)
- CPU: Intel I9-14900KF
- Memory: 128GB DDR5 (4x32GB)
- Storage: 8TB SSD
Unfortunately, due to technical limitations related to MSFS, the only flight sim used for testing purposes was DCS. While not a one-to-one comparison for MSFS, the settings used for DCS were on maximum. In my previous VR experience in MSFS, the platform generally performed considerably worse than DCS. It is possible to tune MSFS for performance. However, the platform is extremely poorly optimized for VR, and the general experience is far less enjoyable as a result.
Pimax – VR Wonderkid?
Pimax is by no means inexperienced in the VR headset field. Founded in 2015, Pimax’s first VR headset immediately marked the company as a top-of-the-line VR headset supplier. The Pimax 4K, released in 2016, was the first (combined) 4K VR headset on the market. The headset was immediately followed by the world’s most successful crowdfunding campaign, raising 4.2 million USD to fund the development of the Pimax 8K. Released in 2020, the 8K was another Pimax record breaker, marking the world’s first 8K VR headset. With a 4K resolution per eye, the Pimax 8K blew any competition out of the water, and it was subsequently selected as Top Tech at CES for AR/VR technology.
Since the release of the Pimax 8K, the headset has seen several iterations leading up to the subject of today’s review: the Pimax Crystal. With a slightly different form factor, reducing the ultrawide 200-degree FOV of the 8K to just 140 degrees, the Pimax Crystal might seem like a downgrade. However, one critical change between the Crystal and 8K sets one light-years ahead of the other…
Dual QLED – MiniLED Displays
The Pimax Crystal utilizes dual 2880×2880 QLED – MiniLED displays. This is absolutely critical in giving the Crystal its namesake, crystal-clear vision. The intense color accuracy of the QLED and the local dimming of the MiniLED combine to create a VR panel experience unlike any other. Combined with the pixel-dense 4K panels and the unique 35mm Aspherical Glass Lenses, the clarity is unrivaled. Jumping from a headset such as the Meta Quest Pro to the Pimax Crystal is similar to jumping from a dot-matrix display to the real world. The benefits of this technology are incredibly obvious from the moment you put the headset on.
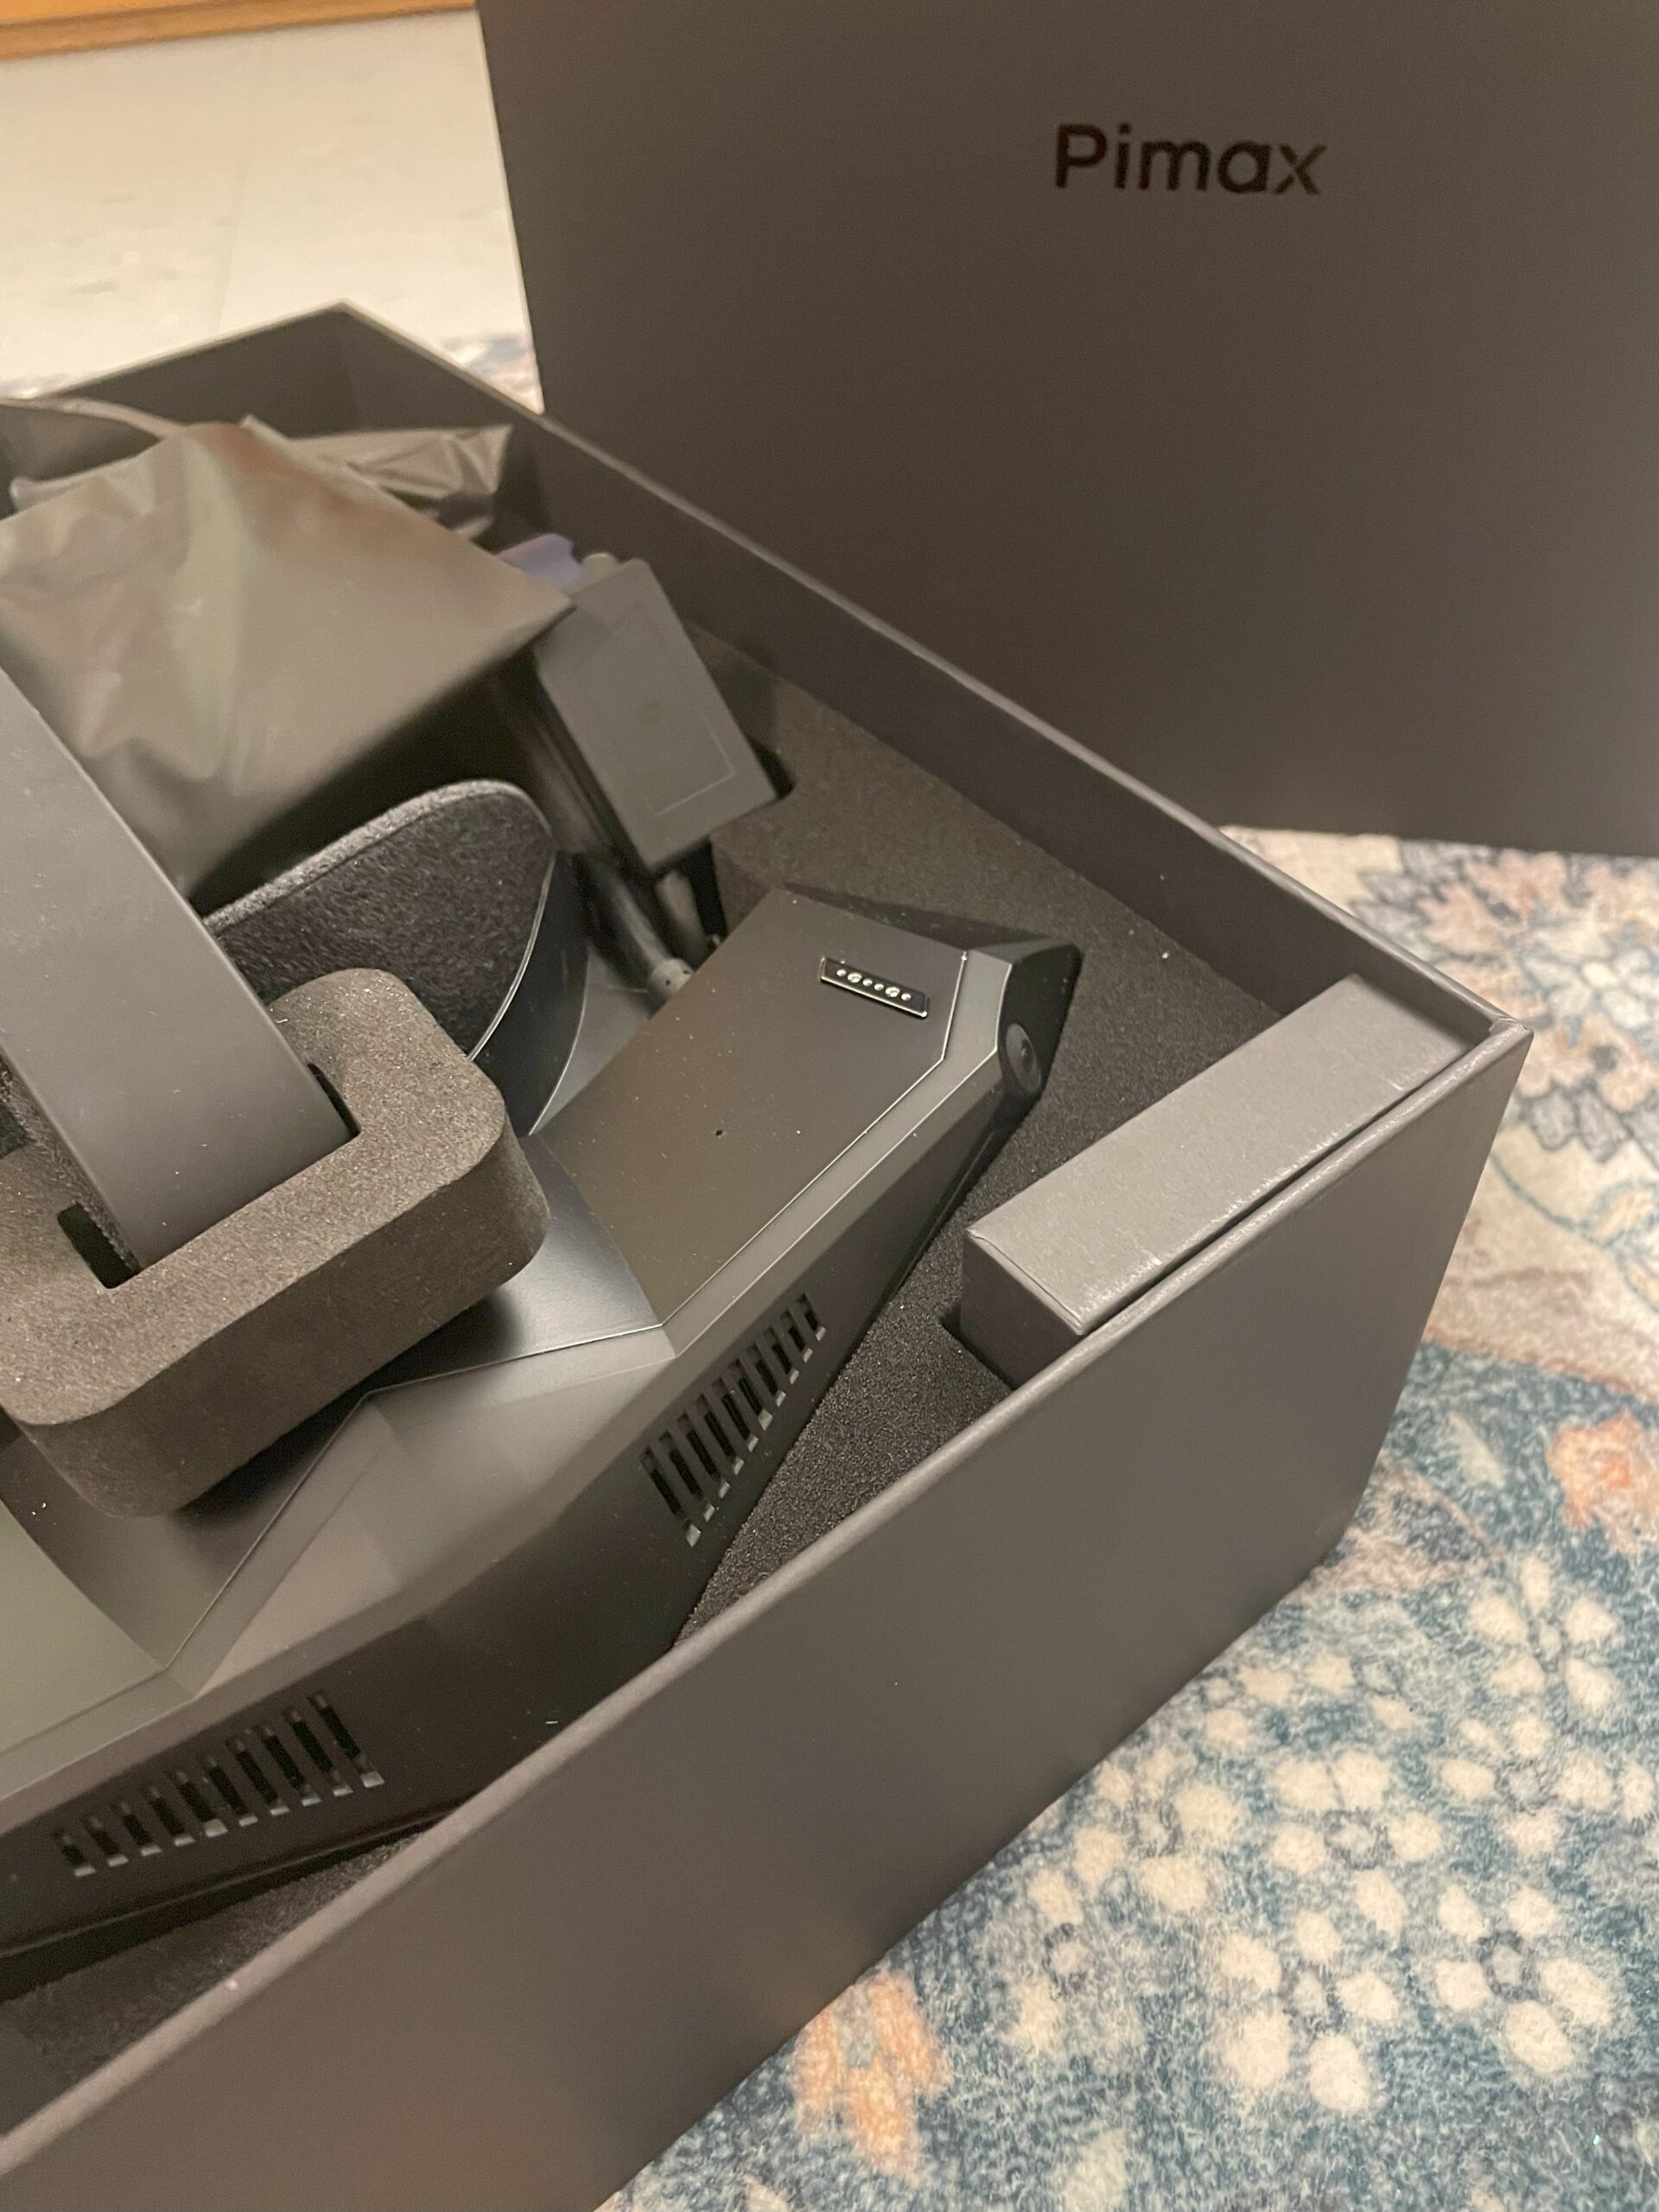
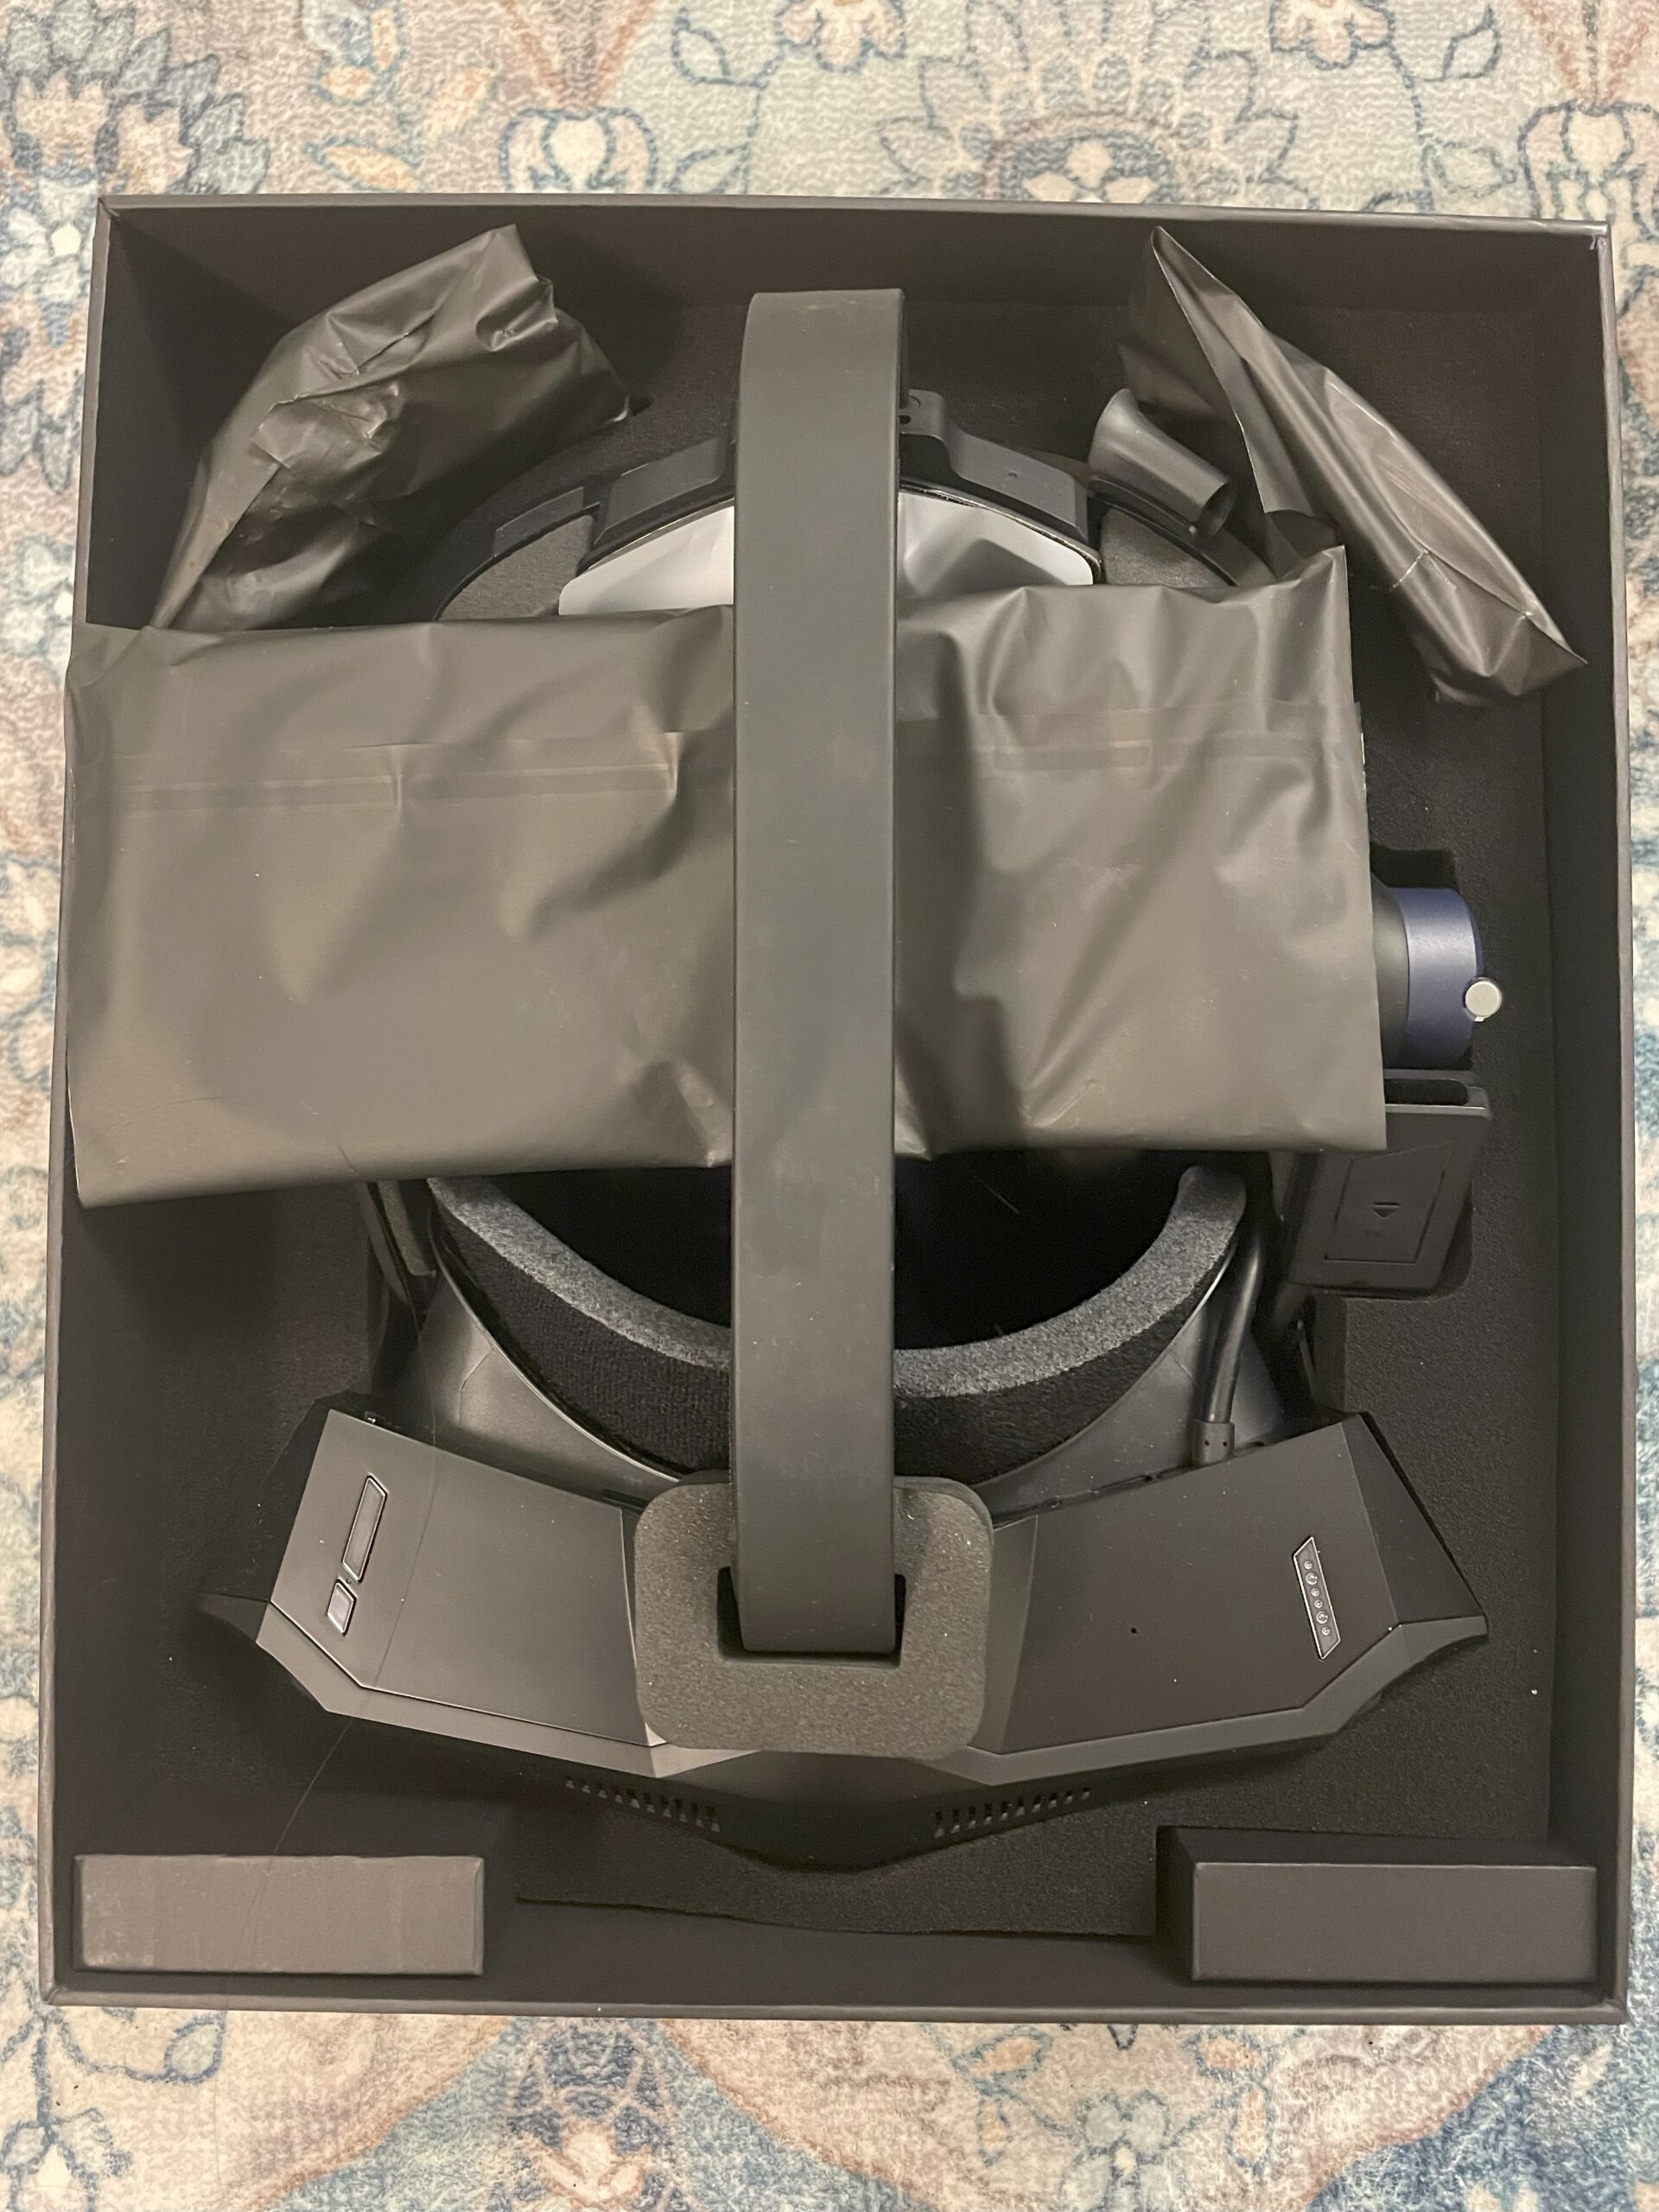
Pimax Crystal – Unboxing and Initial Impressions
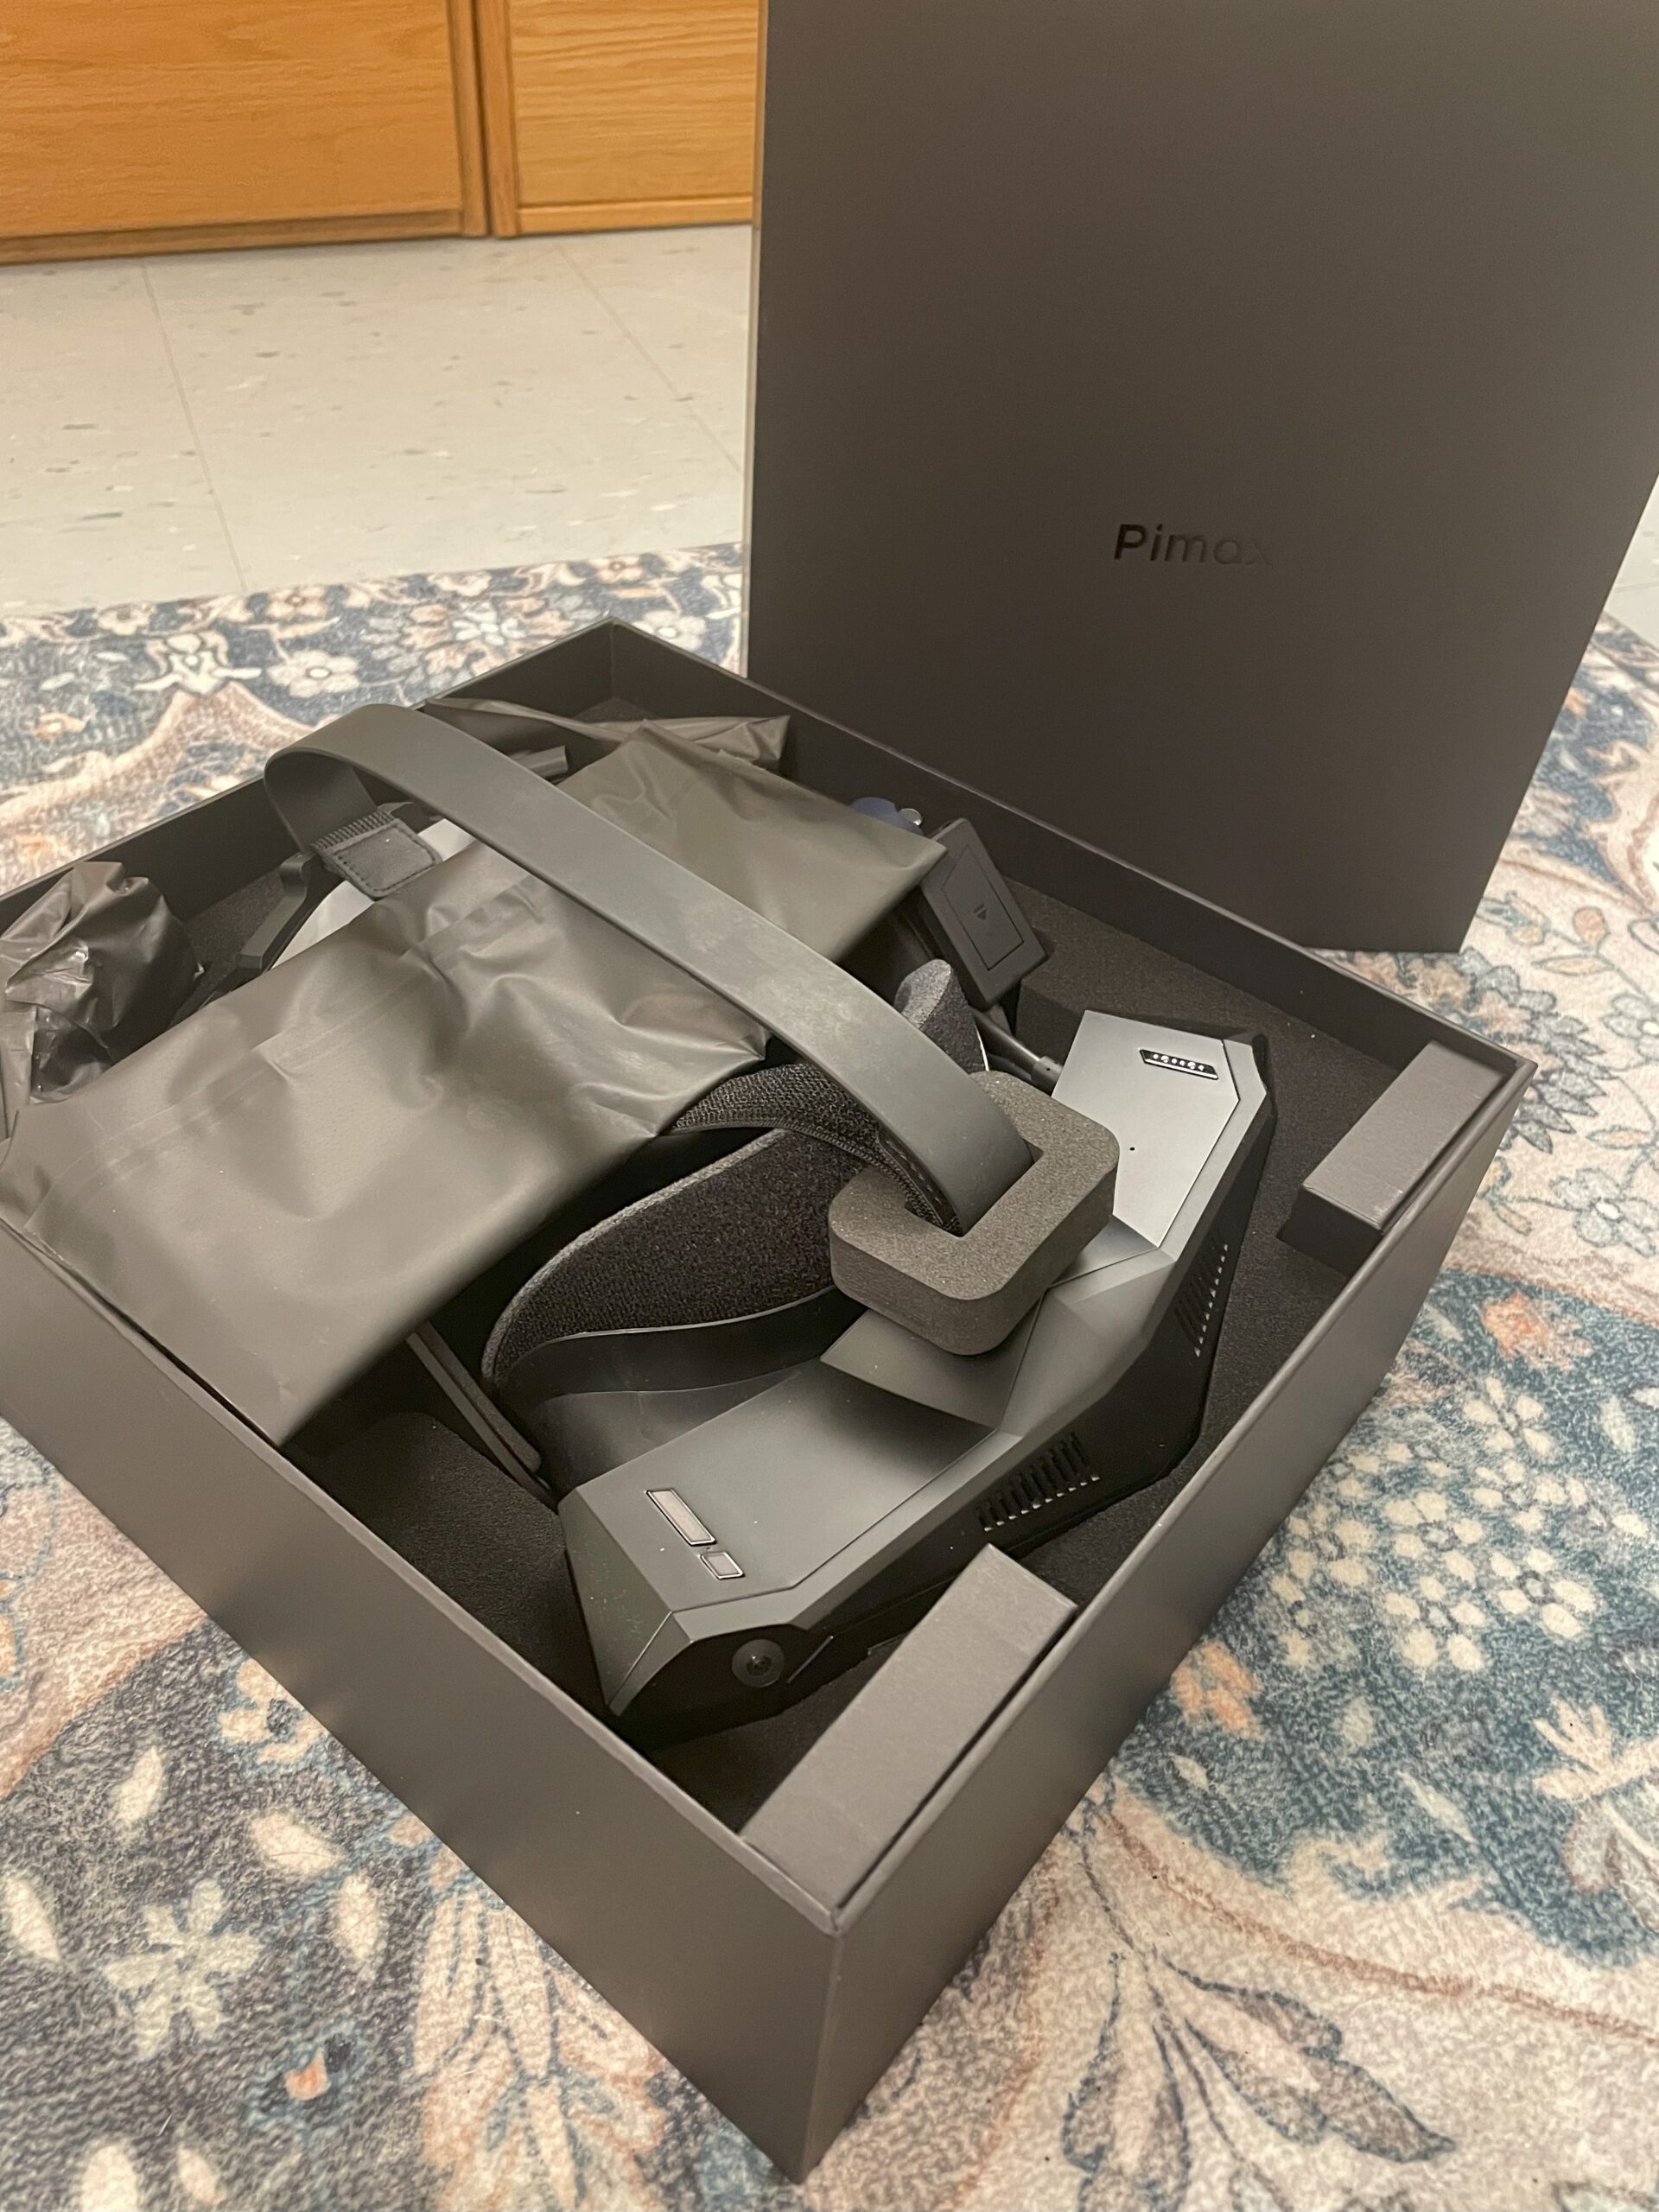
The Pimax Crystal is delivered in a single unmarked box containing the actual unit packaging pictured below. Pimax is generous with included parts and components, running from replacement face masks to multiple batteries (more on that later); the package comes with everything you need to run the headset. I’ve attached a full list of what was included below:
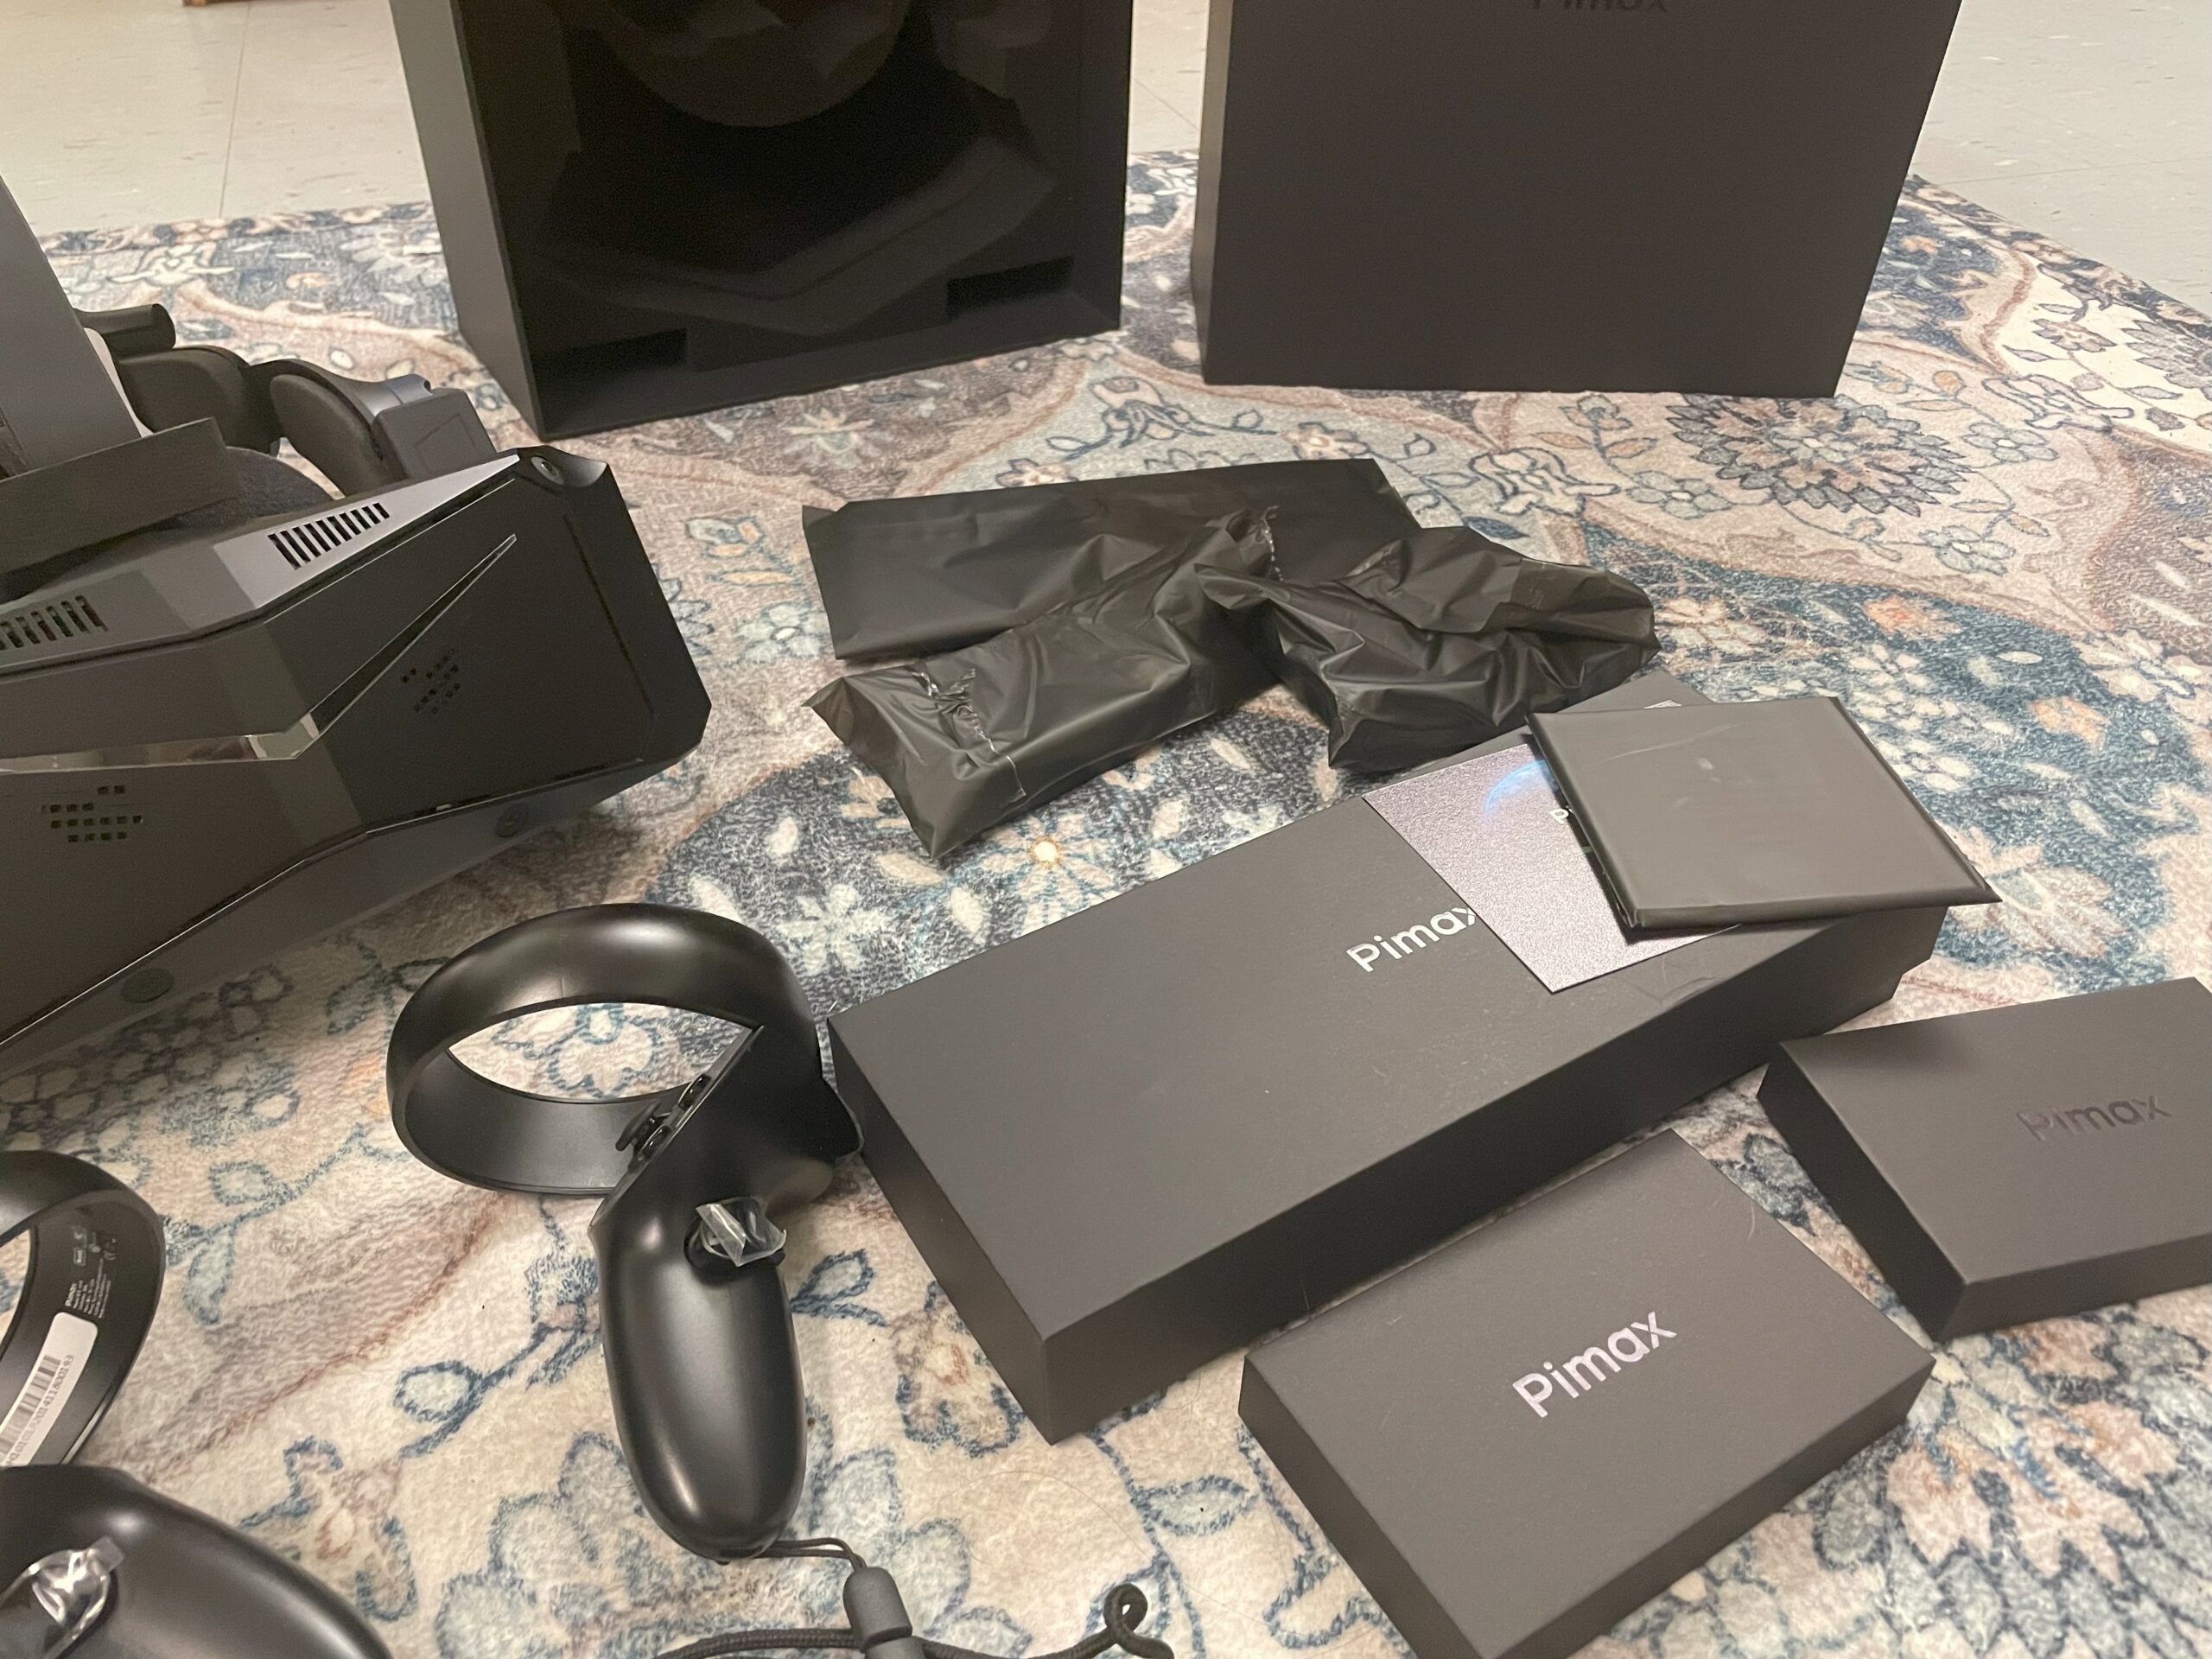
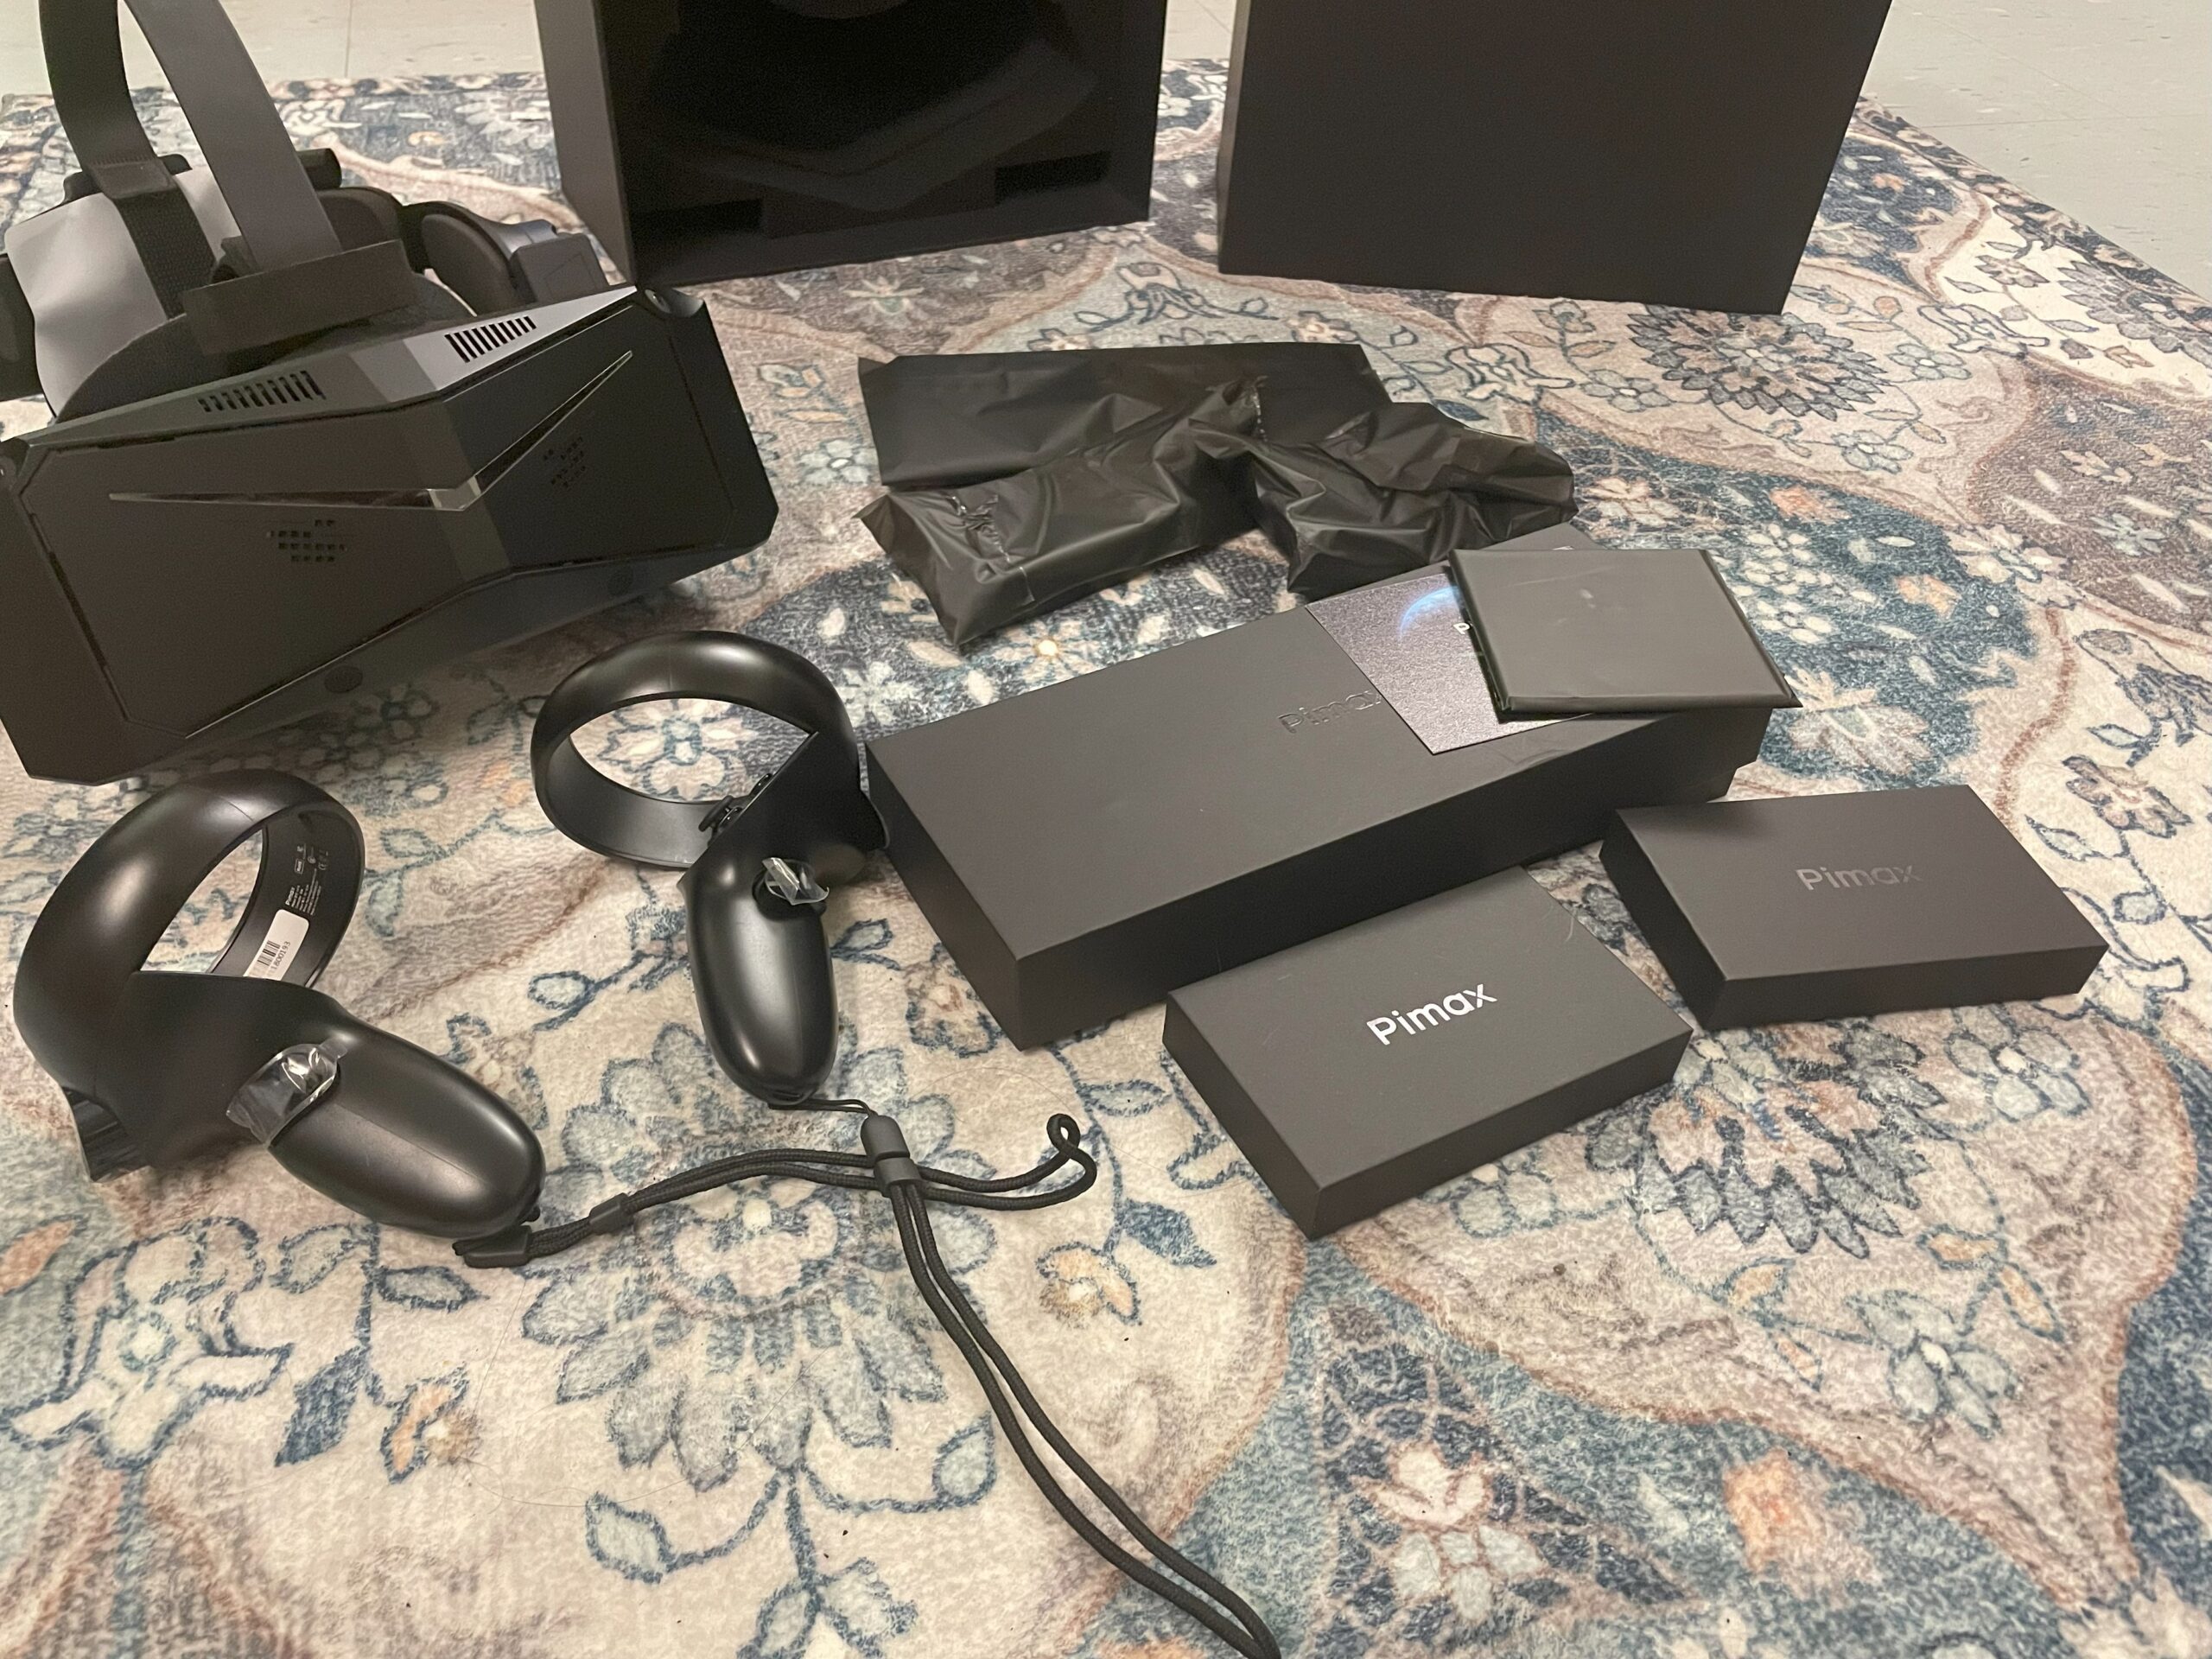
- Pimax Crystal VR Headset
- Mini Display Port to Display Port and Dual USB cable (primary connection method)
- Two Headset Batteries
- One Battery Charger
- Two Controllers with Rechargeable Batteries
- Two USB-C Cables for charging controllers
- USB Dock with 20V Power Supply to run headset without battery
- Replacement Facial Foam
- Replacement Lenses
When I first removed the headset from the box, I was a little surprised by the amount of hard plastics and weight. The headset itself is composed primarily of hard black plastics, which is in line with the build quality of many other VR Headsets. It’s about treading the line of build quality while ensuring the weight is not too excessive, such that the headset becomes uncomfortable to wear. While slightly below expectations on the outside, the headset’s interface (the part your face sits in) has much higher-quality construction. When using the headset, it is virtually impossible to notice any flaws in quality.
I emphasized the word “headset” because some of the other components included in the packaging have significantly lower build quality. The most egregious for a VR Headset is the controllers, which are made of extremely cheap plastic that was already returning to oil when I received them. This seems to be par for the course, though, as the only VR headset controllers that I used that didn’t feel like they were made of waste byproducts were the Valve Index controllers.
Software
The setup of the Pimax Crystal requires a PC and the provided mini-display port wire. Connecting the cable to the PC with the two USB Plugs and the Display Port cable does take up significant availability in the i/o ports on my PC. However, I still had enough for all of my flight sim hardware and other accessories. The mini-display port cable was challenging to put into the headset; there’s a plastic slot that surrounds the port at about 1 inch deep. The plastic seems to have shrunk, and the fit was extremely snug.
Pimax provides a one-click-download software for PC users, Pimax Play, which incorporates all of the functionality of Windows Mixed Reality or SteamVR while also packaging hardware-related features, settings, and software updates. In my experience with the headset, Pimax Play was relatively intuitive; however, it struggled significantly with performance issues. It was a game of roulette: sometimes the software was fine, and other times it was so laggy I would be forced to quit the software in Task Manager, which in itself presents a challenge.
When I first booted up the software after downloading and plugging in the headset, everything was working as expected except for the Eye Tracking. I followed every step I could find on the internet, yet not a single solution would work for me. The headset would allow me to enter the eye tracking calibration menu, which would proceed through the calibration process as if all was normal. However, at the last step, the calibration would consistently fail. The source of this problem turned out to be the Tobii EyeTracker 5 that I had installed for flight simming.
Tobii provides the EyeTracking software used in the Pimax Crystal. If you use the Tobii Eyetracker 5 and have installed the Tobii software, as needed to utilize the eye-tracker, the Pimax Crystal will be unable to use its built-in eye tracking. There were absolutely zero online resources that listed this as a potential conflict. If you are having this issue, remove the Tobii Eyetracker 5 from the PC and uninstall all software related to the independent Tobii eye-tracking system. After fully restarting the PC, install Pimax Play, and you should be good to go.
Ergonomics
I found that while a little large and clunky, the headset’s multiple straps and dials allowed me to dial in a fit for the headset that was near perfect. In fact, the Pimax Crystal is the most comfortable headset I’ve ever used, with much of the design directed at comfort. Critically, the headset doesn’t get overwhelmingly hot. This is down to the interface of the headset, which sits far enough away from your eyes that there is space for airflow, eliminating the largest hurdle for long gaming sessions: Sweat.
Other design choices significantly improve the user’s experience when sitting in the Pimax Crystal for extended periods of time. The Deluxe Modular Audio head-strap (DMAS) headphones are hung away from your ears, which is becoming a standard design choice for modern headsets. This ensures that your ears don’t get fatigued from extended wear. This also comes at no cost to audio quality. With 40mm audio drivers and a full open-back design, the headphones add some truly spectacular audio fidelity to the mix.
The Pimax Crystal’s adjustable back dial allows for easy removal and placement of the headset. This is further aided by the eye-tracking software that displays a guide for optimal headset placement when the sensors detect the user putting the headset on. Not only is this critical for comfort, but the placement of the headset makes an enormous impact on visual clarity. The software ensures that your eyes are centered vertically in the focal point of the lenses. Additionally, the Automatic Inter-Pupilary Distance adjustment is absolutely game-changing for headset users like myself.
Auto-IPD
I have never been able to measure my IPD accurately, which has made using VR headsets extra difficult. The IPD is critical for the horizontal spacing of the lenses, similar to the vertical placement, in that there is an optimal spot for your focal point to be in the lenses, and anything outside of that point will have increasingly reduced clarity. With any other headset that I have used, I essentially have to guess where the best placement lens spacing is. Poor IPD placement can induce headaches and nausea and generally make the whole VR experience horrible. The Pimax Crystal’s AutoIPD feature ensures that all users can enjoy optimal lens spacing and clarity, as well as reduced eye fatigue.
The pre-installed lenses on the Pimax Crystal sit on a motorized rack that utilizes the headset-integrated Tobii eye-tracking software to measure the individual’s inter-pupillary distance and automatically adjust the position of the lenses. This process is repeated upon each headset placement and ensures that the lenses remain in their optimal location regardless of small changes in the way the headset is fitted.
Gameplay Experience
The experience of using the Pimax Crystal for flight simulation is the very reason I can no longer play flight simulator games in 2D. Once fine-tuned and quirks ironed out, the Pimax Crystal is an absolute flight simulation machine. Powering through intense gaming sessions without excessively overheating, getting loose, or having software hiccups. The experience is so perfect that I find hours slipping away before ever realizing it. The display resolution and eye-tracking work in harmony to ensure performance while maintaining crystal-clear imagery at the center of vision.
If you are on the fence about the benefits of VR for flight simulation, I’ve been there. When flying flight simulators such as MSFS or X-Plane, the outright benefits of full 360 degrees of freedom are slightly harder to pinpoint. For commercial ‘bus aviation, there are very limited environments where a flight simmer with VR will significantly benefit over one with a Tobii Eyetracker. VFR flight is much more immersive when using VR for the General Aviation flight simmer; as such, its benefits are slightly more obvious. The flight simmer that will see the largest functional improvement in capability is the military flight simmer. The 360 degrees of freedom bring a level of situational awareness next to none.
As someone who has used VR for all three flight simulation regimes, I knew that military flight simulation would be the most entertaining in VR and would also allow me to demonstrate how significant VR’s benefits are. These reasons, along with some technical difficulties, are why I only tested the Pimax Crystal in Digital Combat Simulator. However, the testing was thorough and involved hundreds of hours of flight simming through intense dogfights, challenging close-air-support missions, and even the most daunting challenge of all: Air-to-Air Refueling.
Air Combat Basics
Before going into the specifics of a combat engagement that really led me to fall in love with the Pimax Crystal, I’ve gone into some basics of air combat maneuvers. While not necessary for the review, it provides important terminology and context for the section that follows it. If you only care about the review, click here to skip this section.
Air-to-air combat in DCS is divided into two primary categories: BVR and WVR (BFM). Beyond Visual Range (BVR) is typically the first stage of any engagement in contested airspace. Flying at maximum throttle, usually attempting to gain as much speed and altitude while closing on the target, the pilot uses their powerful radars to track, lock, and fire a long-range missile such as the Aim-120C AMRAAM (Advanced Medium Range Air-to-Air Missile). At this point in the engagement, the winner is typically the side fitted with the best missiles, the best radar, and, in modern combat, the best stealth.
With the two combat aircraft closing on each other, rapidly gaining altitude and speed, the fight becomes a game of chicken. Who can fire their missile first, and who breaks away to defend first? The first to fire their missile typically enters a long-range beam, pulling their aircraft as far as their radar gimble limit will allow, keeping their lock while reducing the closing rate. The unfortunate target of this missile is now left to defend.
DCS’s rather simplistic cross-sectional area to radar observability modeling means the target aircraft simply needs to enter a sufficient notch, dive towards thicker air, and pray. Notching is an air combat term that involves disengaging the enemy aircraft and pulling your own into a 90-degree turn. By putting an enemy missile on a 90-degree diagonal from your aircraft, you increase your lateral rate of speed relative to the missile and reduce your cross-sectional area. It is critical to maintain awareness in this stage of the defense; monitoring the progress of the enemy missile using both visual cues and radar warning receiver indications is the only way to survive.
To avoid the incoming missile, you will need to fly increasingly evasively and unpredictably right up to the missile terminal phase. When the missile transitions to its onboard radar receiver, the probability of it losing lock is significantly higher. If you can visually track the missile all the way to and throughout its terminal phase, you will be at a significant advantage. By predicting the missile’s response to your movement, a last-minute pull or jink should guarantee you will successfully dodge the missile. At this point, the target aircraft will re-engage the enemy, searching frantically on their radar and visually for a lock.
At this point, the distance between yourself and the enemy aircraft has significantly reduced. Allowing you to be able to visually track the incoming enemy fighter. This is the Within-Visual-Range (WVR) stage of the engagement. Now that both pilots can see each other, their toolbox has grown. Short-range, hyper-maneuverable missiles and aircraft-mounted guns are now practical tools for engagement. The fight becomes a game of wit, and the winner will be the best pilot with the best aircraft and the best short-range weaponry.
Dodging and Weaving
Why did I go through a rather in-depth breakdown of modern air combat engagement? Because I am obsessed with it and could talk about this stuff all day, or because it was in this flight regime that the benefits of the Pimax Crystal made me absolutely fall in love with it? Both.
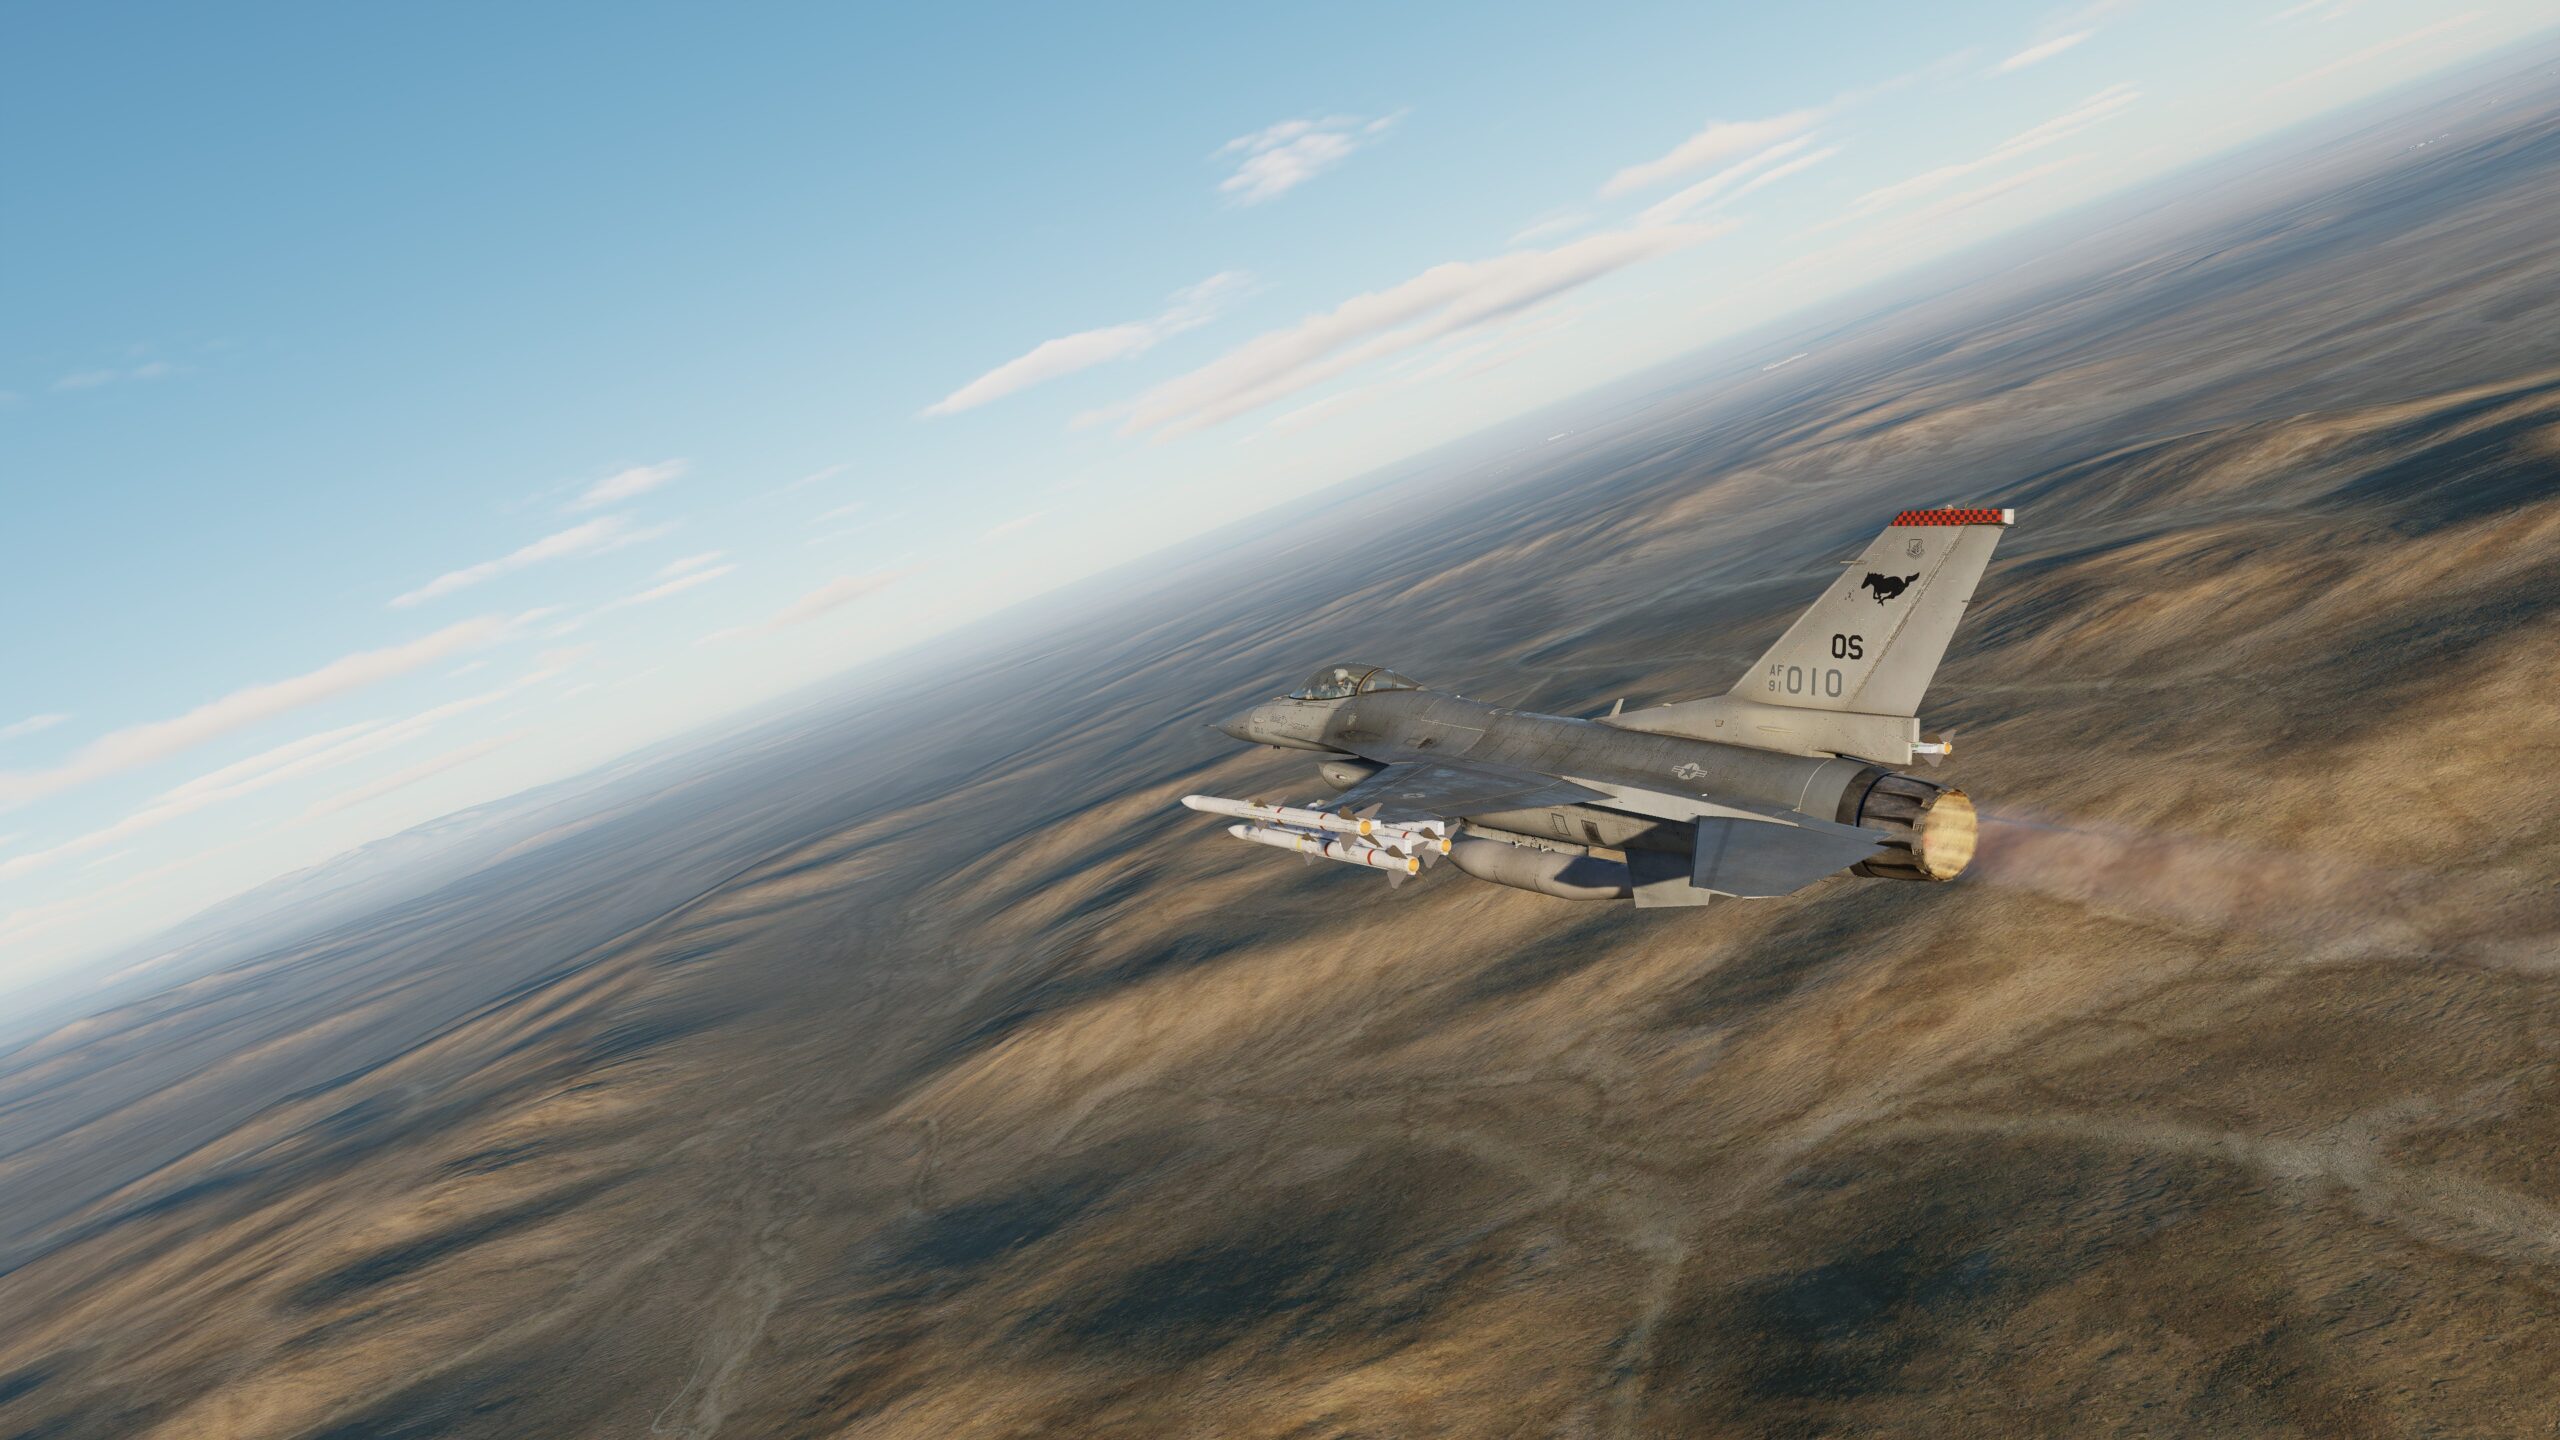
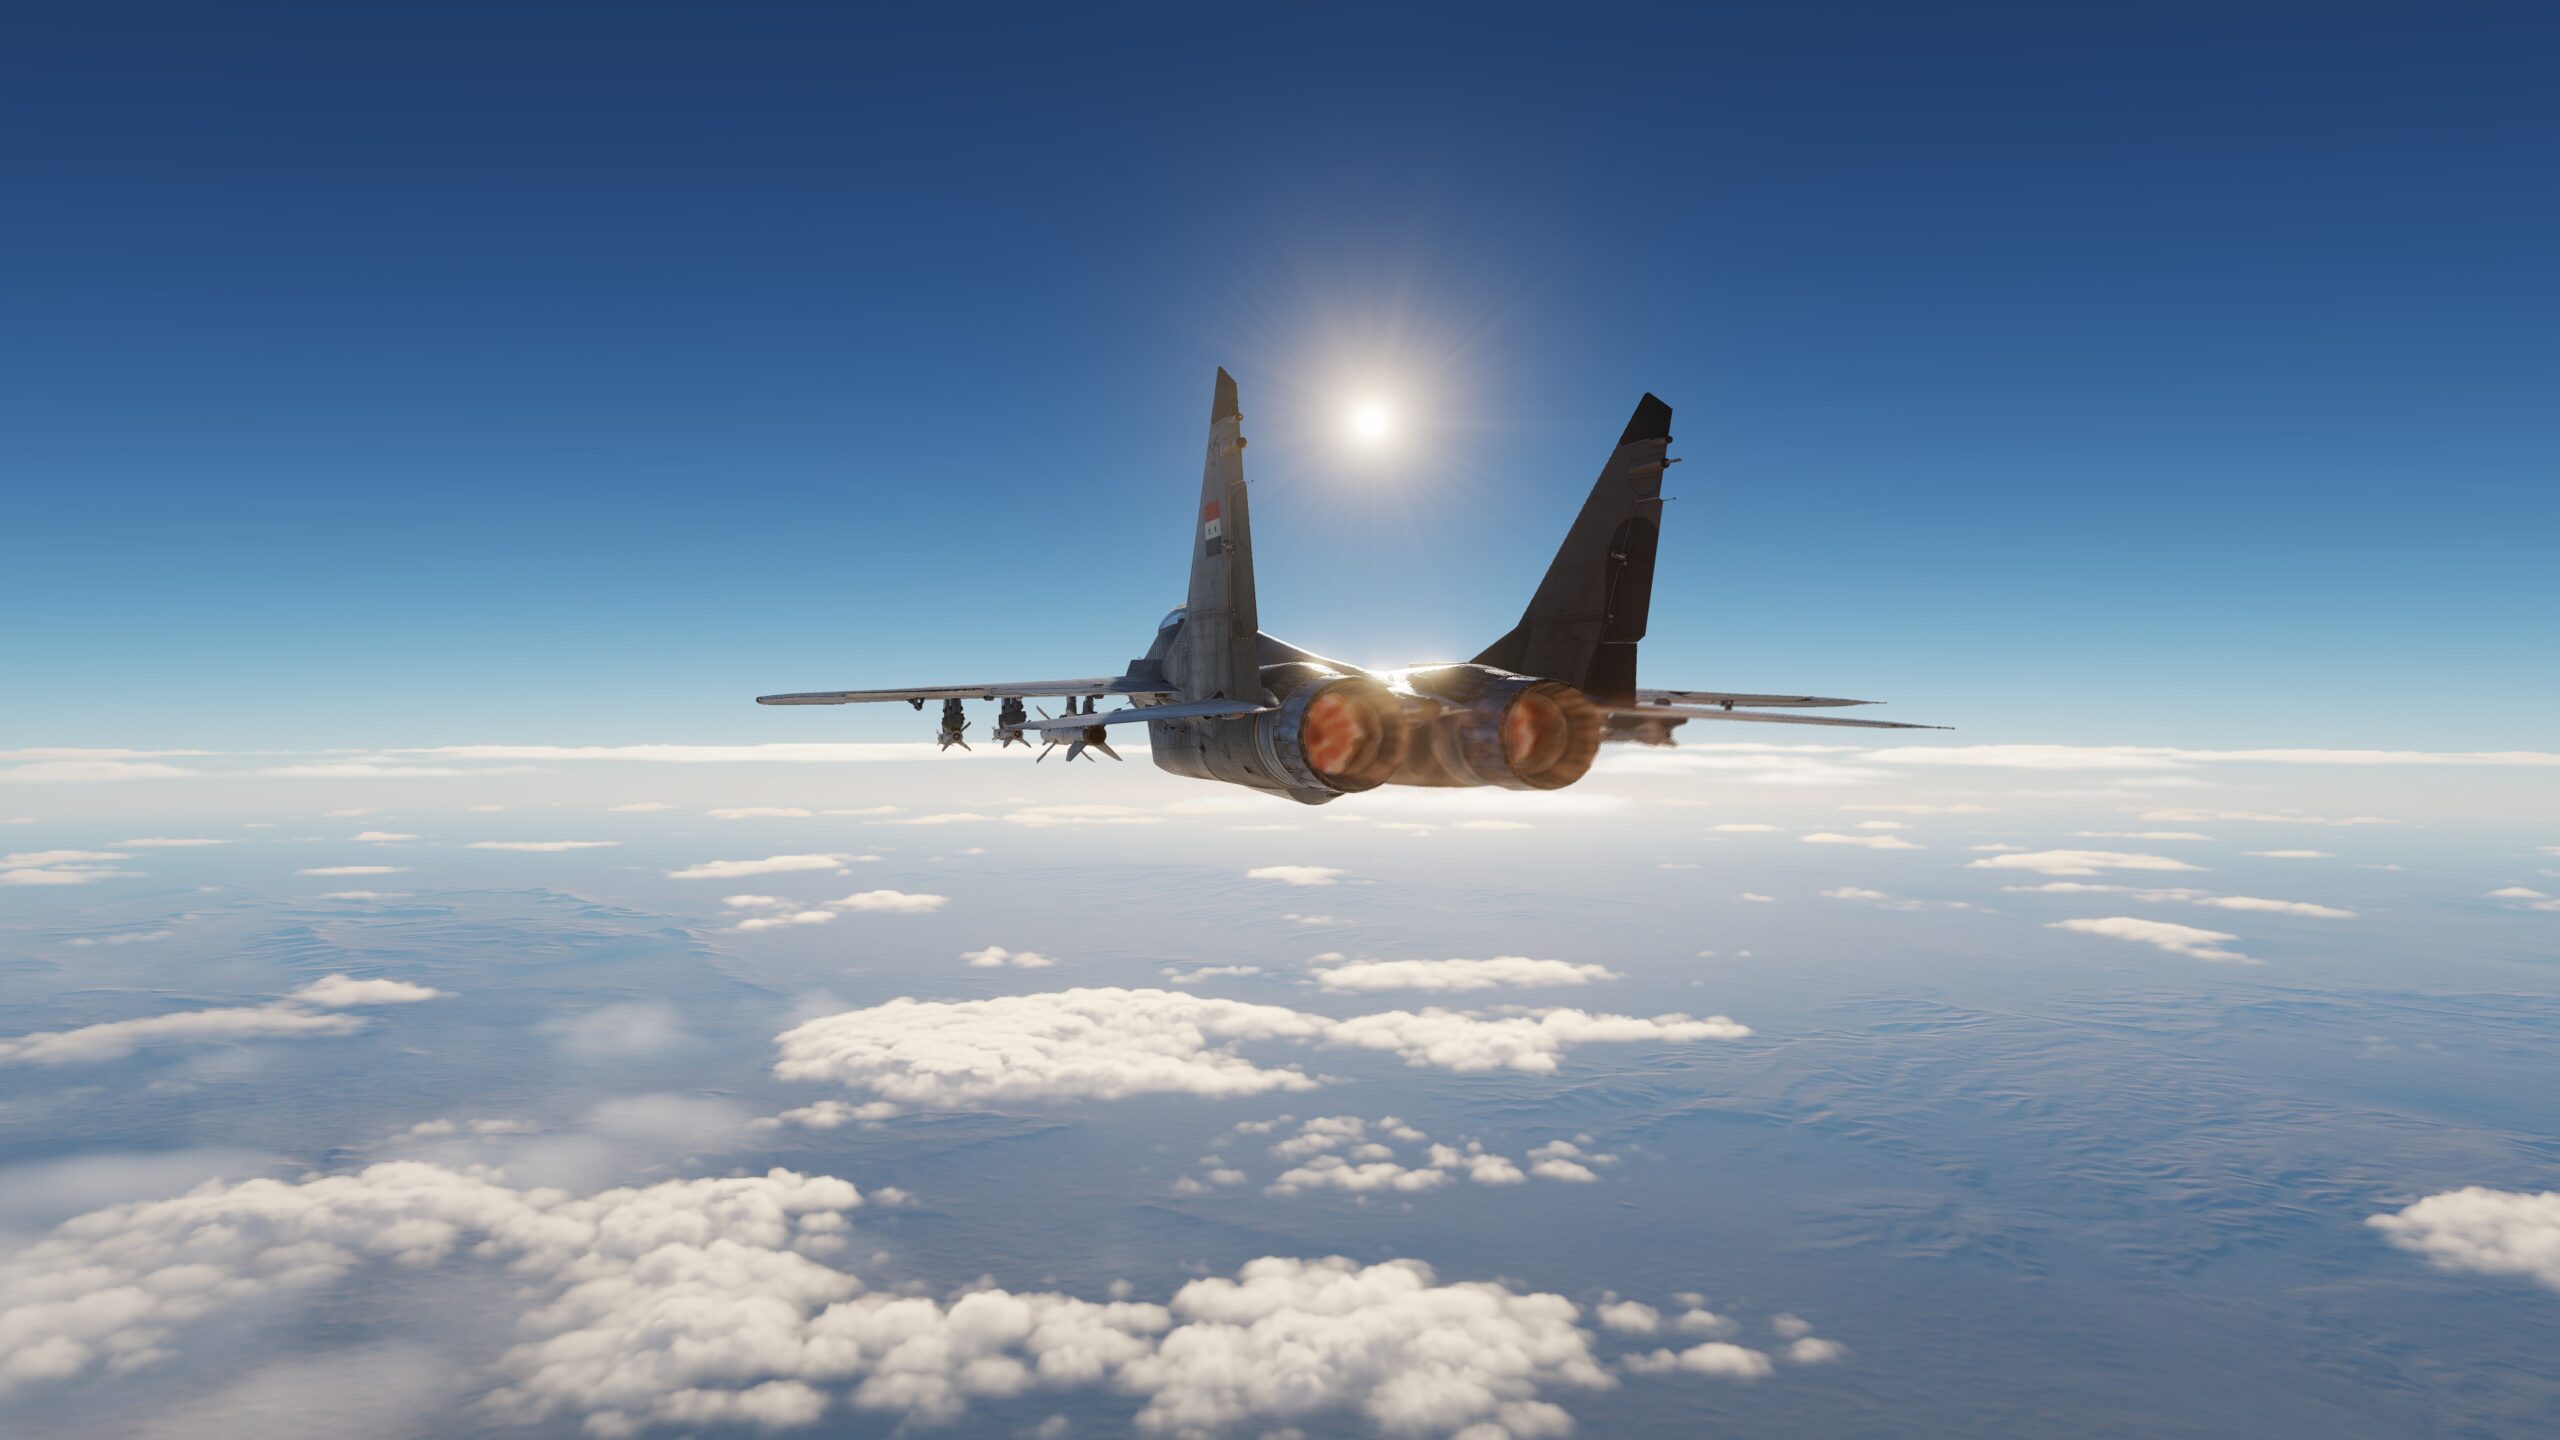
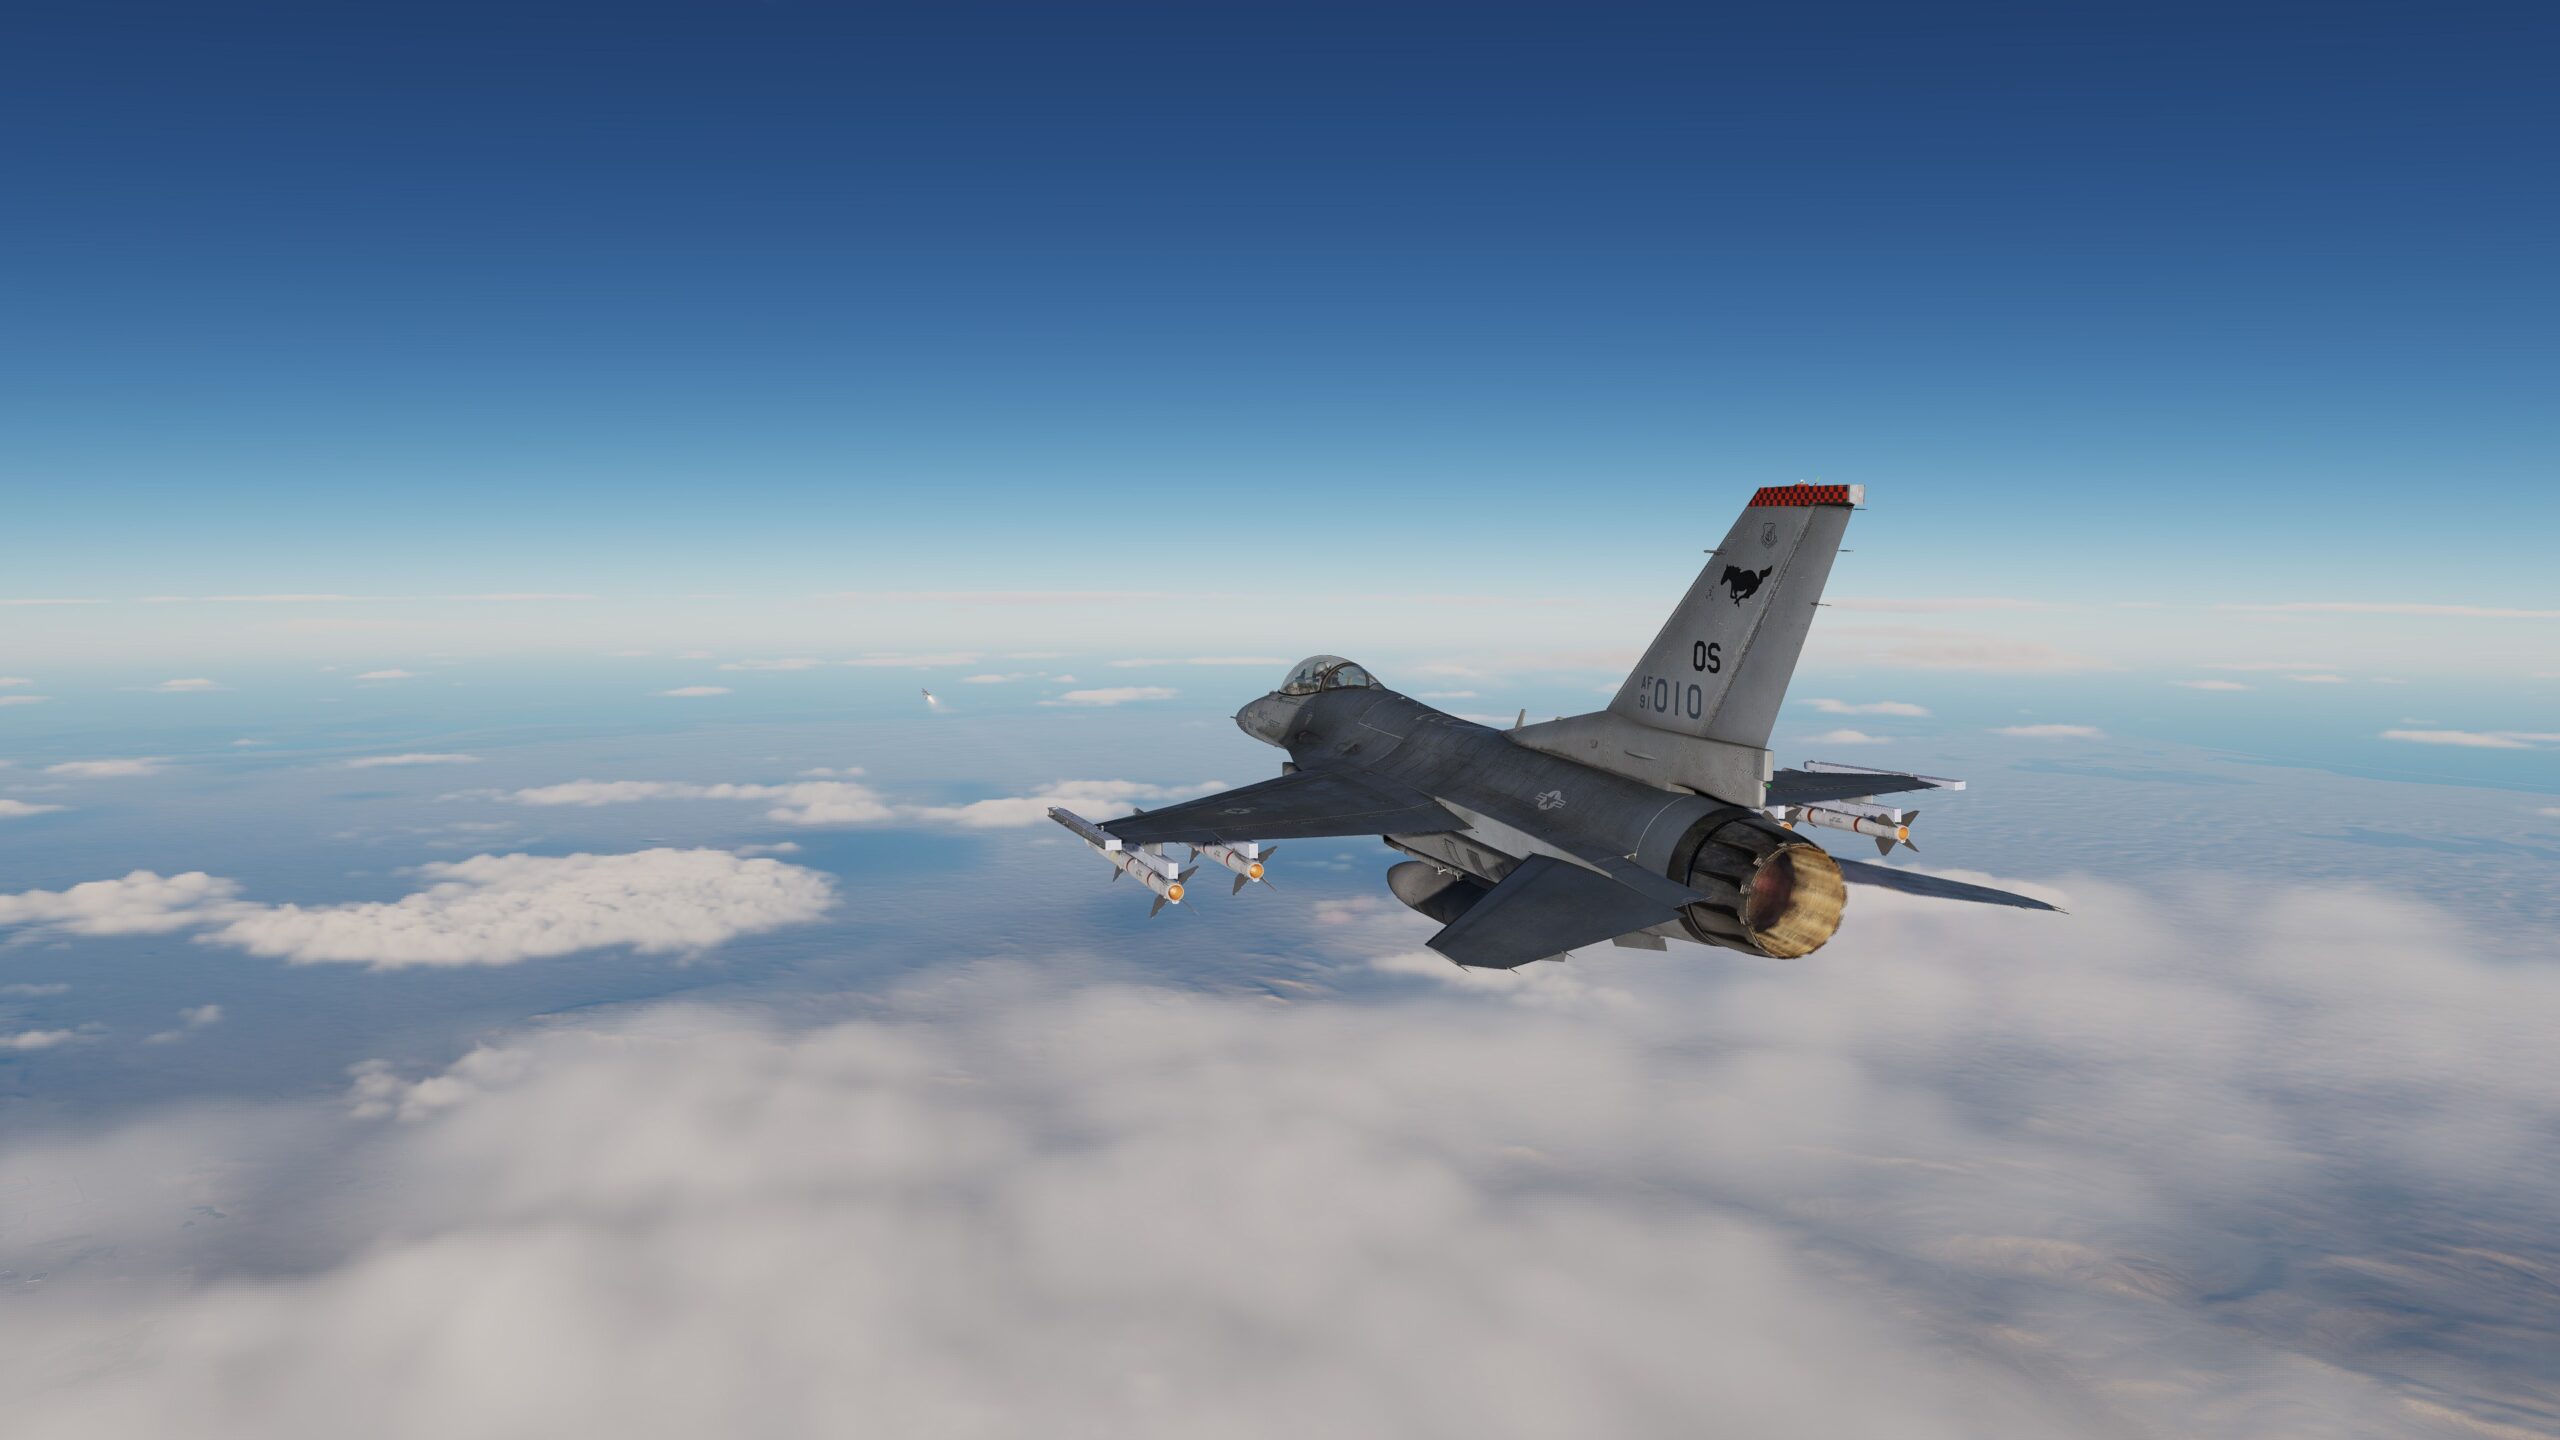
Flying my trusty Block-50 F-16C, I was assigned to a simple Air-CAP (close-air protection) role. Armed to the teeth with six Aim-120C AMRAAMS and a single centerline drop-tank, I was clearly only expected to engage long-range targets. The Israeli airspace that my fighter wing had been assigned to was not contested; AWACS, Tankers, and Civilian Transportation were commencing safely and without threat. My job was to patrol the entirety of Southern Israeli airspace, not to cross the border with Jordan or Egypt, which is nearly 7,000 square miles of land, all alone.

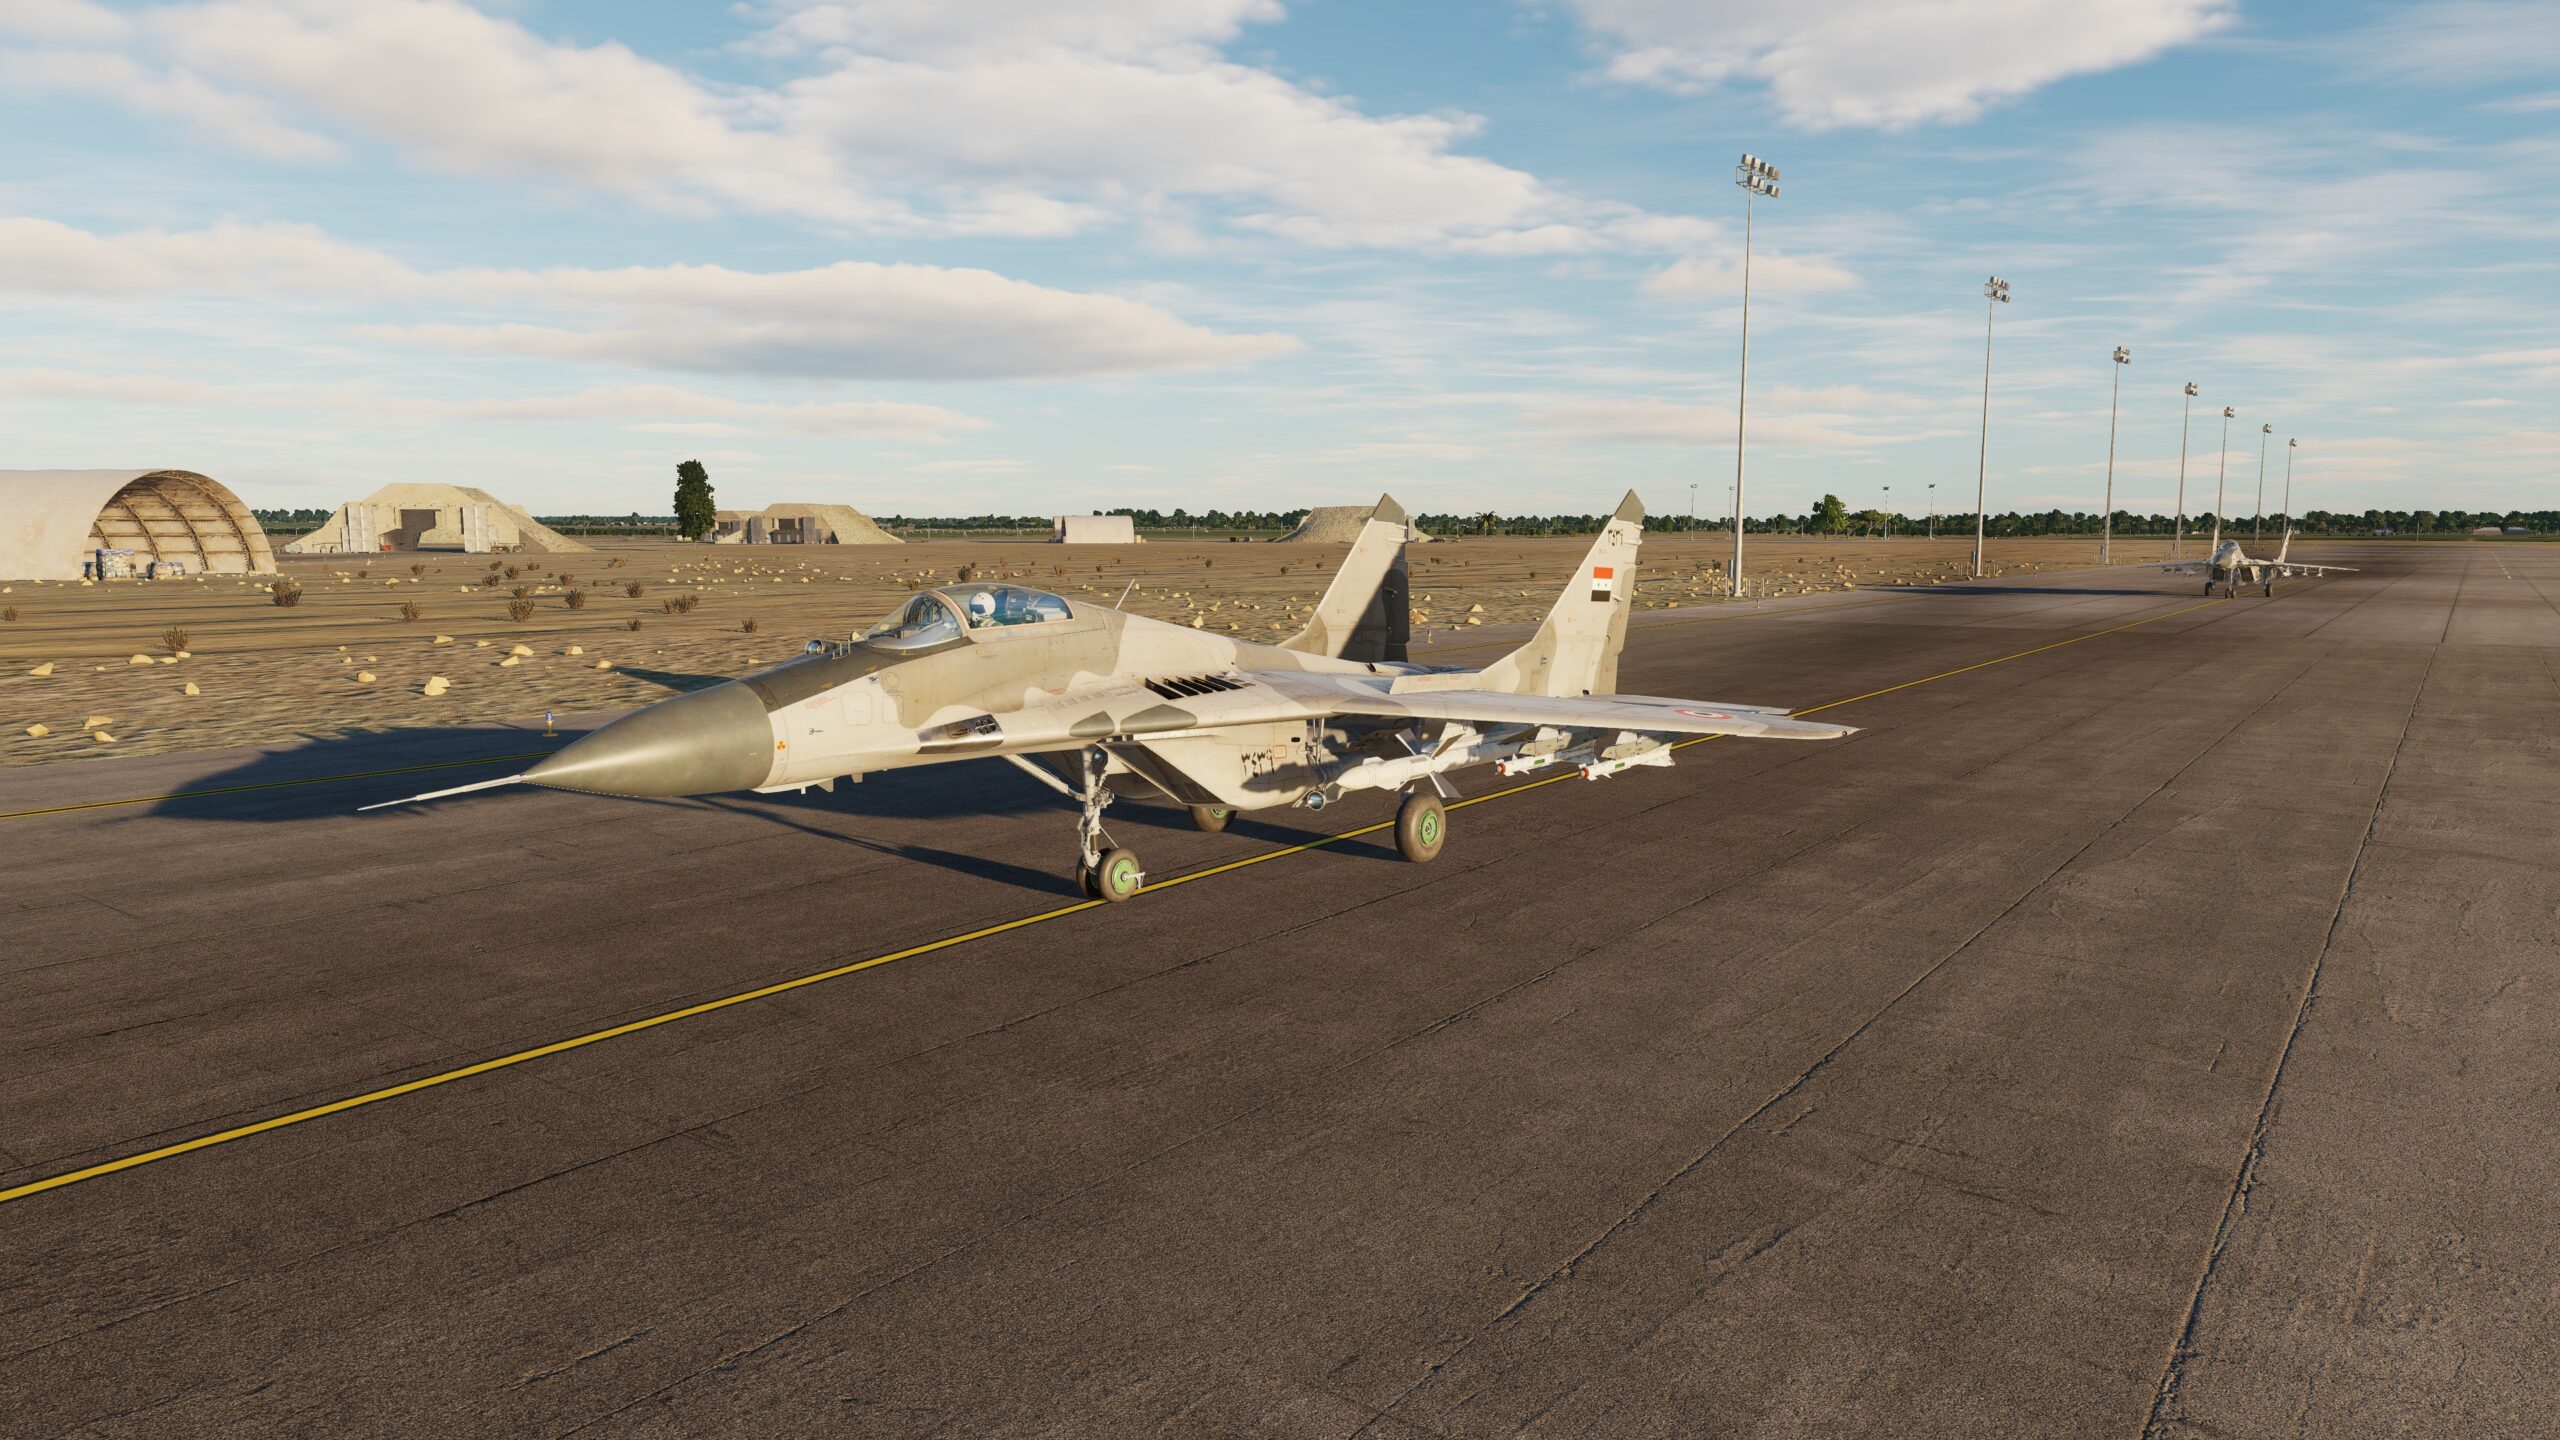
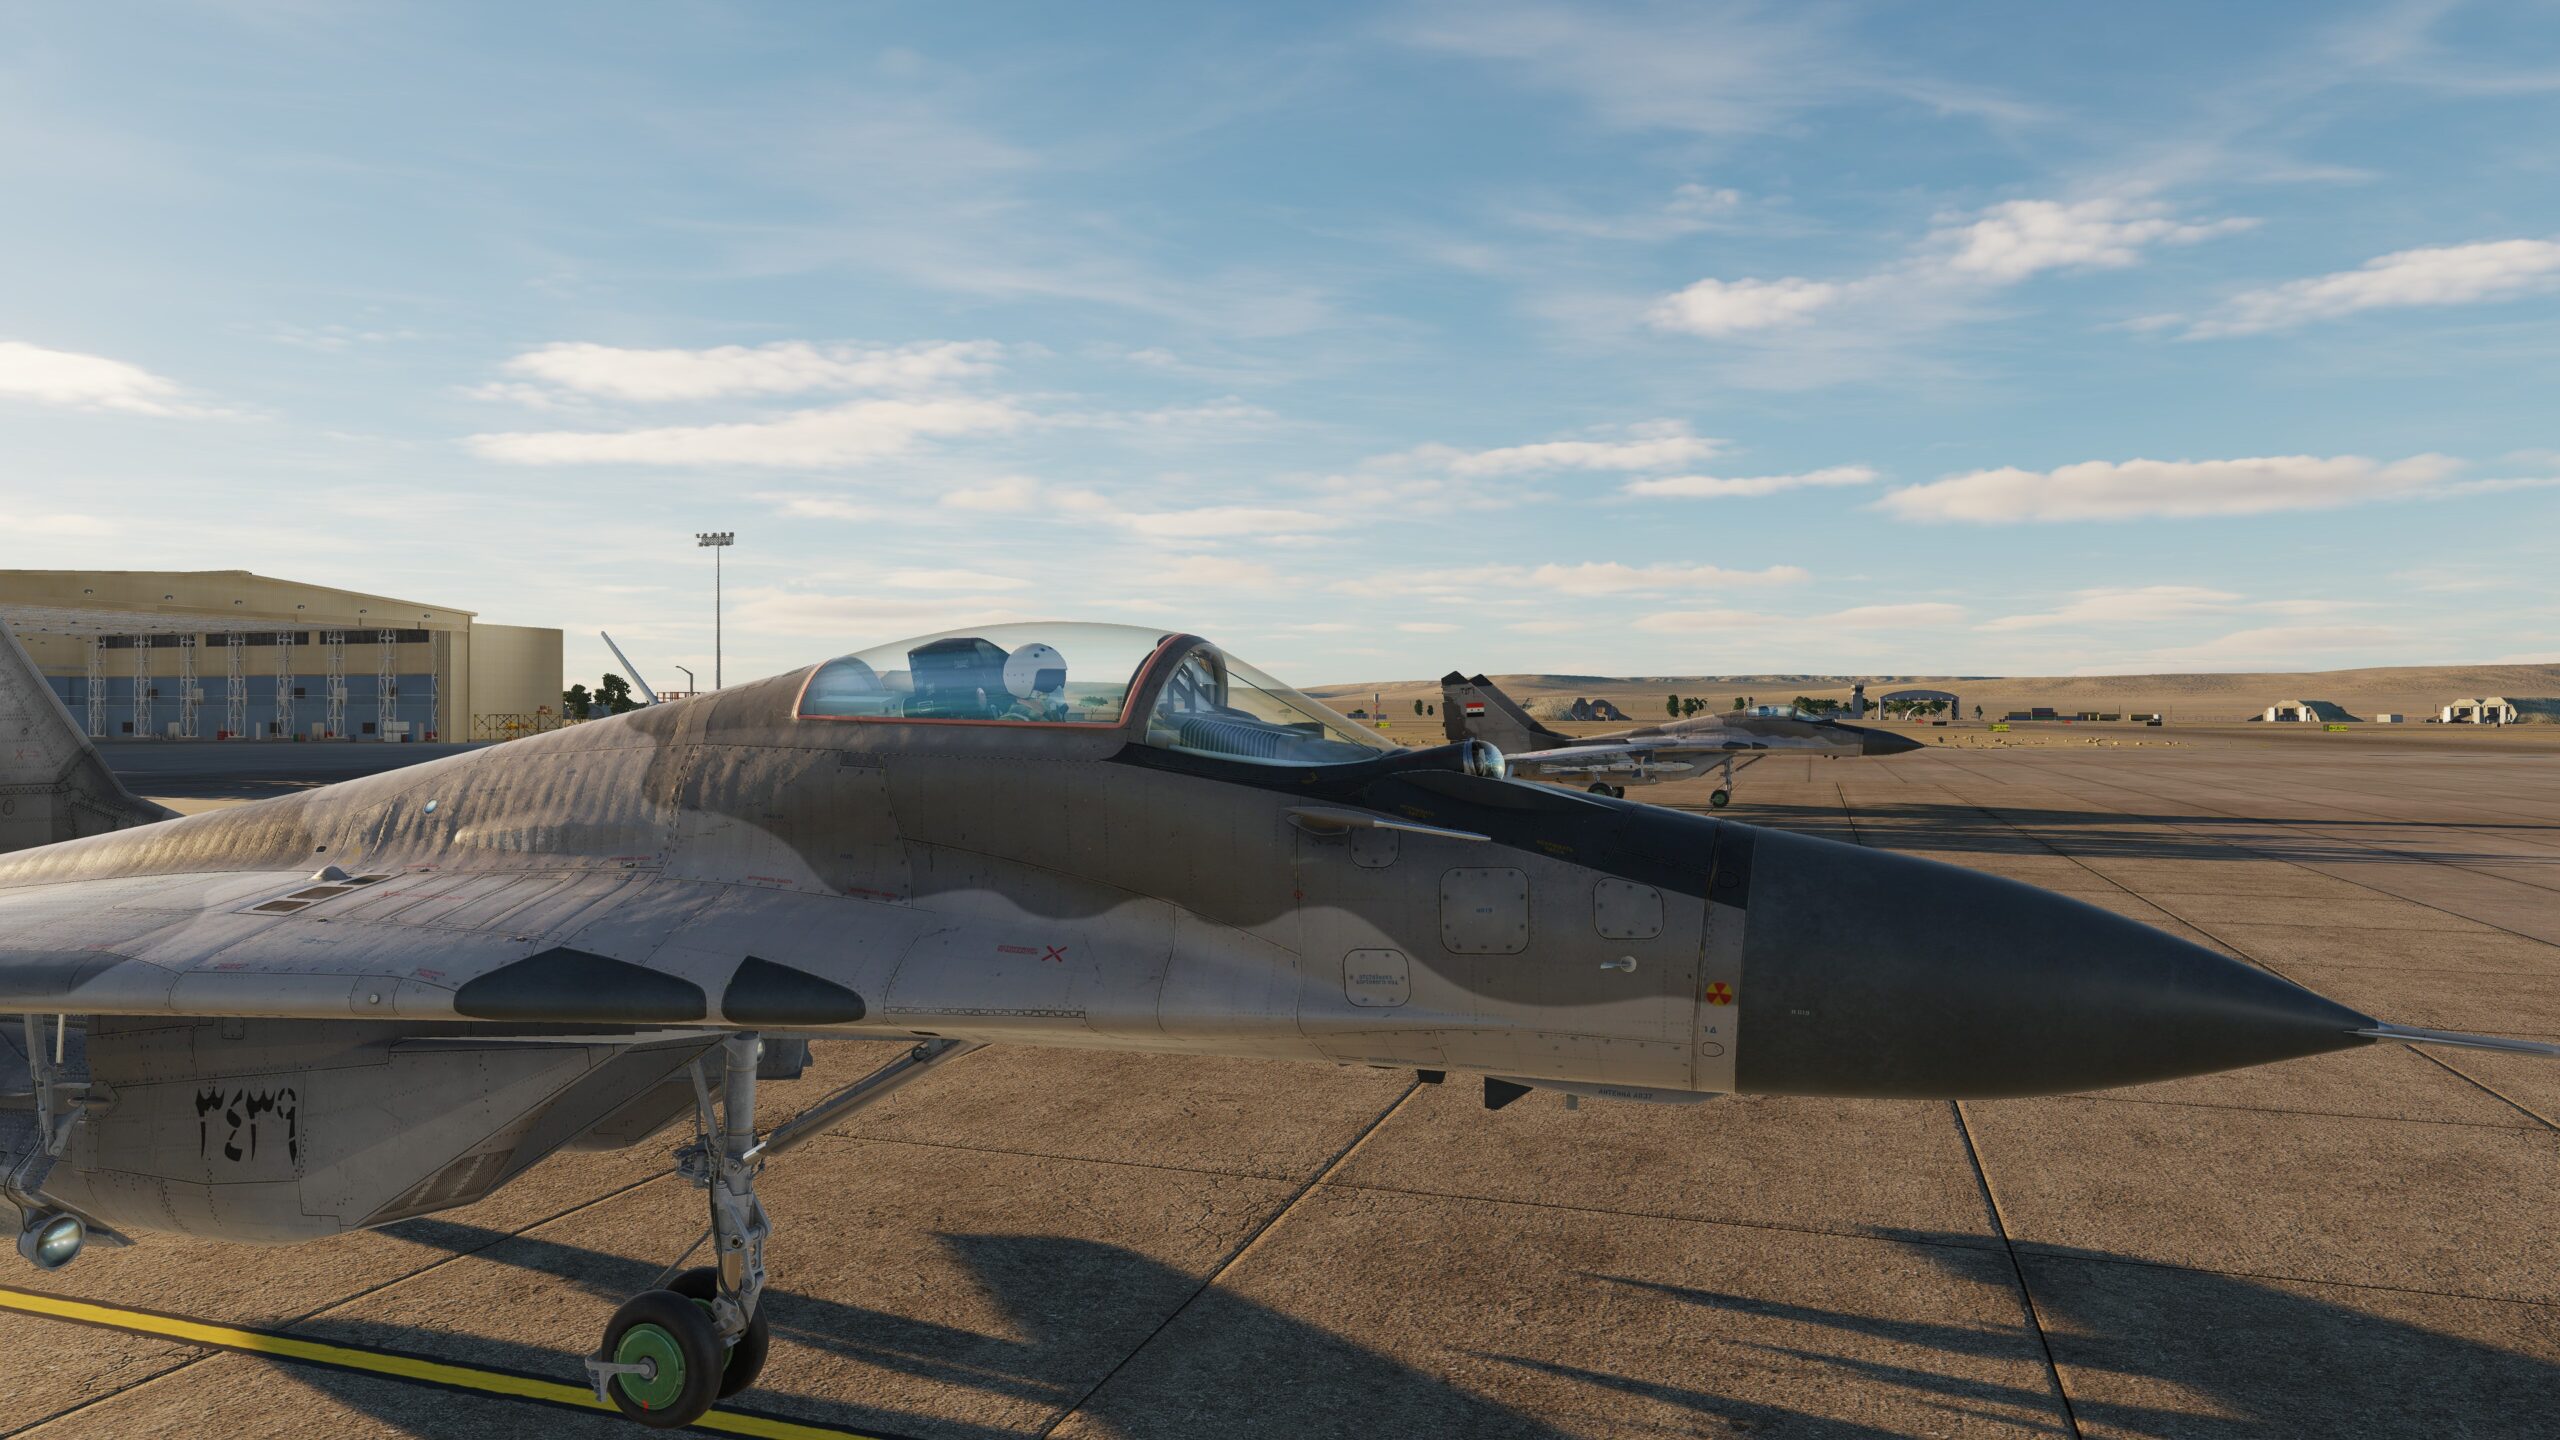
Tensions between the Syrian and Israeli governments were rising. The most up-to-date intelligence suggested that the Egyptians were housing the Syrian Arab Air Force at strategic airbases near Cairo. While no direct escalation was expected, I was to remain alert for the potential of MiG 21s and MiG 29s. Once established in the Area of Operation, I was under the command of “Darkstar,” a Boeing E-3 Sentry on station near the Egyptian Border.
Within minutes of establishing on my flight plan, I received a call from Darkstar alerting me of an airborne flight of two Syrian aircraft departing from Cairo. At this point, they were cold and only just climbing through 10,000 feet. However, they were vectoring directly towards Darkstar. Cruising at my assigned altitude of 25,000 feet, I turned towards an intercept vector with Darkstar, expecting little of the situation. At this point, the intentions of the enemy group were unknown, and the rules of engagement (ROE) were to engage only when fired upon unless cleared by command, which in this case would be Darkstar.
At about 120 NM from the intercept point, Darkstar changed the threat level of the enemy pop-up group to “hot,” meaning they were now a threat to Darkstar or any aircraft in the region. My distance to the pop-up was 180 NM. Darkstar cleared me “hot” and vectored me directly to the group. ROE did not change; however, Darkstar was vacating the area, and conditional engagement approval was granted once the airspace was clear.
With the clearance “hot,” it was time to intercept the pop-up group. My objective was to protect Darkstar, which clearly had become the target of an airborne intercept. I lit the afterburner and began a steep climb. Passing 40,000 feet and Mach 1.0, I settled into a supersonic intercept, leveled out, and lowered the throttle to maintain Mach 1.1. Setting my radar into the Track-While-Scan setting, I maxed the range to 160 NM and narrowed the field of view to a single bar. AWACs had already shared the approximate location of the pop-up over Datalink. I knew where they were, but I had to get a radar return.
At about 90 NM, I still had no return on the targets. Darkstar informed me that the group had split up; one of the aircraft was hanging back while the other had begun a maximum-speed engagement with me. I was alone, no reinforcements were coming, and my F-16 was well equipped, but fuel was going to become an issue if I didn’t manage my resources. At last, the AWACs removed the ROE limitation, and I was cleared to engage. Fencing in, I switched my Master Arm on, selected A-A mode on the ICP, and the Aim-120 symbology appeared on my HUD.
The distance to the two aircraft was closing rapidly, one much faster than the other. The aircraft that was vectoring directly towards me was closing through a distance of 70 NM at an altitude of 30,000 feet. Since I was now engaging only a single aircraft, I set my radar back to Range While Scan (RWS), which is much more reliable than TWS. Within seconds, I received radar returns from the approaching aircraft. At my altitude of 40,000 feet and speed of 1.1 Mach, the range of the Aim-120C was so great that at even 65 NM, I received fire cues.
At this point, I decided to try something clever; I switched the radar back to TWS and prayed for a radar return. Luckily, I quickly received returns from the enemy fighter and locked it up. While the TWS lock is weaker than RWS, there is a massive benefit to utilizing TWS. Enemy radar warning receivers do not receive launch alerts when the target aircraft is under TWS locks. As such, with my TWS lock obtained, I fired a single Aim-120C at the enemy aircraft with 65 NM of range and began to enter a beam.
The engagement was significantly in my favor at this point. The target aircraft had no idea that I had fired a missile and was blindly flying toward me and the missile in a straight line. The missile uses the TWS lock until its terminal phase, which in this case would start at about 10 seconds from the target. At that point, the aircraft’s RWR would indicate launch alarms, but it would already be too late. It took about 20 seconds before the missile went “pitbull” (terminal), and in that instant, the enemy aircraft immediately went defensive. Just to my luck, the missile had enough energy to maneuver, and the first enemy aircraft was downed.
As soon as the missile had gone pitbull, I began to engage the second fighter. This engagement was looking like I had it in the bag. Using the TWS method, I began my search at 160 NM. The Datalink was showing that the second fighter was engaging me at about 90 NM. The TWS is basically useless at this range, so now it is a waiting game. I watched the datalink marker get within 70 NM and switched my radar range to match. Immediately, I got radar returns from the second aircraft. I repeated the same steps and began a leisurely beam.
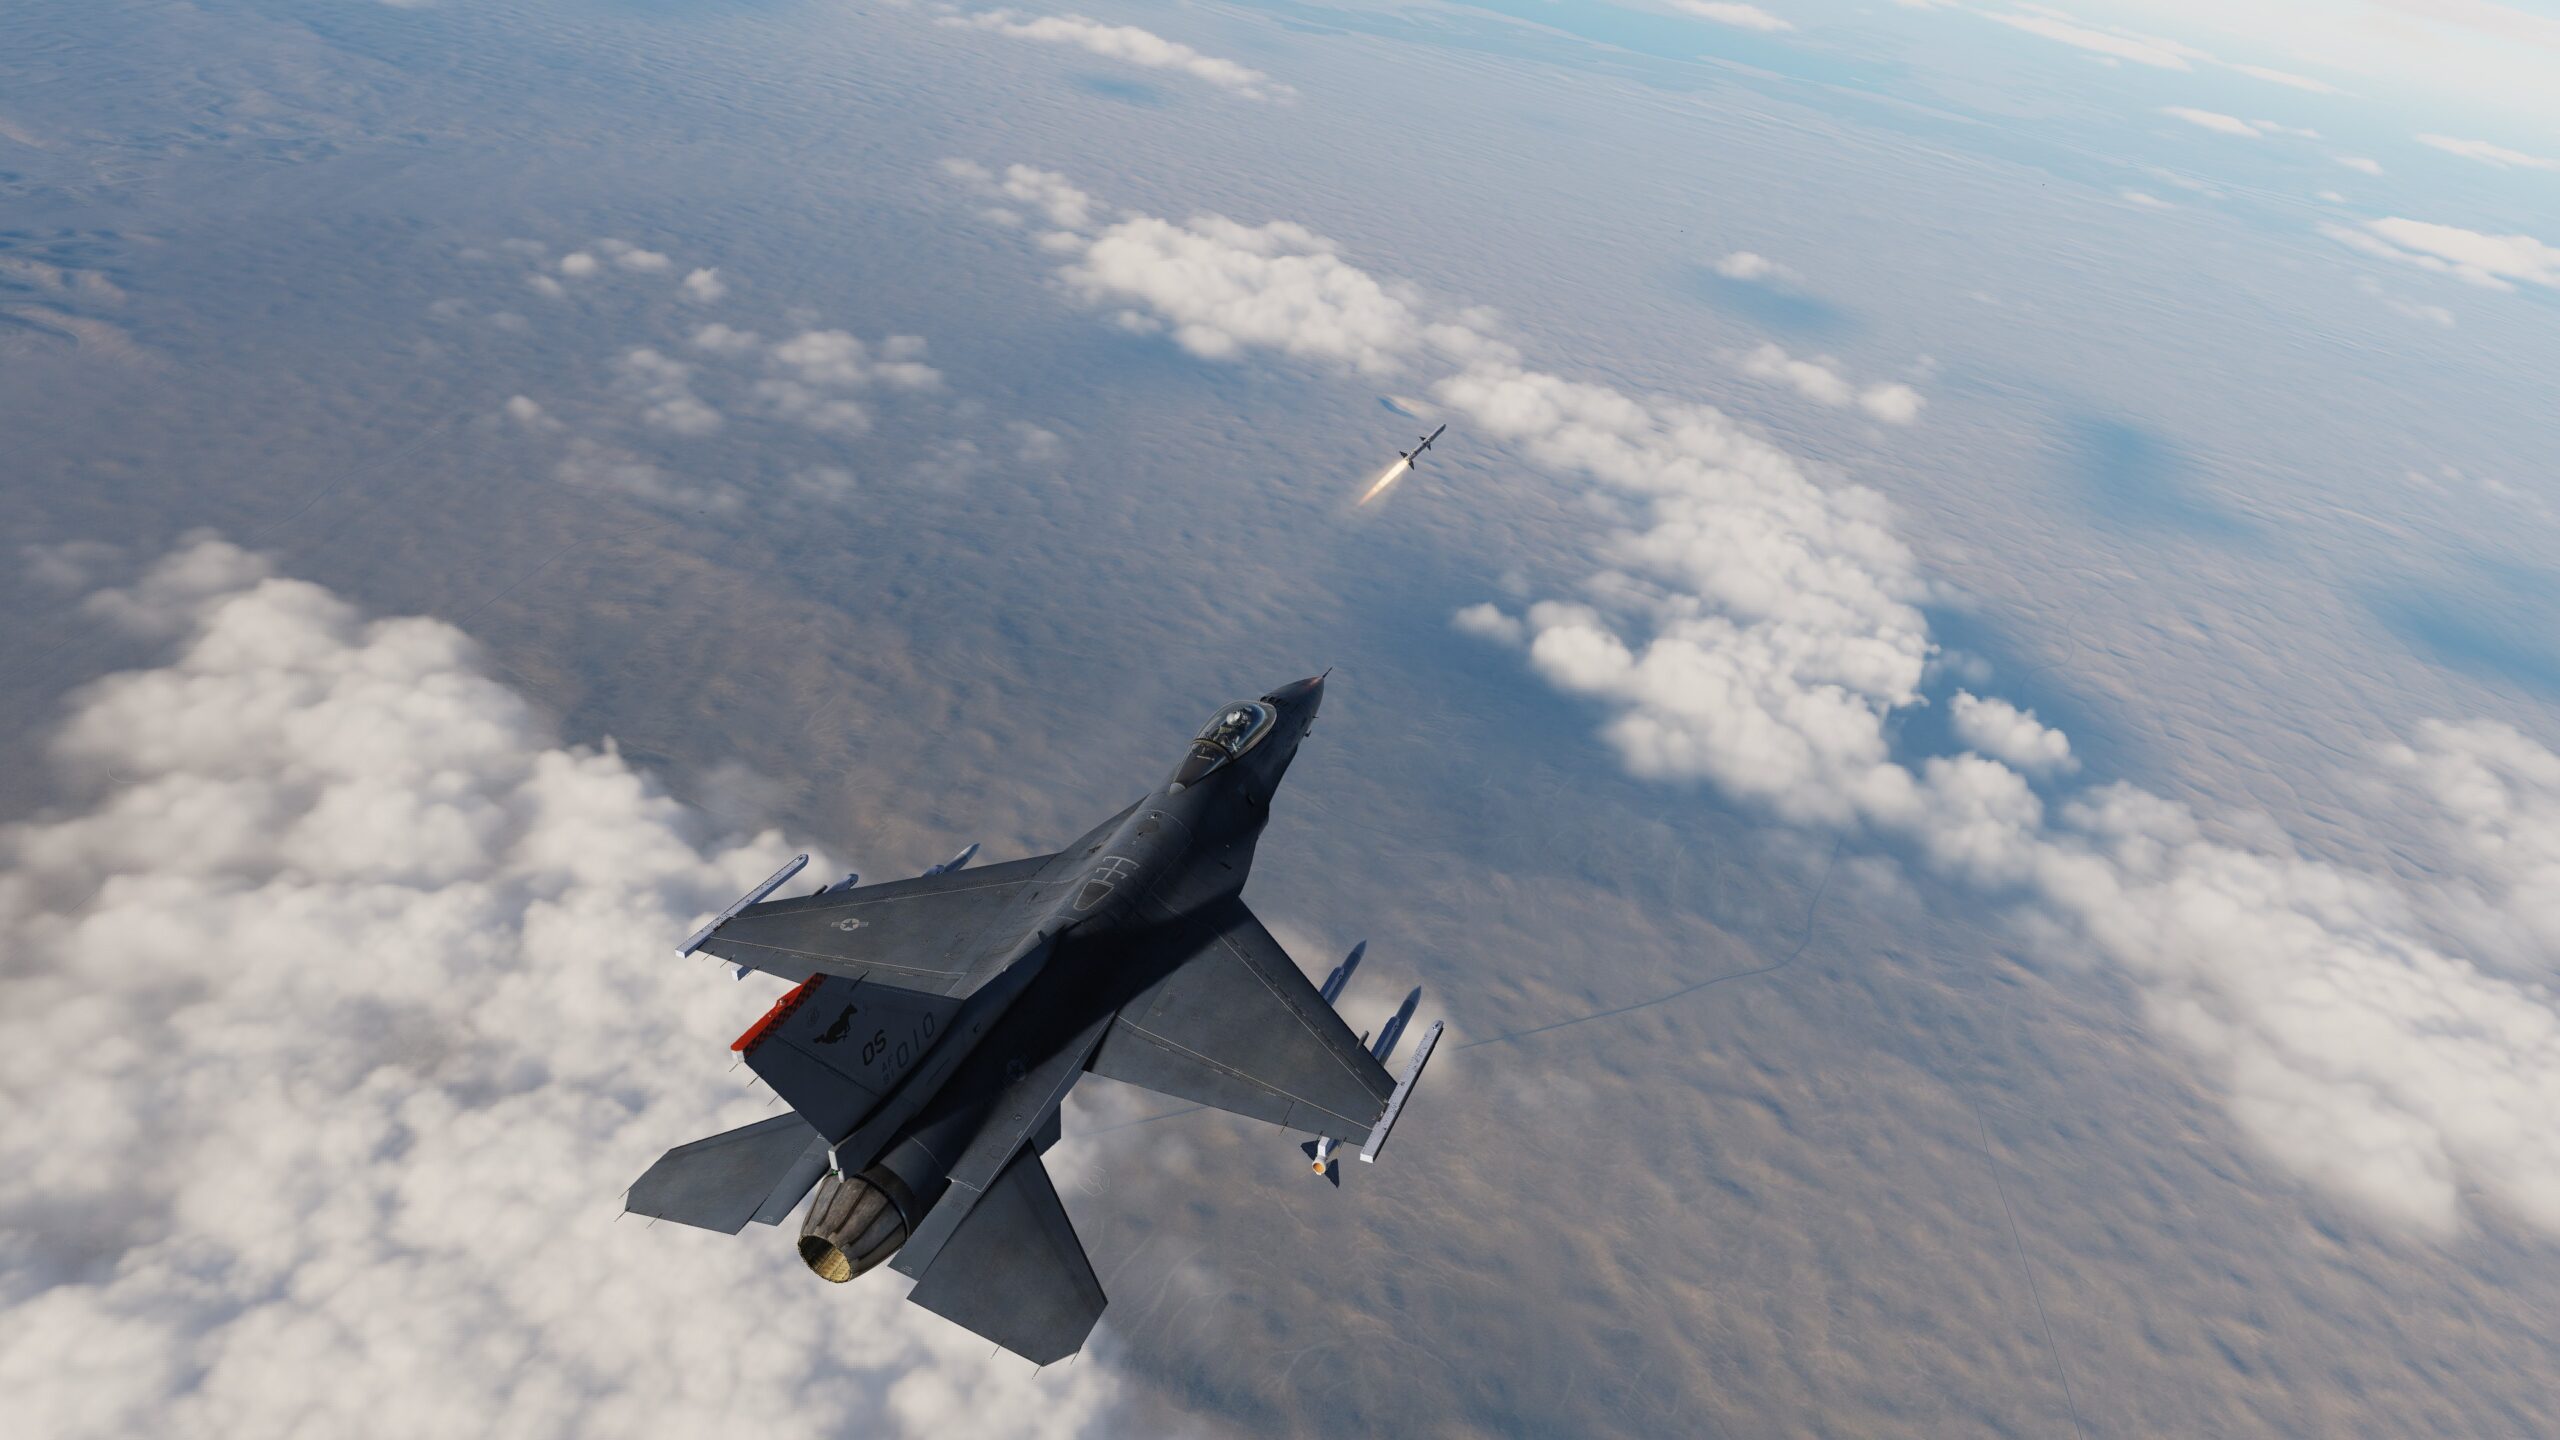
Thinking the battle was done, I sat back and watched the missile timer count down to pitbull and then to impact. No splash. The missile missed completely. Now I was in trouble; I had been spotted by the enemy’s radar, no lock yet, but our range had reduced. At about 15 NM, I fumbled with my radar, trying to fix the range and settings, but then the RWR cues went from painting to locking to missile launch. The aggressive missile launch alarm rang in my ears; I pushed the emergency jettison multiple times, dropping my centerline tank and rolling into a 90-degree bank before pulling >6 G’s into the notch.
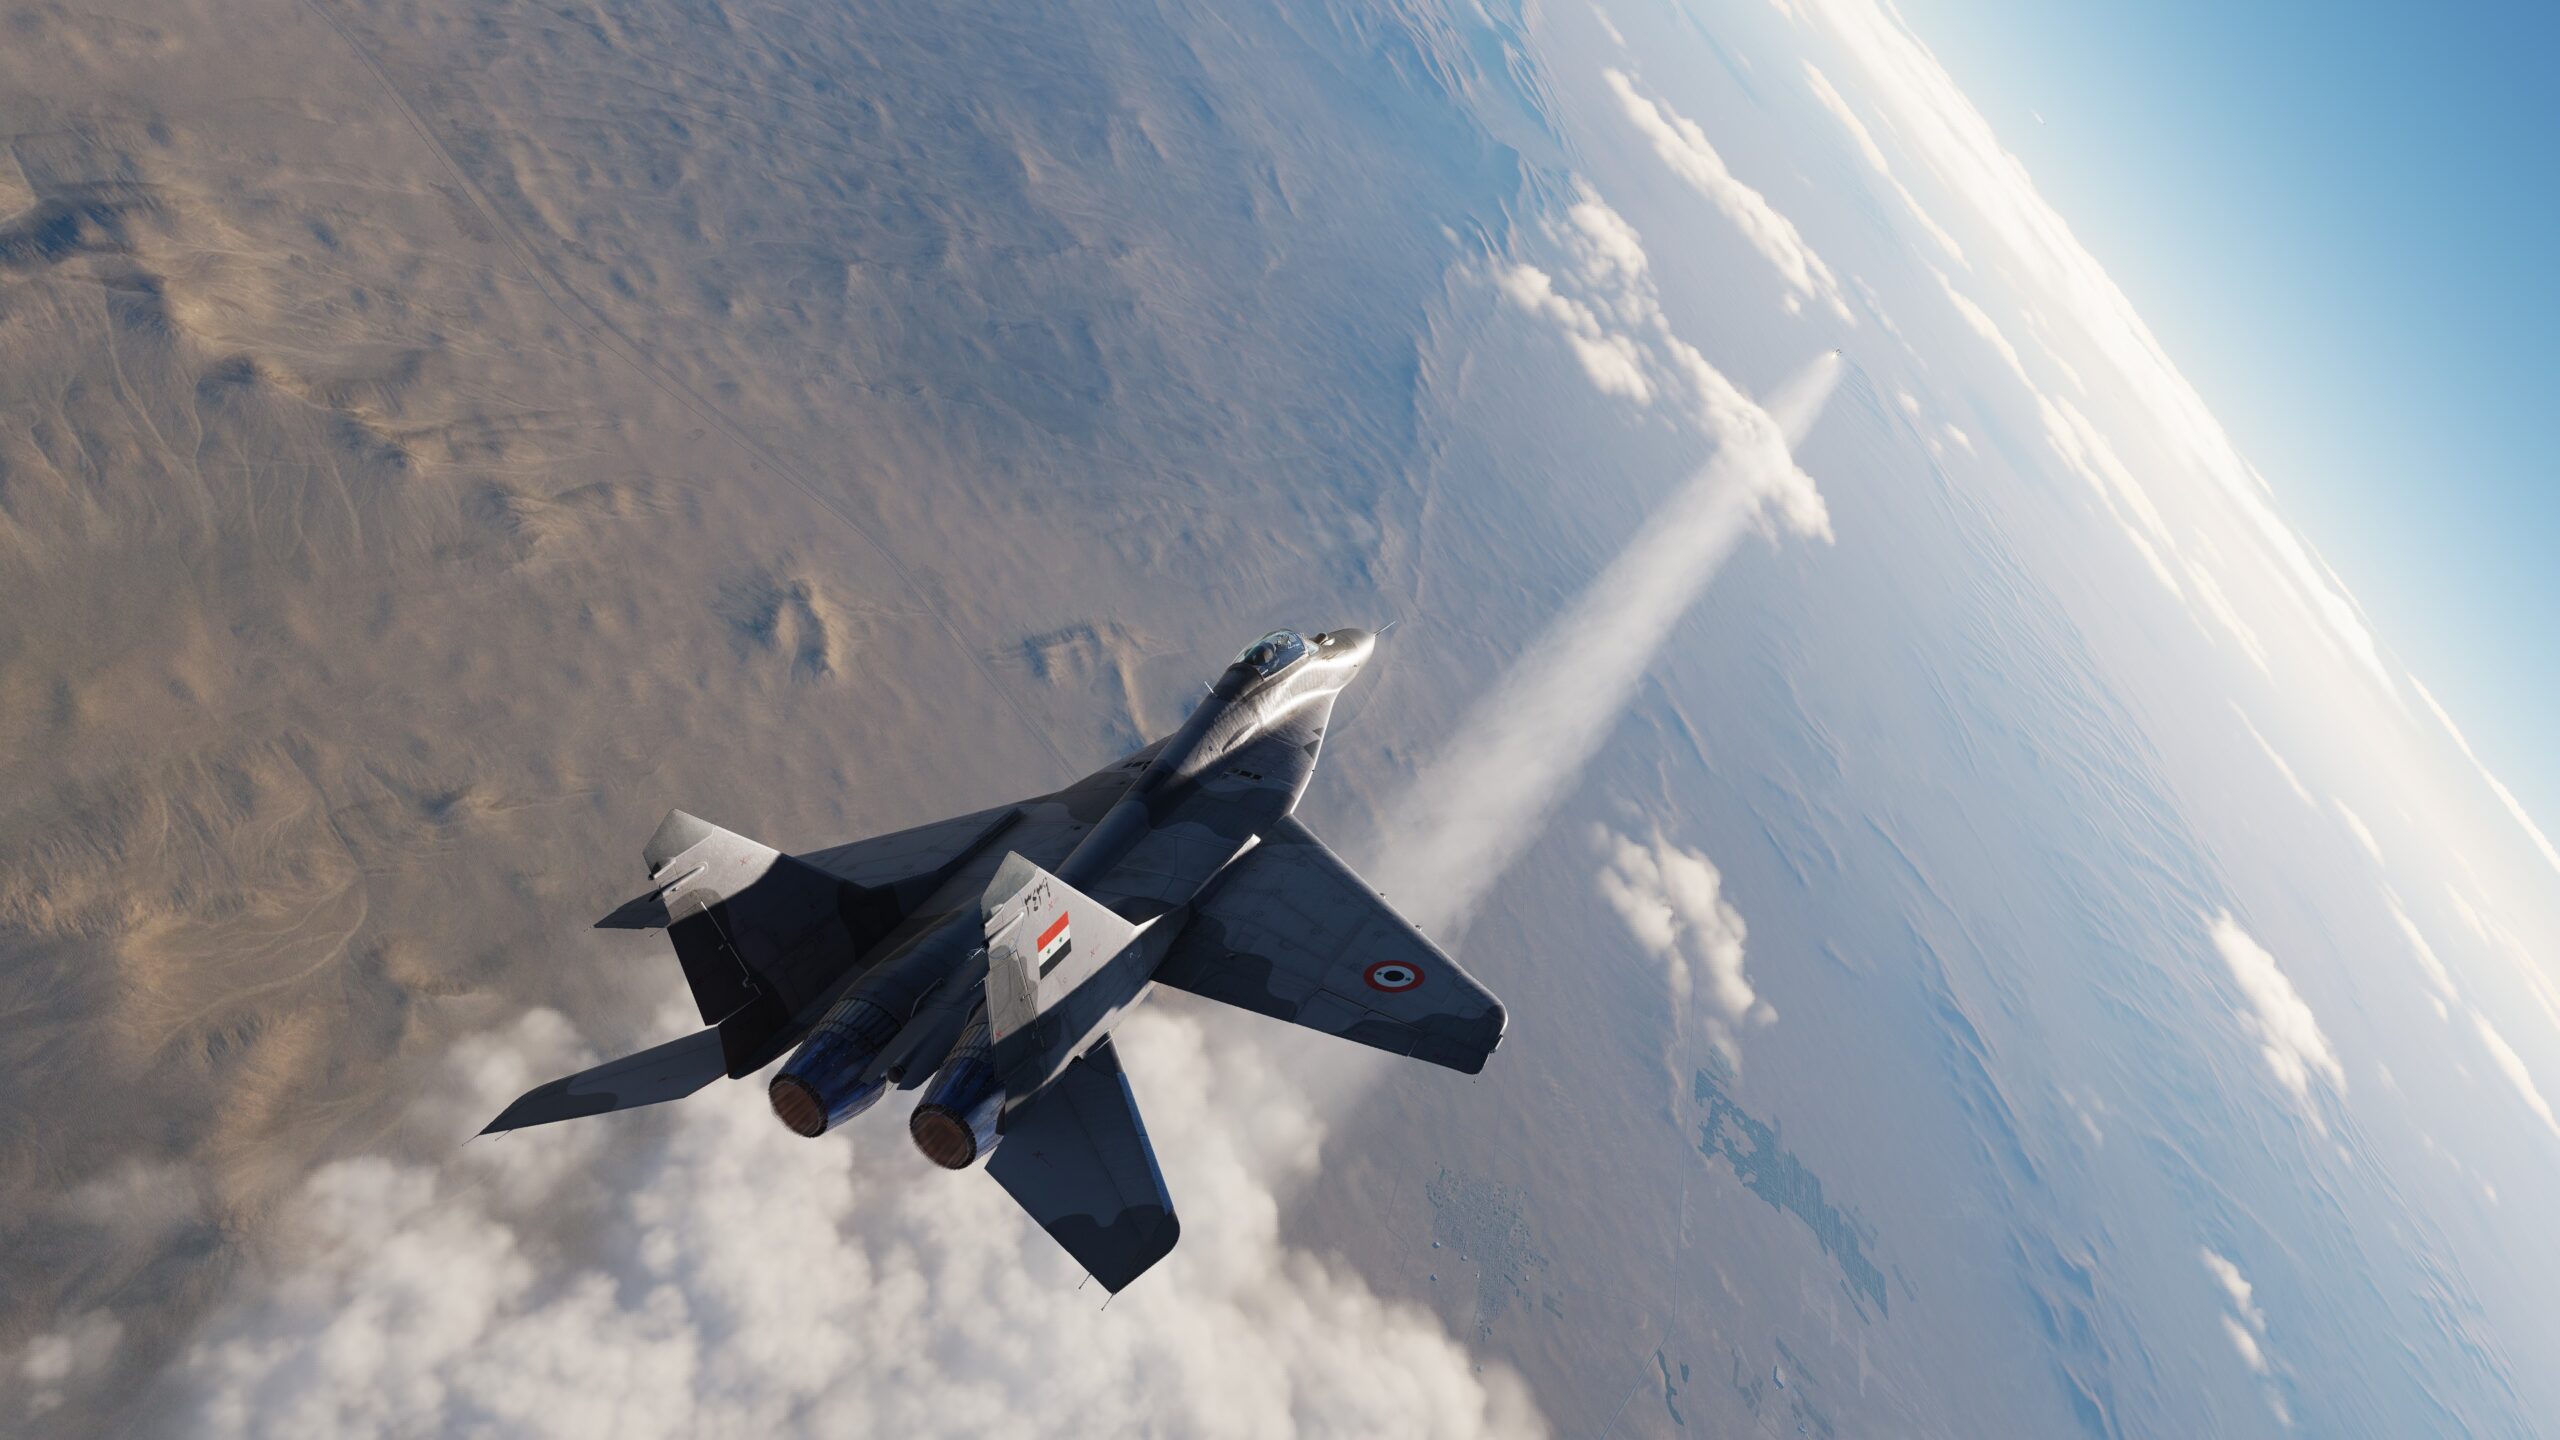
Looking over my shoulder, I tried my hardest to get a visual of the enemy missile. Luckily, I was able to see the smoke trail and follow it to the missile. I knew exactly where it was, and I adjusted my notch slightly to better defeat the missile’s tracking. Rolling upside-down, I pulled into a sharp dive to gain speed and enter thicker air. Frantically checking over my shoulder for the missile, I reversed the notch just to notice that the enemy fighter had fired a second missile.
Successfully evading one missile is hard enough. Trying to evade two is borderline impossible. Frantically checking over my shoulder as I continued to pull the notch, I visually tracked the closer missile over my right shoulder and the new missile directly to my rear. As the first missile rapidly approached me, I dropped copious amounts of Chaff. Luckily, the missile went for the chaff just aft of me. Now, I had to deal with the next missile. My RWR was warning me about the en-route missile while also warning me about the Syrian MiG still locking me. I had to get something offensive on him, or I would be dodging missiles until my luck ran out.
Now was not the time to consider going nose-on; instead, I flipped the dogfight switch located on the throttle, which switched the aircraft into a high-risk survival mode. In the same instant, I had to pull another 90-degree notch and dive into even thicker air. Rapidly approaching the deck, I passed through 3,000 feet in the notch, watching the missile track me the whole time. My head stuck nearly permanently over my shoulder. I glanced forward only to make sure not to hit the ground. The missile tracked once again all the way to the very last second. I managed to just barely jink the missile without using up any more chaff.
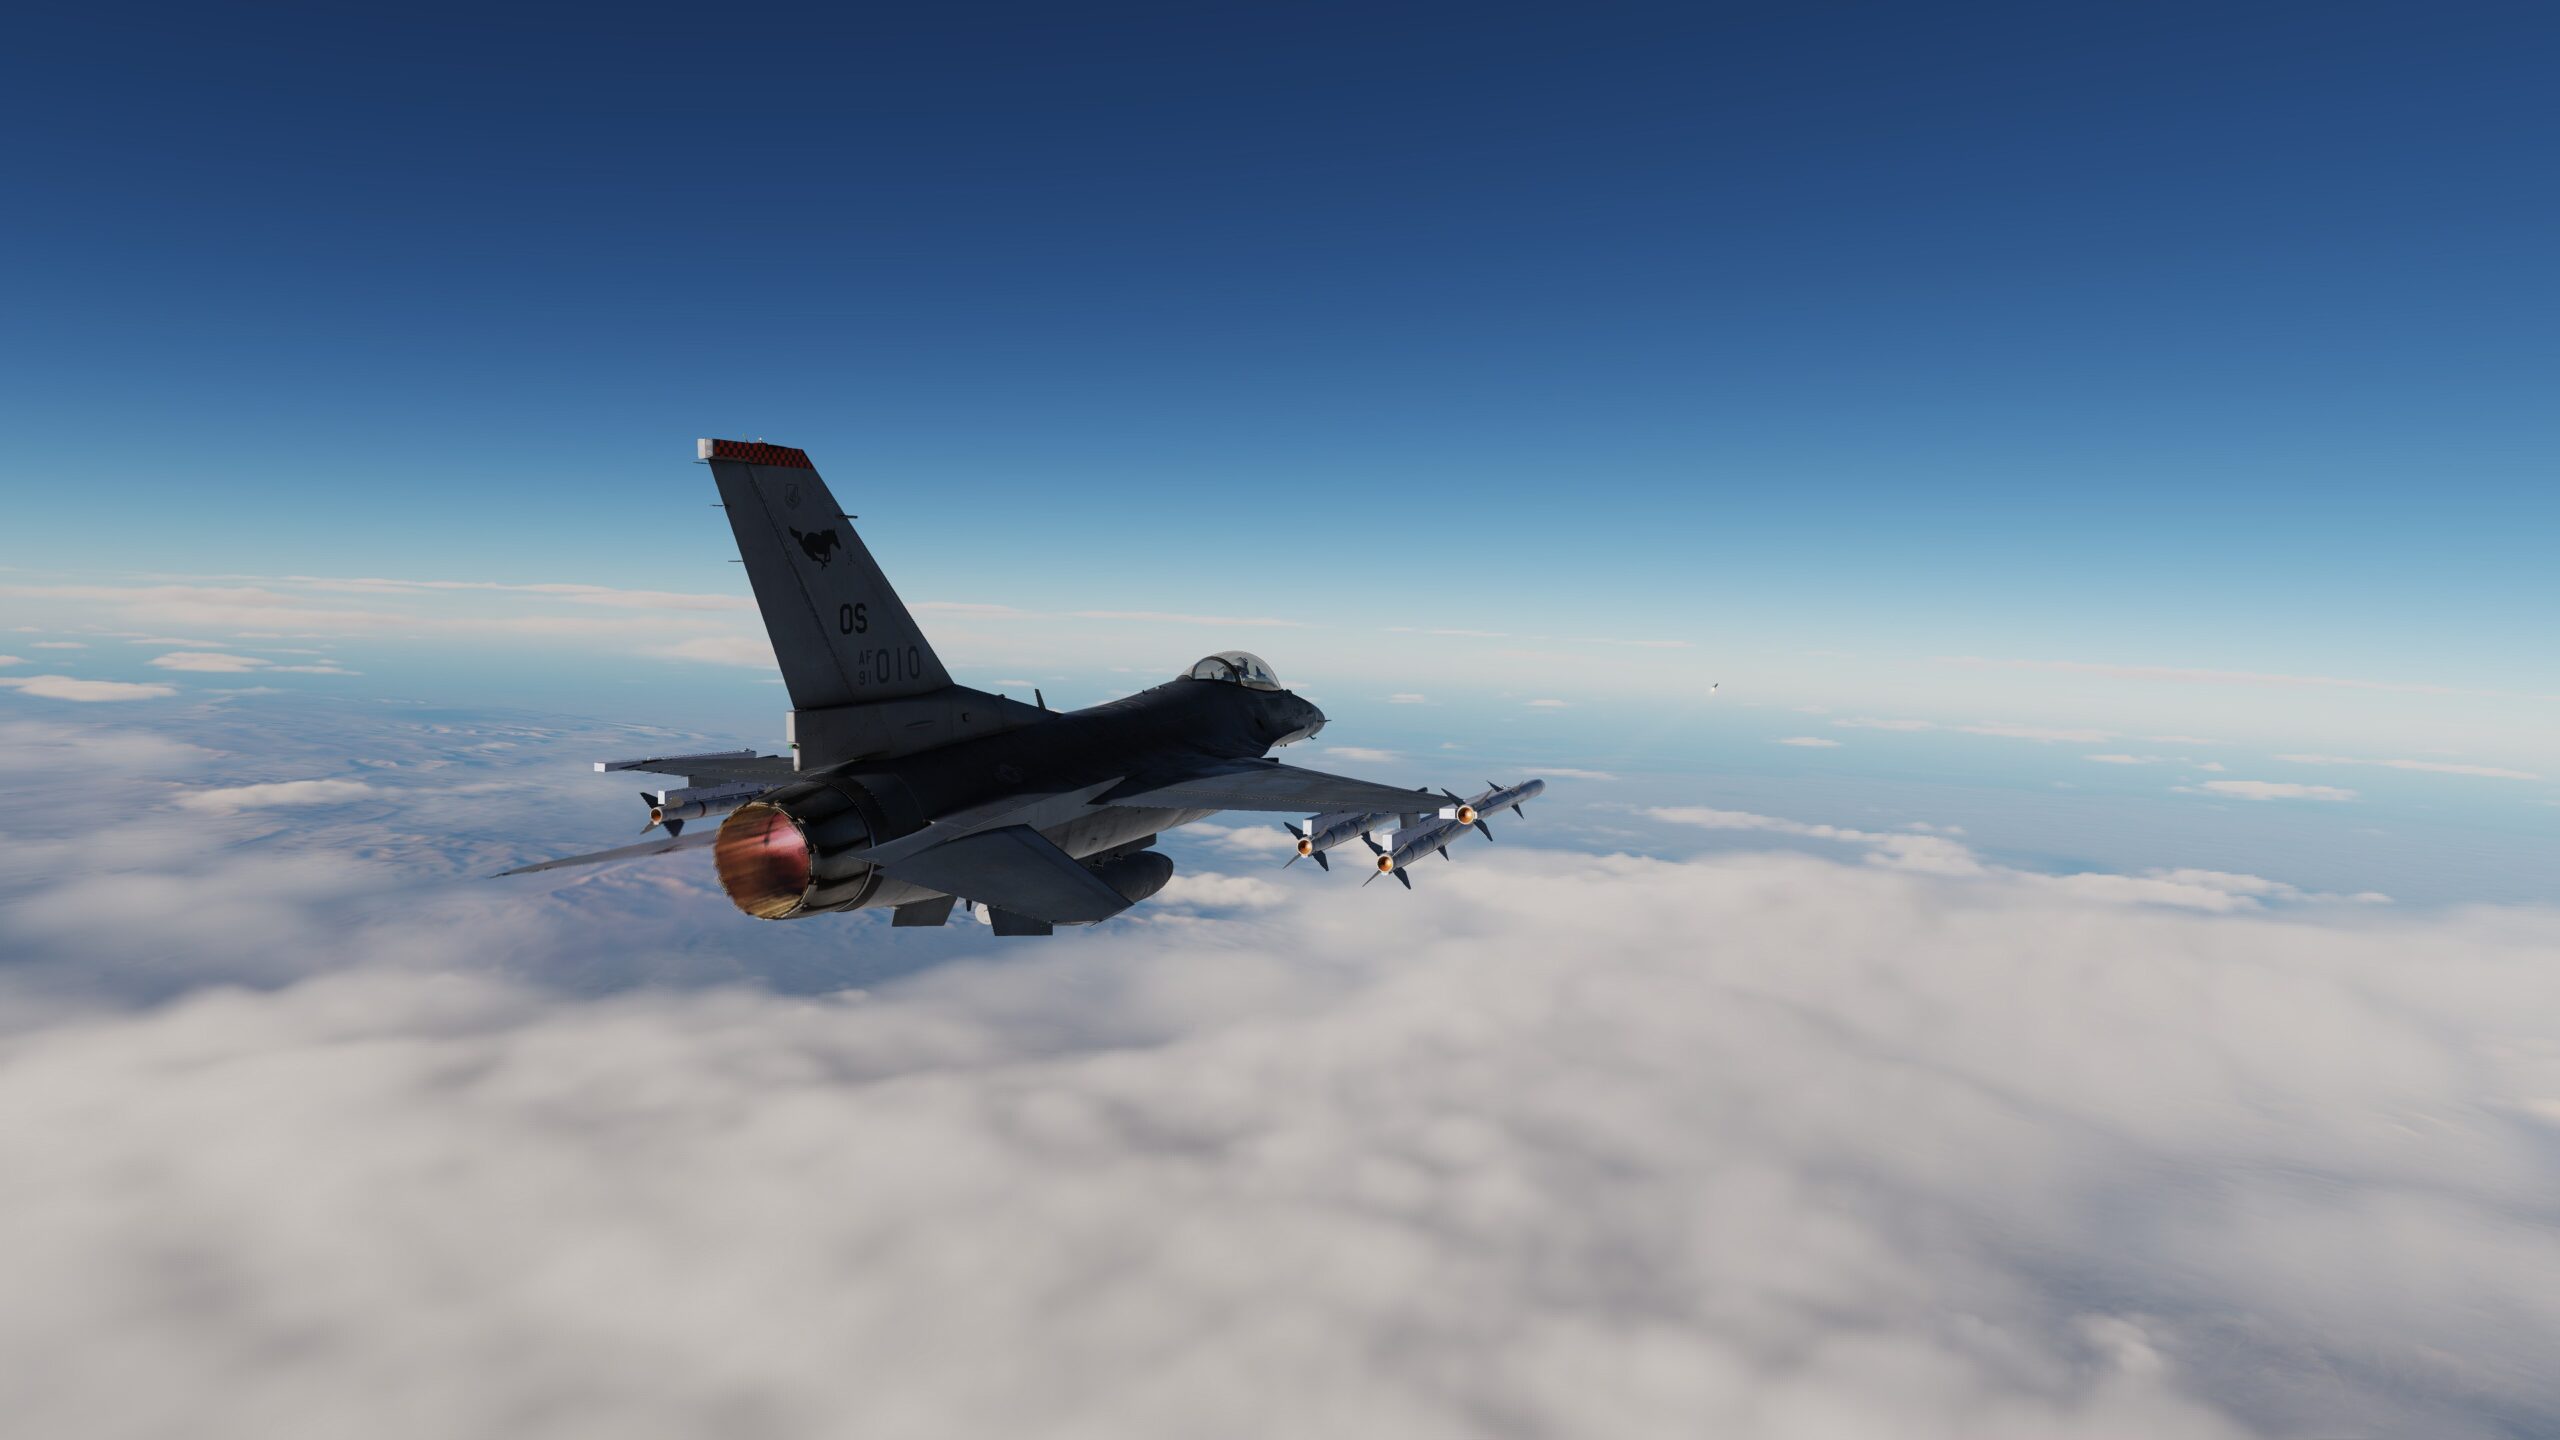
With the missile defeated, I pulled extremely hard back to face the MiG nose-on. Frantically turning the radar back on, I placed the dogfighting cursor right over the trail marked by the MiG and waited for lock tones. My F-16 is not armed with Aim-9Xs, which means I’m stuck with the medium to long-range AMRAAMs for this engagement. The whole time I’m flying towards the MiG, the RWR is screaming a lock alert, and before I can get a lock, the missile warning alarm goes off, and I see not one but two smoke trails coming off of the Syrian’s MiG.
A smarter pilot than me would have placed the AMRAAMs into boresight mode and fired, hoping that a missile would lock and track the MiG on its own. However, with an audible groan, I pulled the yoke into a notch and began screaming back towards the ground. The distance between my jet and the MiG’s had reduced so significantly that the first missile was already barreling down on me. I was well aware that I could not outrun the missile. Looking over my shoulder, at just the right time, I pull hard left on the stick and dodge the first missile. Absolutely pumped and full of adrenaline, I spot the second missile and correct my notch.
The MiG had fired four radar-guided missiles at me. In the pilot’s seat, I strongly believed that he had run out. As I begin to drop chaff, I start to pull my aircraft back towards the Syrian. The fourth missile is still barreling towards me, but I’ve committed again, hoping that it’s lost enough energy. Just in time, the missile goes for the chaff behind me. It’s the first time in this entire engagement that my RWR is silent. In a blind rage, I hold the MiG in my radar crosshair and wait for a lock. Finally getting a solution, I fire an AMRAAM. The missile tracks, pulls an extreme turn, and bang! Splash the second MiG.
Experiencing this with the Pimax Crystal was so immersive; I had never felt such an adrenaline rush playing a video game. I got up after landing that F-16 with such a massive smile on my face and genuinely started yelling about how awesome the experience was. I had never dreamt about flying in a flight simulator until I used the Pimax Crystal. I simply cannot express enough how smooth and natural the Pimax Crystal feels to use. When it comes to using the headset in-sim, I have nothing but praise for Pimax and the work they’ve done. However, outside of the sim, there are issues.
The Issues
This section of the review precludes the verdict. While the Pimax Crystal is perfection once you’ve loaded into the simulator, there are issues with some of the before and after, which let down much of the experience. Some of these issues are overlookable, and others are not so much. This section is to aid you in making an informed decision to determine if these issues matter to YOU.
Pimax Play
The issues with Pimax’s software were touched upon in earlier sections. However, many of the problems with Pimax Play specifically surround the performance issues and the apparent lack of important software components. When first installing and using Pimax Play, it presents itself as an all-in-one software. However, upon consulting with Pimax, I was recommended to use several external pieces of software that not only fundamentally improved the performance but essentially proved to be a requirement for enjoyable use. This software includes:
- OpenXR Toolkit
- PimaxXR Runtime
- Tally Mouse Companion App
- Almalence**
These are four pieces of independent software that all enable one feature: Quad-View Foveated Rendering (QVFR). This feature replaces one of the marketed features of the Pimax Crystal: Dynamic Foveated Rendering (DFR). These two tools target the same effect, increasing performance by rendering only the center of vision at full resolution and reducing the quality outside the point of focus. However, DFR does not lower the resolution outside the field of vision, only reducing the rendering quality. This is in contrast to QVFR, which directly lowers the resolution outside the focus point.
The benefit of QVFR is that it allows the user to increase the resolution at the focus point while still reducing the total resolution due to the significant reduction outside the focus point. These settings are adjusted using the Tally Mouse Companion App. Almalence is an algorithm that further improves the clarity at the center of vision. However, the software is no longer available to the public and was only available via a limited demo. This means that at the time of releasing this review, you will not be able to download Almalence.
Using all four different software programs requires the user to open all the programs before launching the game and further bypasses Pimax Play by essentially requiring the user to use SteamVR as the launch platform. The result is a significant improvement in performance and clarity at the center of vision and is definitely worth the workaround effort. However, this software must be included in Pimax Play. It is difficult for me to understand why it hasn’t already been implemented, and I hope in the near future to see that this very convoluted process can be simplified to a toggle in Pimax Play’s settings.
Batteries
The Pimax Crystal requires the use of Pimax’s proprietary batteries as the headset utilizes internal processors and hardware that is too powerful to be powered purely by USB connections to the PC. While not inherently an issue, the batteries have a life of around 4-5 hours. In order to facilitate the battery drain, Pimax includes two batteries in the package so that one can be charged while the other is in use. This is a massive positive on Pimax’s part to take that step without charging additional expenses for what is essentially a needed solution to the problem created by a reliance on batteries.
However, the process of installing, uninstalling, and charging the batteries proved somewhat challenging. Initially, I could not charge the batteries at all; when placing the battery into the adapter for charging, I would not get any indication that charging was occurring. It took me several hours of troubleshooting to realize that the battery must be pushed all the way into the adapter, similar to latching the battery into the headset. This is doubly challenging due to the latching mechanism, which feels cheap and is too difficult to operate. Latching and unlatching the battery latches always left marks on my fingers and is genuinely painful.
The Lights… What Do They Mean?
It seems Pimax enjoys placing indicator lights on virtually every component. Batteries, chargers, the headset, the controllers, etc., all have their own indicator lights. Each of these indicator lights is a small LED that allegedly flashes colors associated with those listed in the manual. Imagine my surprise and confusion when the lights flashed colors that were not only never listed in the manual but were colors I couldn’t even name. This is not a massive issue. However, it does lead to some difficulty when trying to power off the headset or understand the battery’s charge state on the charger.
Verdict
This is the most challenging part of the review to write. My experience with the headset outside of using it was mixed. Yet, when I was all buckled and strapped in, the headset was near perfect. The use case for this headset is, again, difficult to explain. Lastly, the cost of this headset. I’ve intentionally avoided mentioning how much my exact headset costs until this point. The Pimax Crystal with DMAS kit comes out to a total cost of $1,800… that’s nearly twice as expensive as the Valve Index with all of its accessories included.
For this reason, I’ve divided this verdict section into categories of flight simmers. Each category has a different recommendation based on their ideal use case and how well they fit the use cases of the Pimax Crystal. The categories include:
- The hardcore mil-sim flight simmer, which is the mil-sim pilot who has spent more than $1,000 on mil-sim-related products and is happy to invest in their passion (i.e., me).
- Then there’s the hardcore non-military flight simmer. They fly strictly civilian applications, learning the intricacies of the many high-quality civilian airliners available across the flight simulation marketplace.
The baseline requirement for the Pimax Crystal applies to both of these categories. The Pimax Crystal requires a significant investment in PC hardware as well as into the headset itself. The recommended minimum specifications are listed as an RTX 2070. My brand new RTX 4090 liquid-cooled Suprim experienced some stutters and ran pretty warm after extensive use. I do not have a 2070 to test on. However, I would be wary of purchasing the Pimax Crystal if you have a GPU that benchmarks any lower than an RTX 4070 TI.
Mil-Sim Flight Simmer
The mil-sim flight simmer is the ideal customer for the Pimax Crystal. The advantages and the transformative improvements to the flight simulation experience in games such as DCS bring so many new elements to the table that the Pimax Crystal feels like a requirement to actually experience military flight simulation as intended. The Pimax, in combination with high-quality HOTAS and Throttle Quadrant, brings you closer to the cockpit than ever before. The only drawback is having to use your mouse for cockpit interaction…

Mouse interaction aside, the cost of the Pimax Crystal with the DMAS kit included is worth it if you are like me and spend exorbitant amounts of money for hardcore mil-sim hardware. The Pimax Crystal is essential for the proper enjoyment of mil-sim flight simulation. Purchase the Pimax Crystal for $1,599 here and the DMAS kit for $99.90 here. You can save $150 by selecting the Pimax Crystal with no controllers. As I am recommending the headset for mil-sim pilots, I recommend selecting the controller-less option, as I never found myself using them.
Non-Military Flight Simmer
The non-military flight simmer, which only focuses on civil-commercial aviation, is in the middle ground for the primary use case of the Pimax Crystal. While the headset will certainly improve the flight simulation experience, the benefits are not as significant as they are in military simulation applications. While having all 6 degrees-of-freedom in the cockpit may benefit the pilot in situations such as landing or general awareness, head-tracking hardware may be better suited for this use.
The only non-military flight simmer that I can recommend the Pimax Crystal to is a flight simmer who has already spent significant amounts of money on flight simulator hardware. For those of you who have purchased high-end rudder pedals, HOTAS, throttle quadrants, or even replica flight panels, the Pimax Crystal might be a worthy addition to your simulation hardware. Even so, the cheaper alternative of a head tracker or even spending similar amounts on high-end ultrawide monitors, such as the Samsung G9 or Triples, may serve as a better alternative overall than investing heavily into Virtual Reality at all.
If you are in this category and are on the fence. I encourage you to take the leap. If spending this amount of money is already within your acceptable window, then you may find yourself diving into virtual reality flight simulation and never looking back. Otherwise, I would recommend investing in a cheaper VR headset first. Taking the leap with more affordable VR options is an excellent stepping stone into the VR world. However, if you find yourself using these lower-end models and wishing for higher frame rates, resolutions, and FOV, then the Pimax Crystal is for you.
Feel free to join our Discord server to share your feedback on the article, screenshots from your flights or just chat with the rest of the team and the community. Click here to join the server.