When you are using a flight simulator, there is going to be a time when you will get bored with flying straight from point A to point B and will have to prepare for your flight. This is a huge part of the experience, and all should know that flight simulation is not only about turning on the simulator and flying.
There are many options on how to prepare for your flight; however, the best currently available is SimBrief, available at simbrief.com. It is an online service, provided by Navigraph, that helps you plan your flight in advance and get all the crucial numbers and details. Everything is automatic after you input the general details the system requires to generate a flight correctly.
In this article, we will briefly guide you around the interface and show you how to work with the system. We just want to put up front that this is not an article meant for experienced flight simmers but rather for newcomers who want to learn more about where they can move. Of course, with that, we are not stopping anyone from reading it.
Foremost, we highly recommend getting at least the basic Navigraph Navdata subscription, so you can always have an up-to-date database in SimBrief. It is not required, though. Even without an active subscription, you are always provided with older AIRAC data within SimBrief. If you want to fly on VATSIM or any other network, on the other hand, it is very recommended to have all your nav data updated everywhere, including SimBrief.
How does SimBrief work?
SimBrief is very simple to use, with a modern interface and simple design, to accommodate both new and seasoned pilots.
Before we start, the first thing you’ll have to do is create an account on Navigraph. Since Navigraph acquired SimBrief a while ago, the same accounts are used for both platforms.
Generating SimBrief flight plan
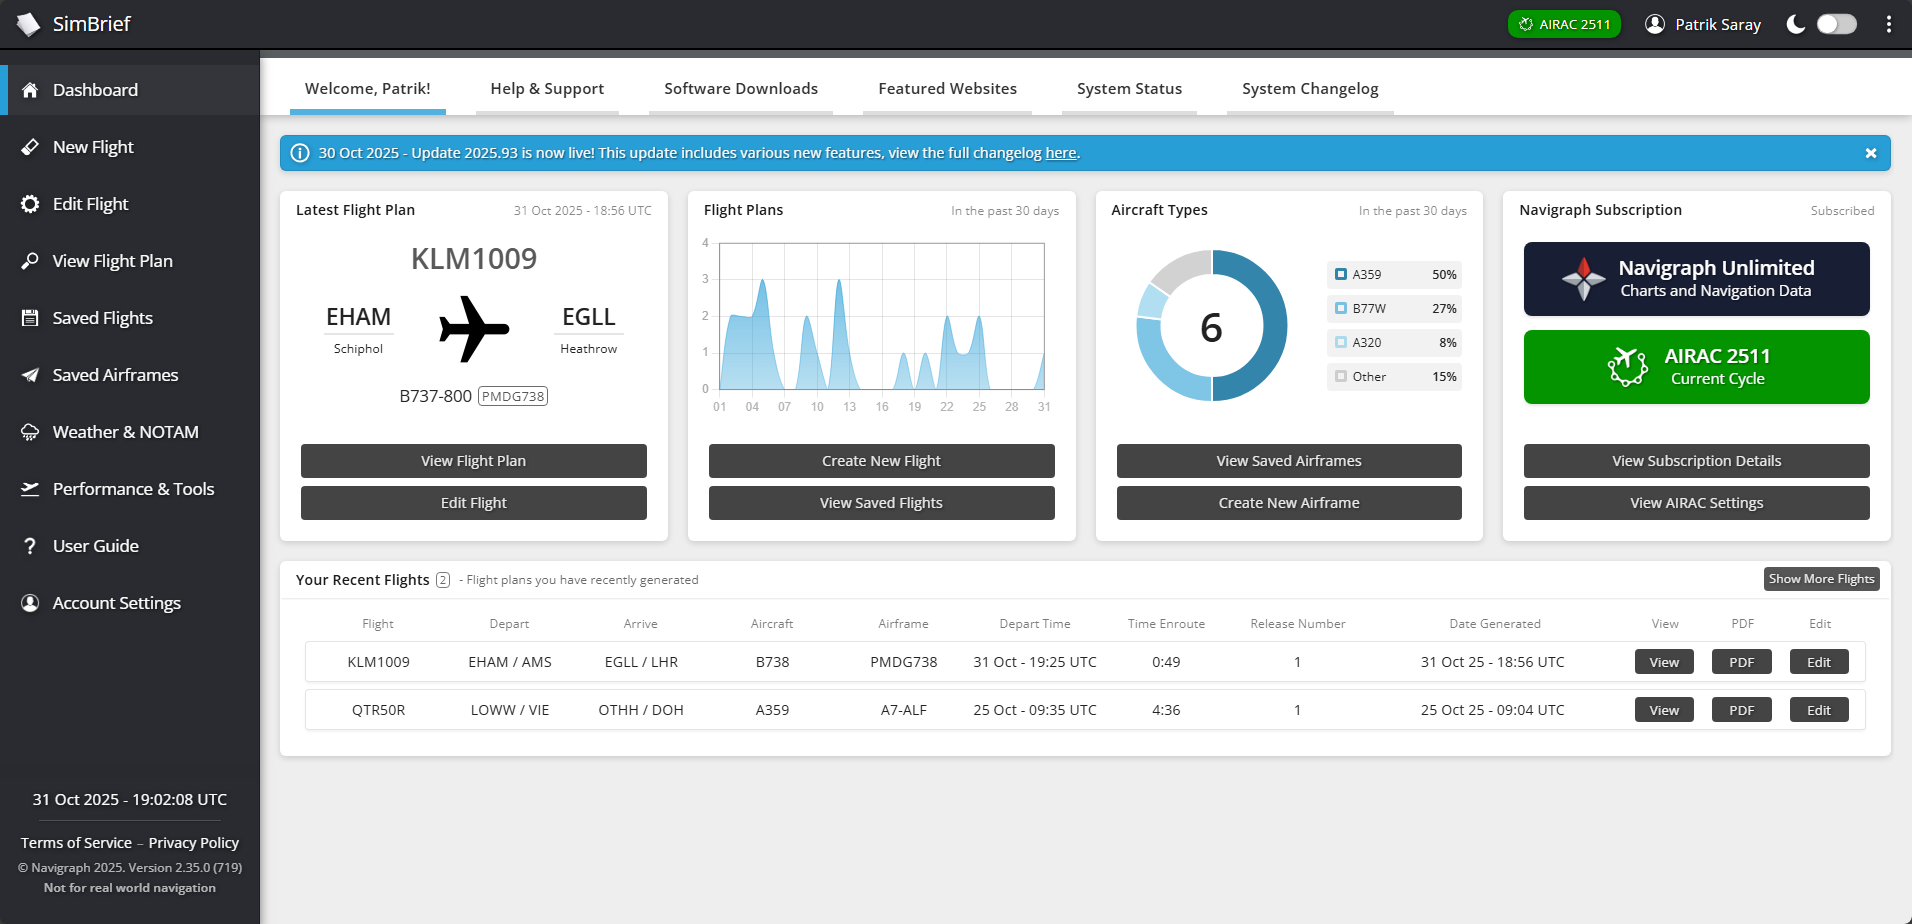
By selecting “Dispatch” in the menu followed by the “Create New Flight” submenu item, SimBrief will take you right into the part of the website you should be most interested in. Let’s say that we want to fly from Amsterdam Schiphol (EHAM) to London Heathrow (EGLL) as KLM1009, and we will be flying on a Boeing 737-800.
We have to, most importantly, insert the airline’s ICAO code and flight number we will be flying. After that, our departure and arrival fields, the alternate airport will be generated automatically. Further, there is an airframe (airframe = aircraft + variant) we have to set. You can, of course, play around with the rest of the values, but what we described is the alpha and omega of dispatching.
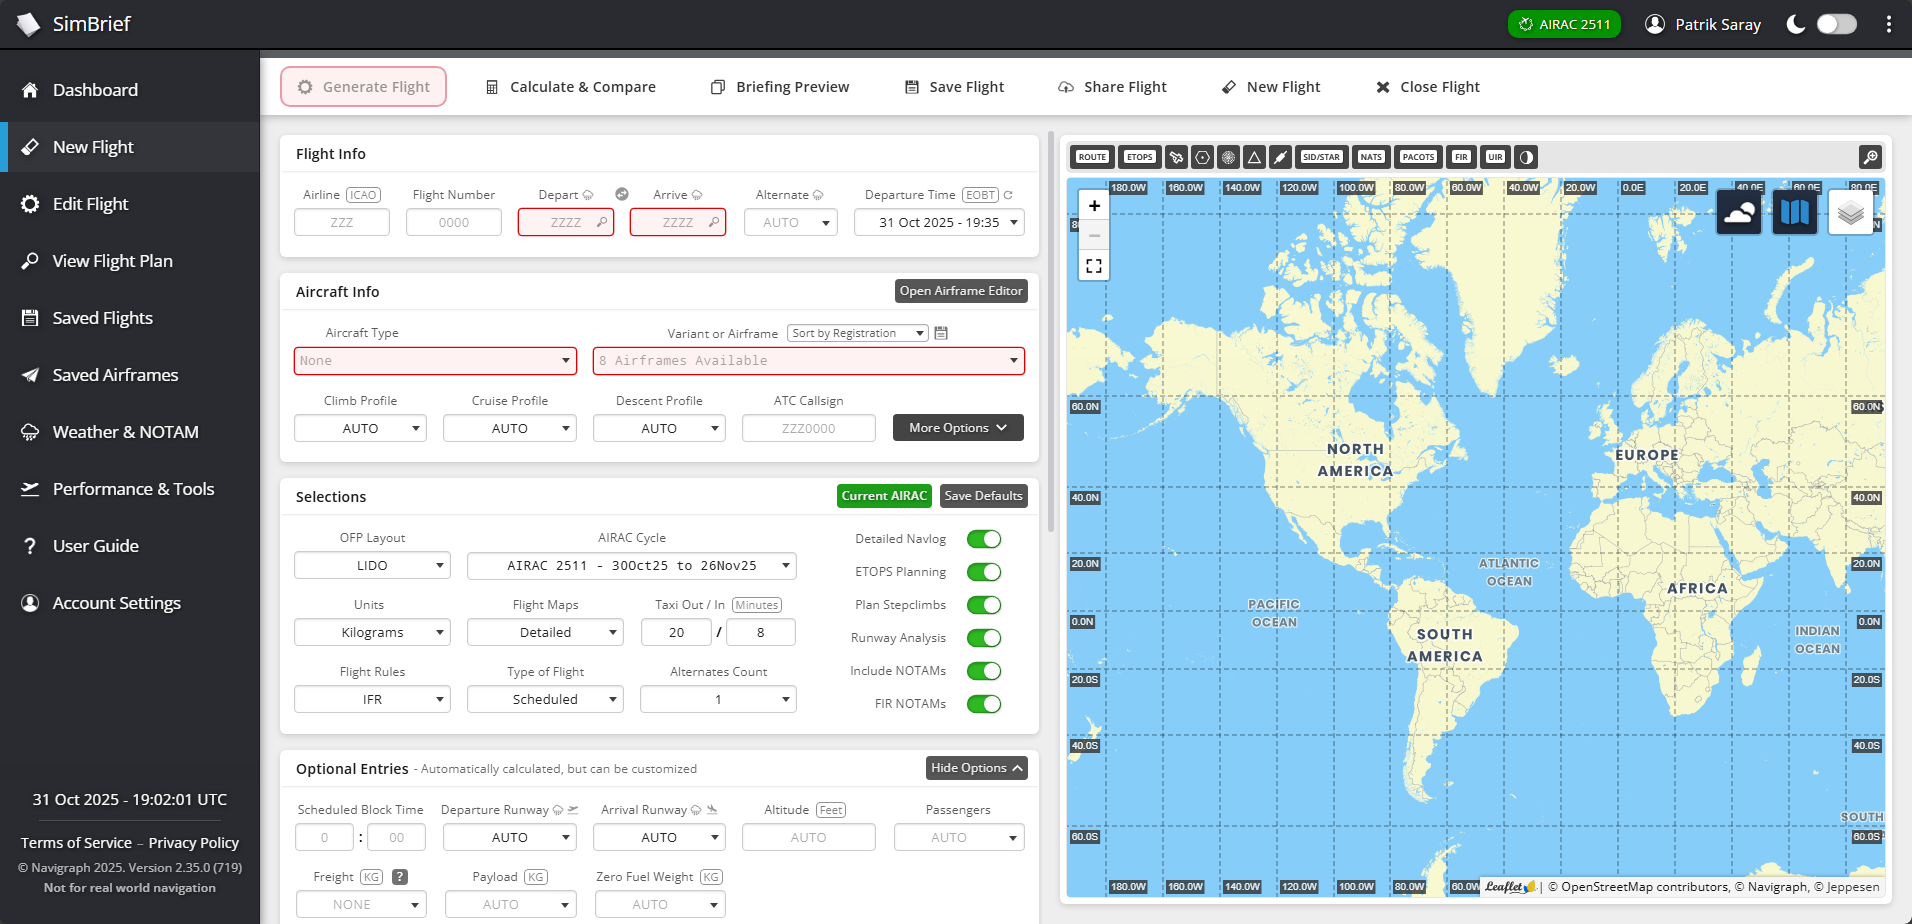
SimBrief works with real-world data and is going to give you the most accurate route, specific to your AIRAC cycle. You can update your AIRAC by subscribing to Navigraph, which will immediately upgrade your SimBrief and Charts experience. If you don’t like the route SimBrief initially gave you, you have three more route options that you can choose from. The route is always shown on the map.
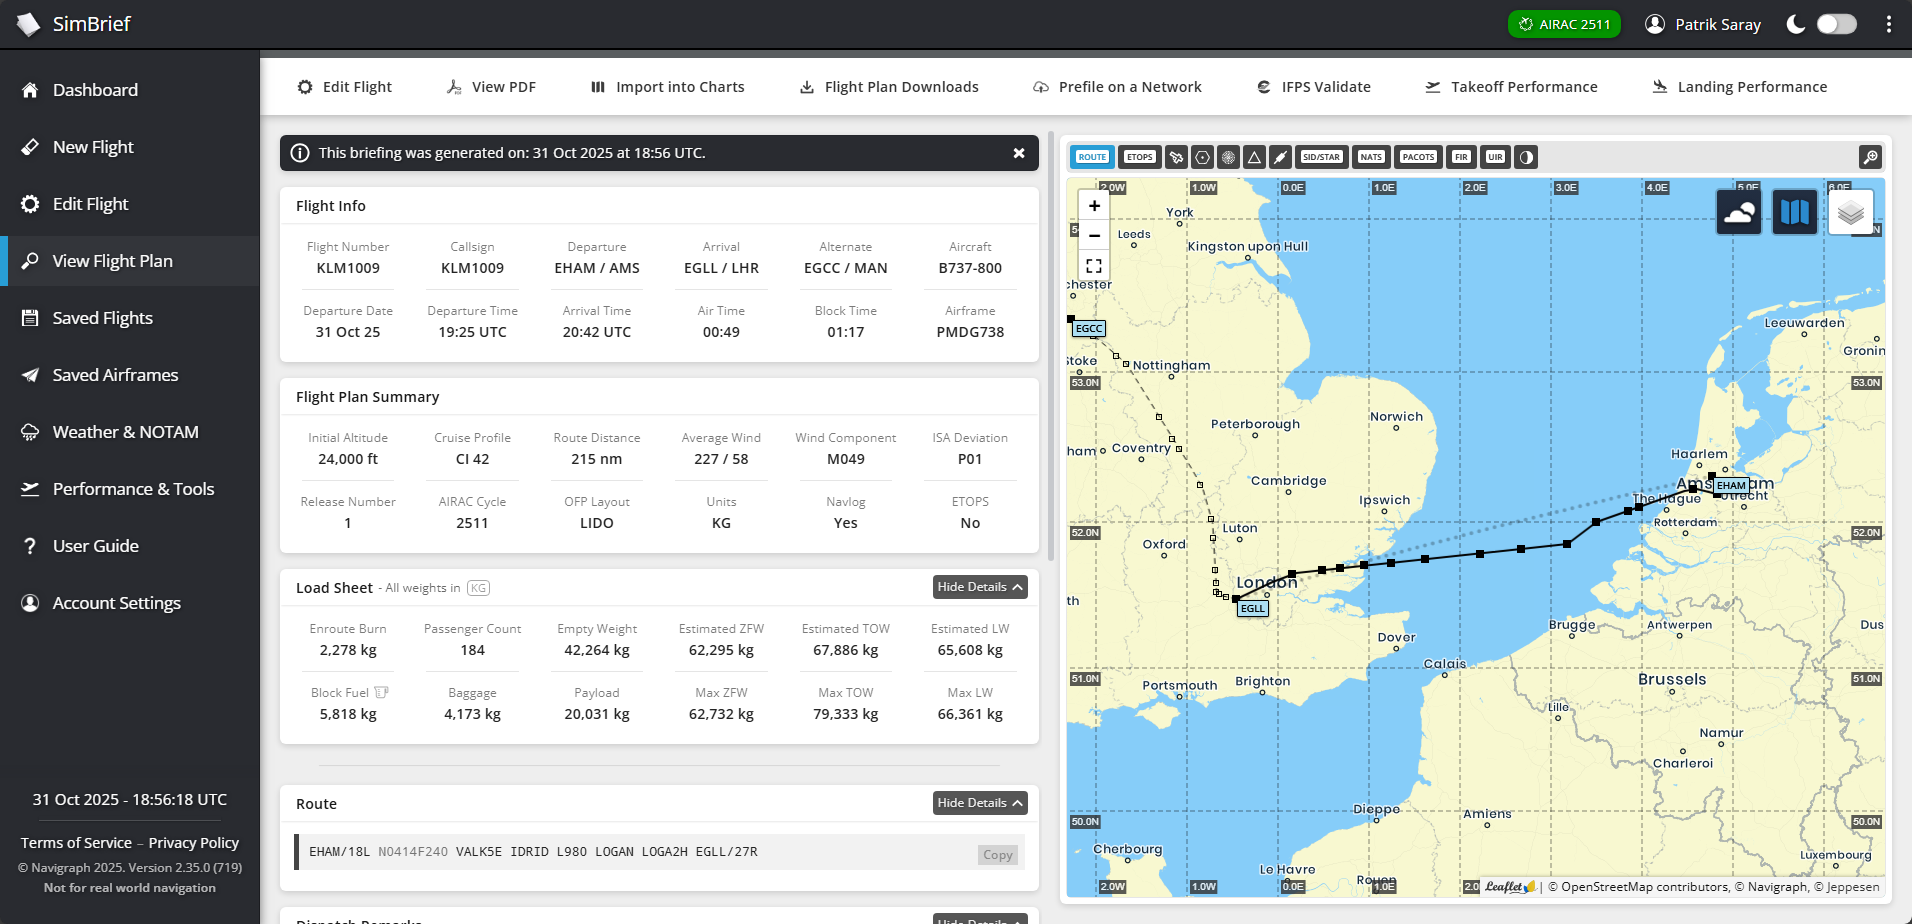
SimBrief will do all the calculations for you, and after pressing “Generate Flight“, a PDF output will be created for you with the final details.
Working with the SimBrief flight plan
In the PDF, you get all the things you need for a successful flight, from payload and fuel calculations to your flight level (altitude) or weather along the route. You also get many various maps showing the meteorological situations en route. The whole PDF file usually has 50 pages or more, and you can choose from various presets, such as LIDO or a number of airline-specific presets.
You do not have to be frightened of the 50 pages. If you’re new to flight planning, we wouldn’t recommend complicating your life just now with the rest and focusing only on a few of the pages.
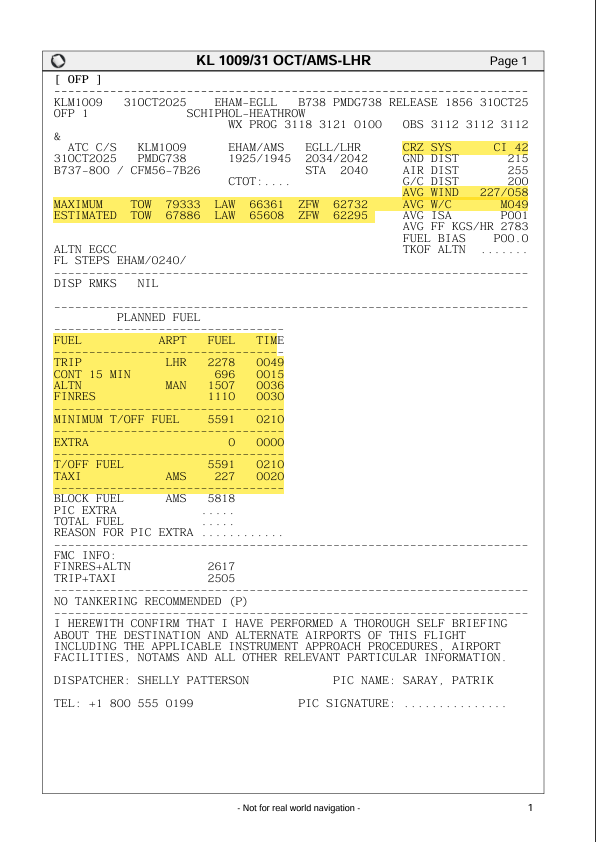
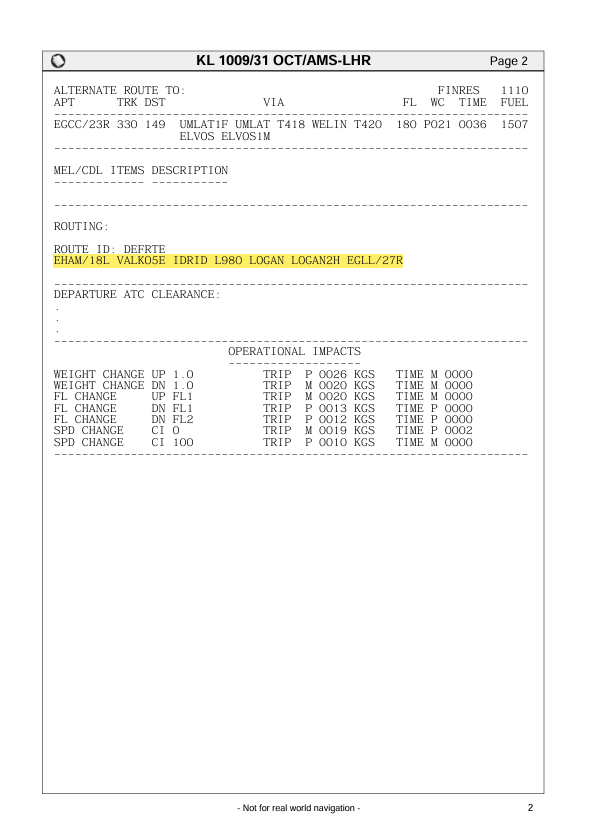
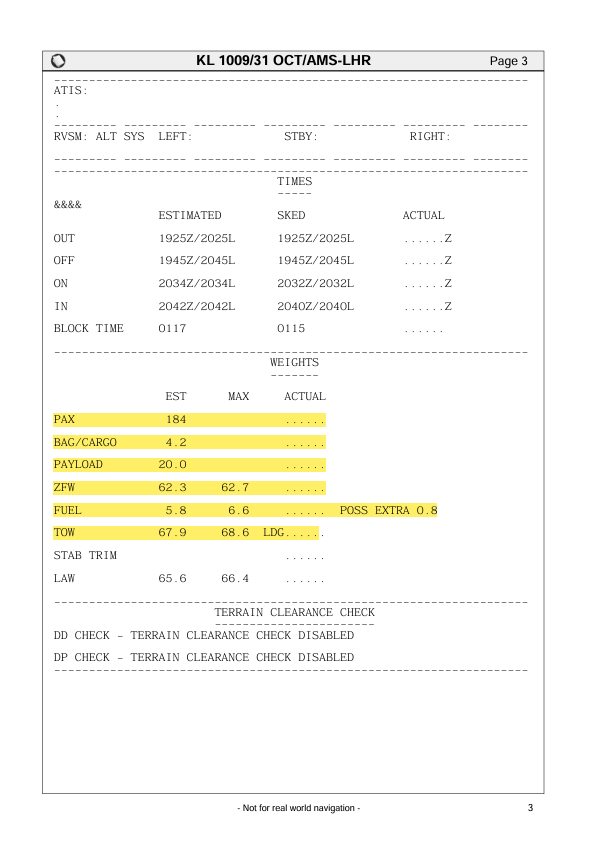
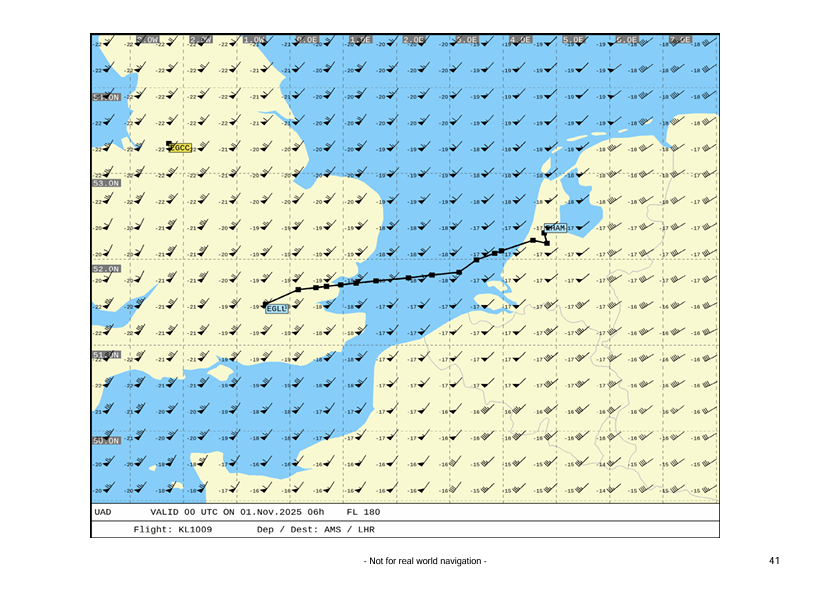
The very first page contains your planned fuel, aircraft type and other fundamental information like altitude and wind component. The second page shows the dedicated route, and the third contains details about the passengers, cargo and weights in general. Then, for a better idea of what you will come across on your journey, towards the end of the document, you will find weather maps and vertical profile maps.
We put all of the crucial information and flight details from the OFP with their locations below. It should give you a little better idea of where to look in the generated output.
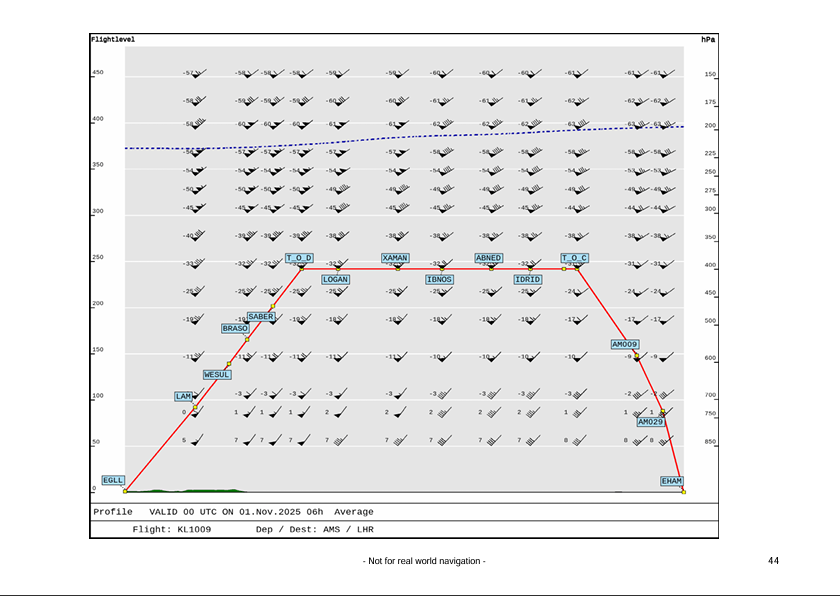
The most important things to you – those being weight and balance details, flight plan, cruise level, etc. are always on the first two pages of the briefing PDF file. The weather maps and more detailed vertical profile, however, are always at the end of this document. The placement of this information may vary from different briefing presets that your virtual airline might use. We used LIDO in this article. It is set by default.
Aircraft presets
Furthermore, you can also create your own or load others’ aircraft presets. Especially if you don’t like the default ones which SimBrief provides you with, or if there is a new addon that does not have a preset yet. However, it is rather a difficult process to create such a preset. Many airlines (and sometimes even 3rd party aircraft developers) provide you with a custom aircraft preset.
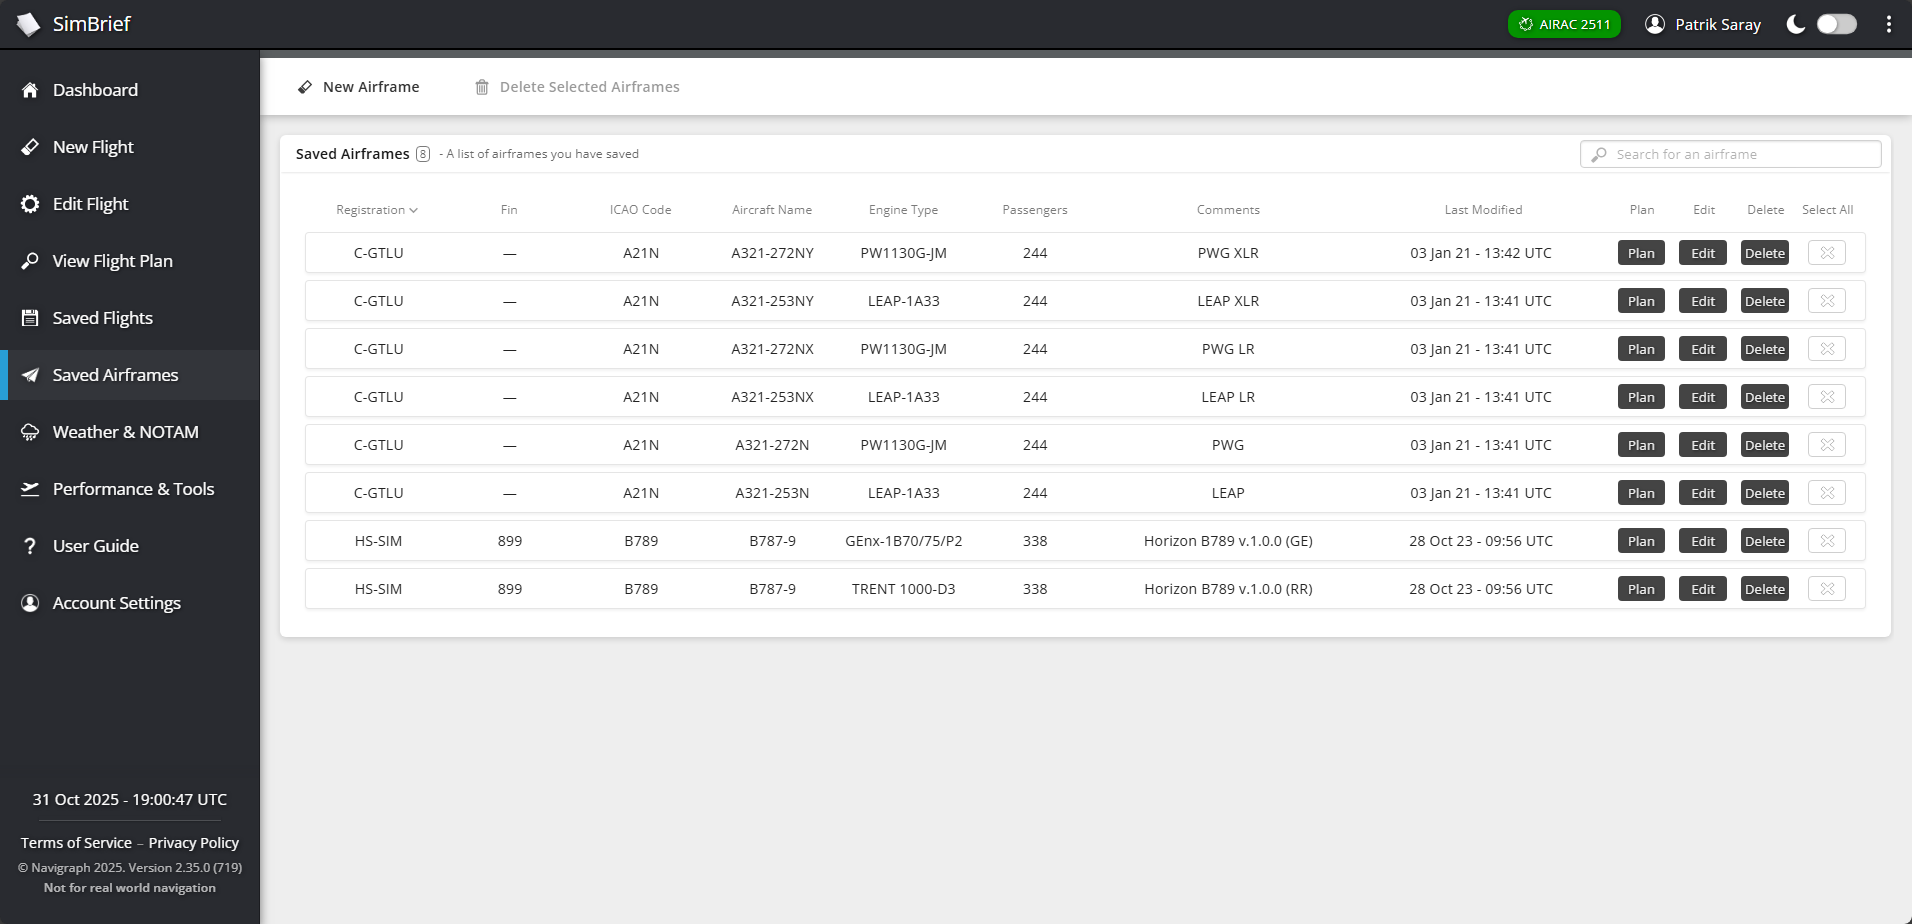
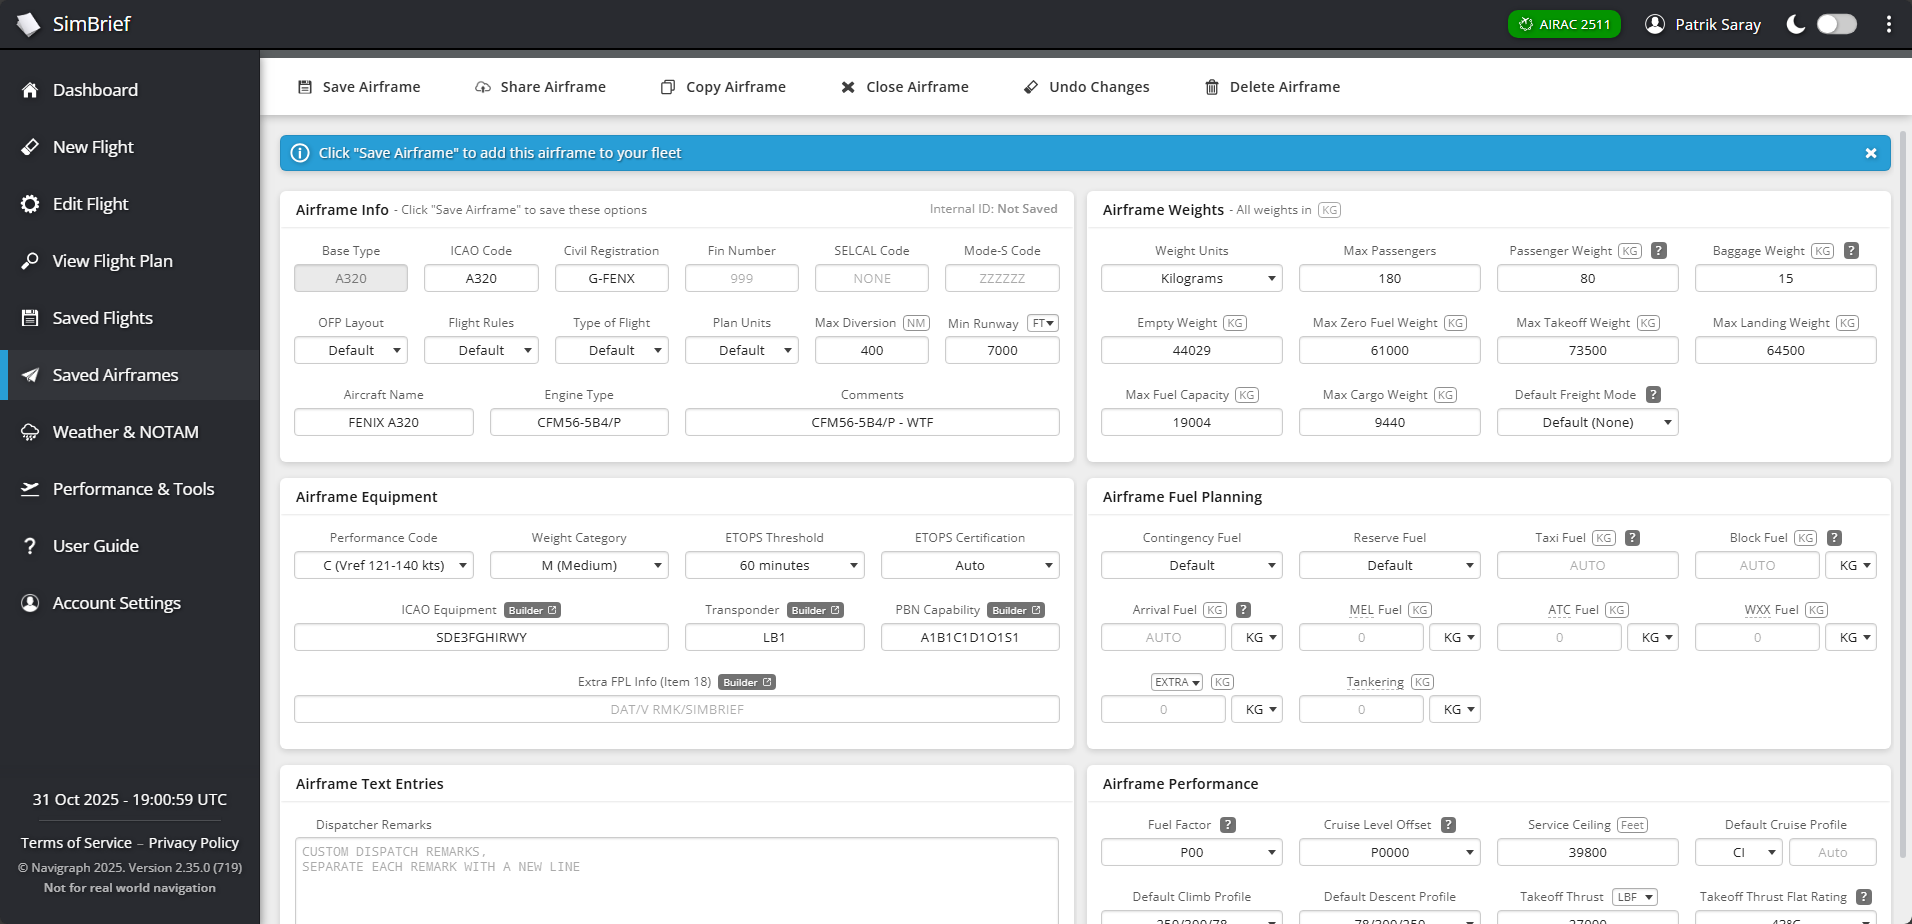
You can add these to SimBrief in the “Dispatch” menu within the “Saved Airframes” section. There, you click on “New Airframe“, select the aircraft type, and write down all the data you need. If you don’t want to create your own airframe, you can always load and save someone’s airframe, but you will have to have a link to that.
If you close SimBrief by accident, don’t worry, you can always return back to your previous flight plan by clicking “My Flight Plan” in the Dispatch drop-down menu. All your previous flight plans will be displayed there.
Useful Additional Tools
SimBrief is not only about dispatching the flight and gathering the data to Navigraph Charts, your aircraft and so on. It is a broad dispatcher that provides you with much more information that may be useful for your flights, especially if you aim to fly as realistically as possible.
Firstly, if the aircraft you want to fly doesn’t have its own performance calculator, you can use the one found in SimBrief. It is not as accurate as if your aircraft developer created it. However, it definitely fills in some gaps in this regard.
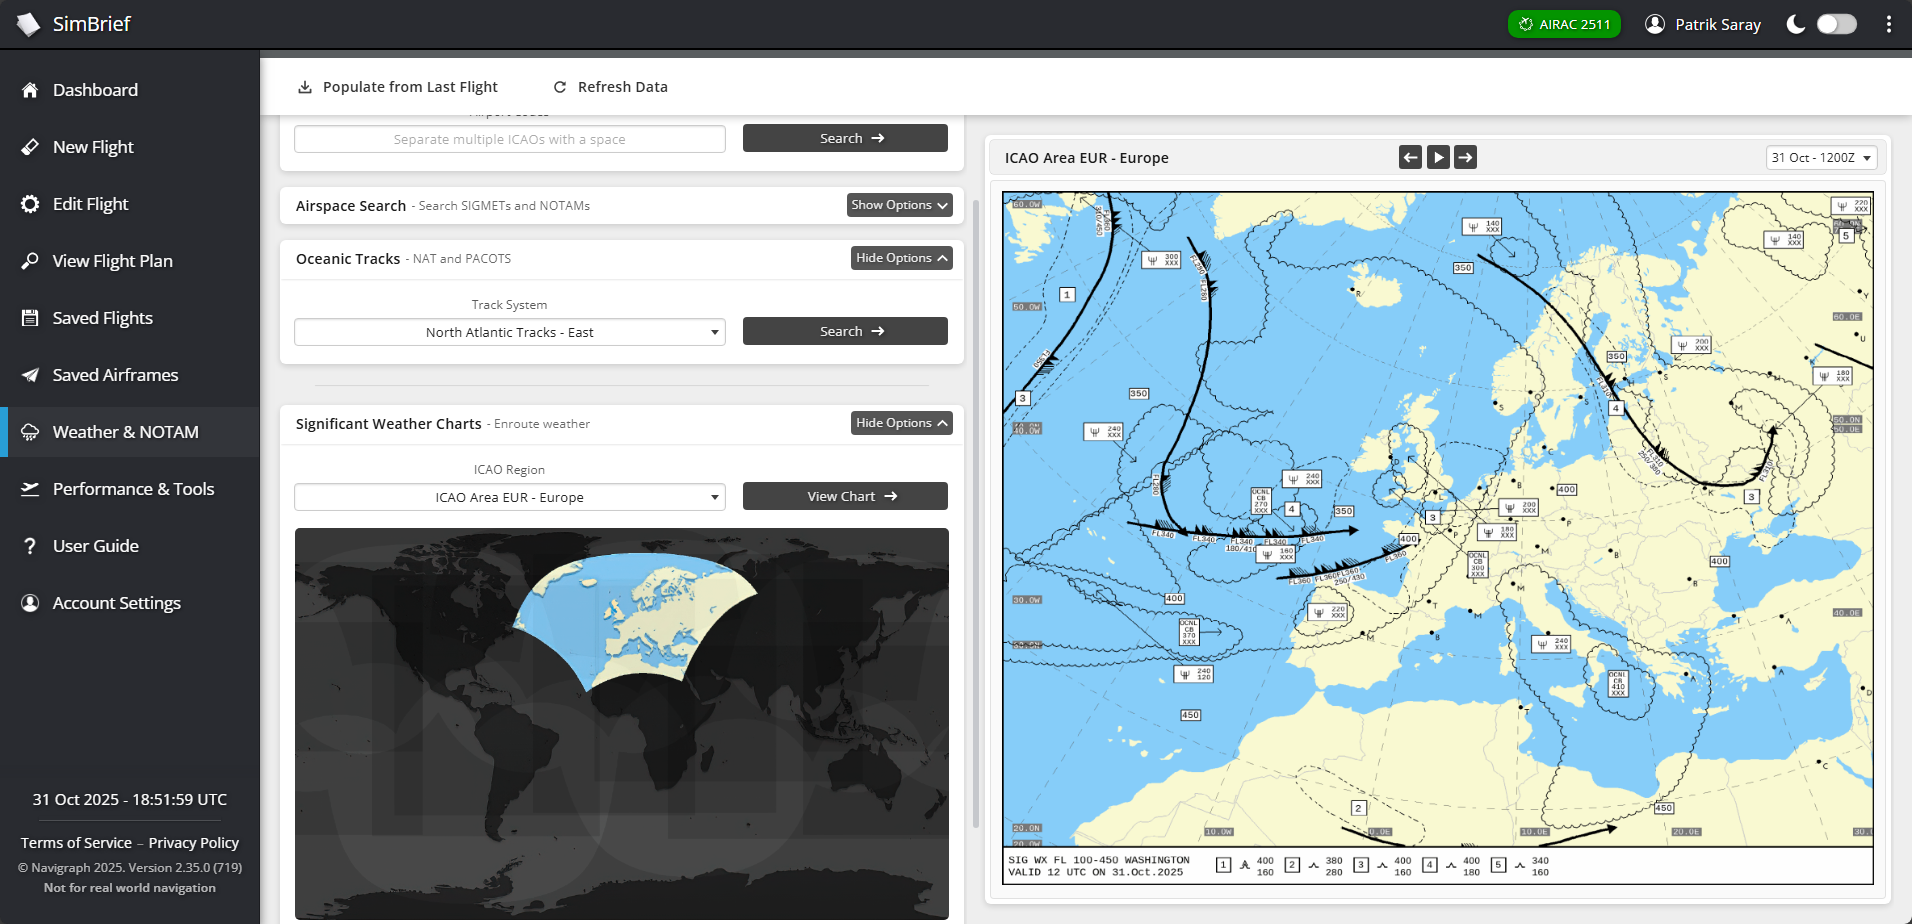
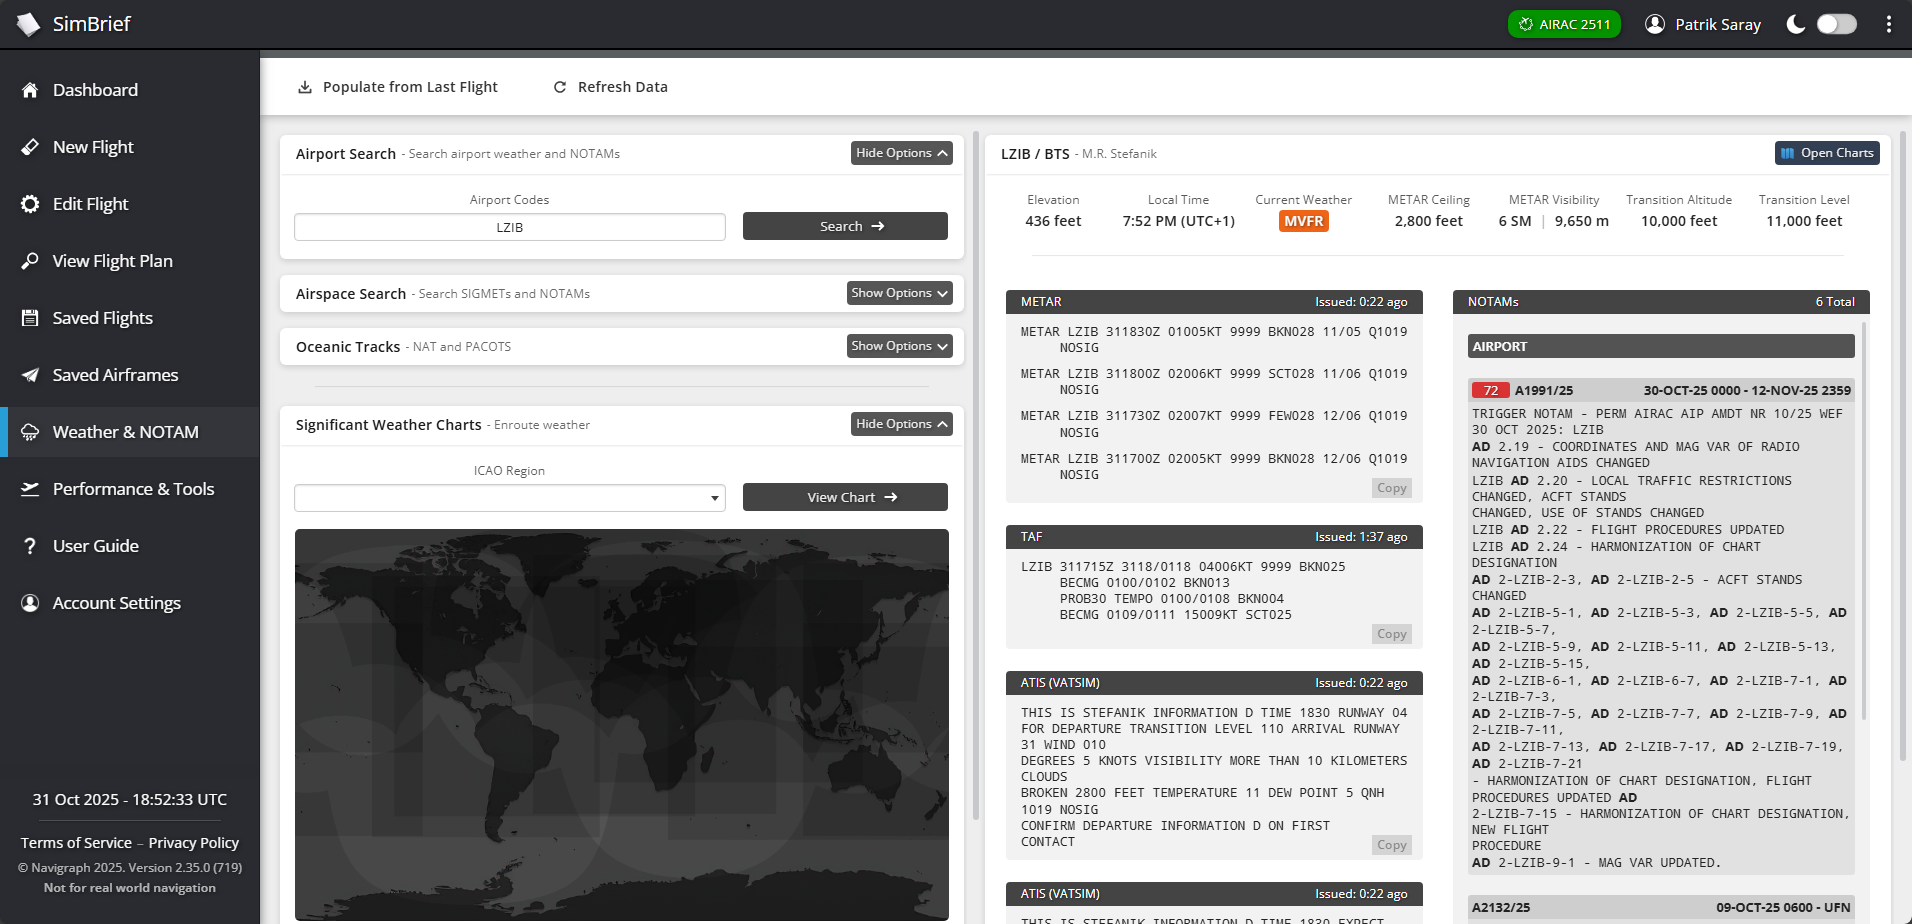
Detailed Significant Weather Charts and wind maps can be especially helpful for IFR flights in higher altitudes. You can select your map by choosing the region, and SimBrief will generate up-to-date SIGWC, as well as wind maps. If you want to fly across the Pond, you may find the inclusion of Oceanic Tracks and their representative daily variants really useful. Requesting information about a certain airport gives you all the needed information, including NOTAMs, METAR and TAF.
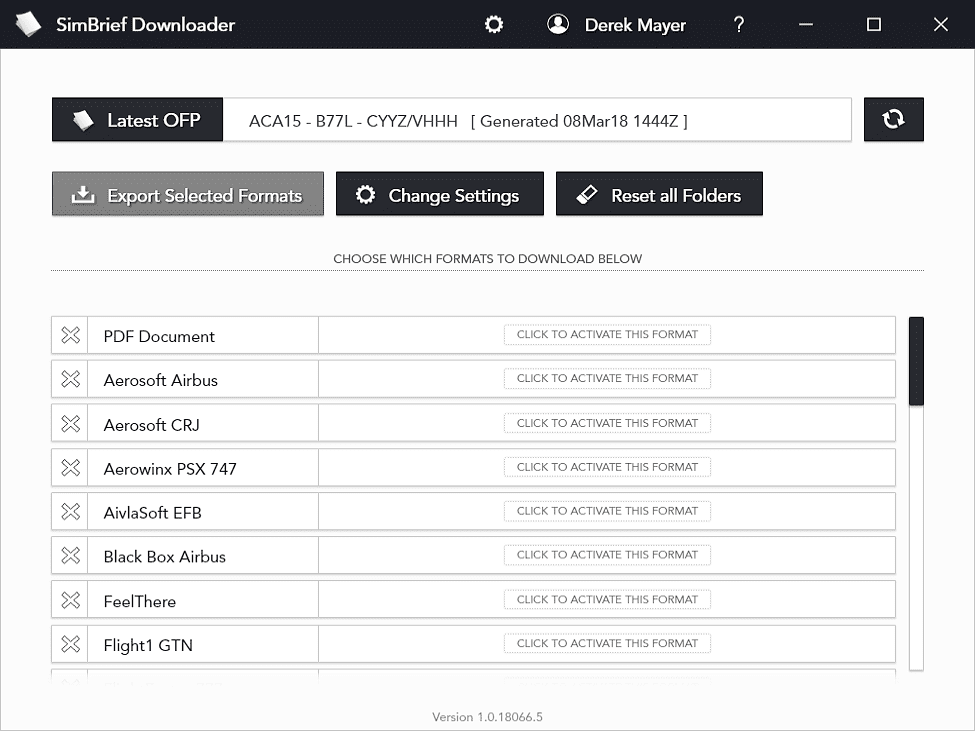
SimBrief FMS Downloader
The SimBrief FMS Downloader is a standalone utility which helps you download your flight plan into your FMC. You can do this with any flight if you don’t wish to put your route into the FMC on your own.
The flight plans can also be downloaded from the website directly once you generate your flight by clicking the “Download FMS” button at the top of the output page. You will have to then save it to the appropriate folders manually, which can vary from addon. The FMS Downloader is in no way needed, and I want to make that clear.
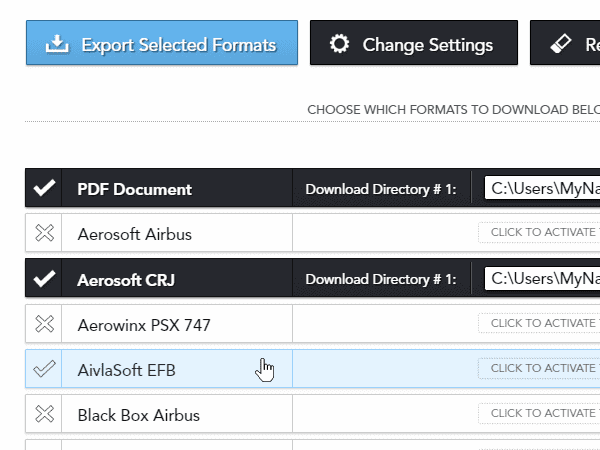
Once you generate a flight, the FMS Downloader automatically detects it and prompts you if you wish to download the flight plan to your dedicated simulator. Generally, it makes your life much easier.
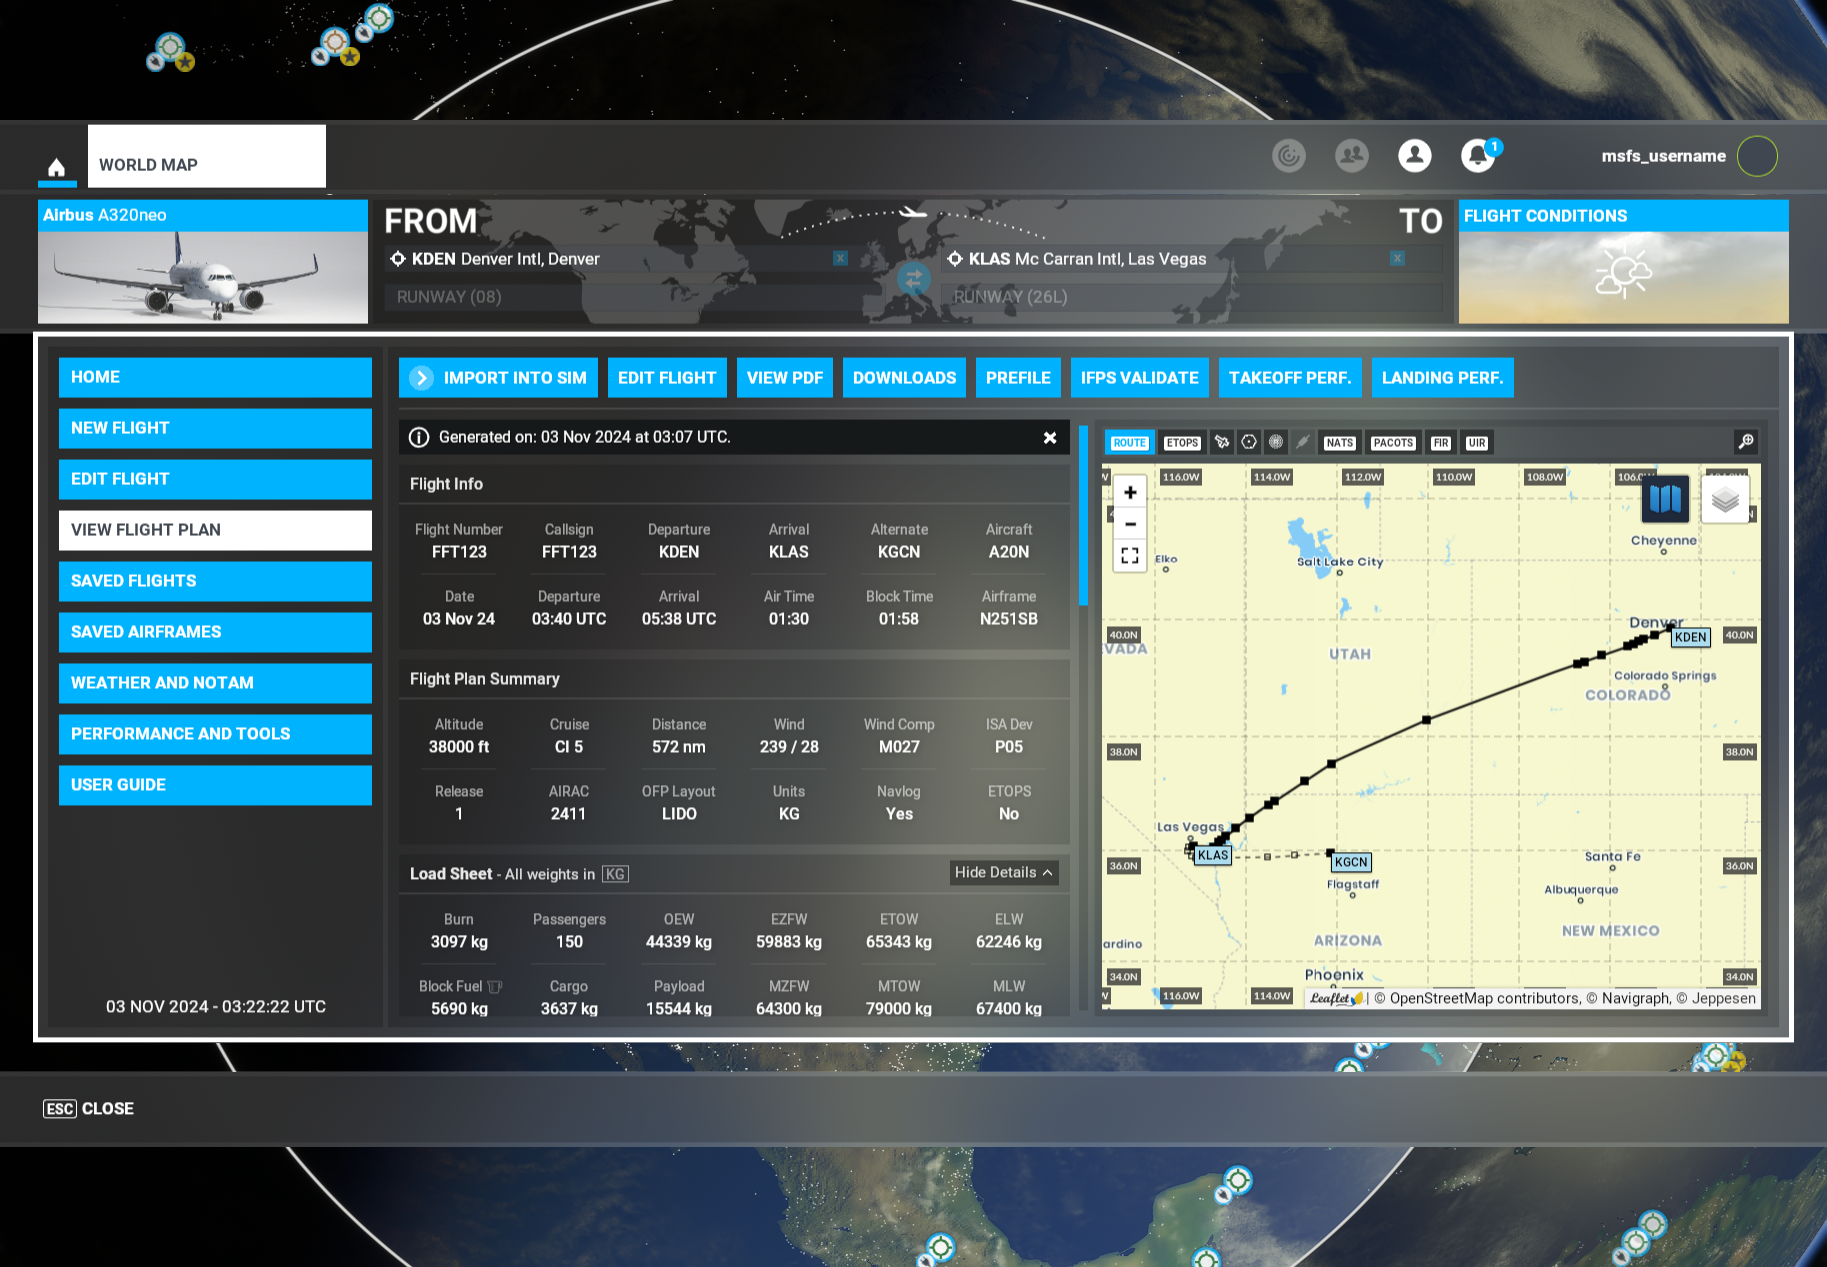
SimBrief Dispatcher for MSFS 2020 and 2024
Navigraph has also created a standalone dispatcher for Microsoft Flight Simulator games. This dispatcher is basically working like an integration of SimBrief Downloader directly in the game, and marginally improves the in-game dispatching, which is, by default, very lacklustre. This dispatcher is also working within the toolbar and can be accessed anytime during the flight. This is especially helpful if you are not running two or more screens to run the simulator on one screen and the needed information on the other.

This plugin also makes it very easy to integrate your flight plan into the aircraft. However, it is worth mentioning that all the developers, especially those focused on airliners, are putting a SimBrief API into their planes, making the ACARS flight plan uplink seamless, even without the Dispatcher plugin.
In Microsoft Flight Simulator 2024, this Dispatcher comes in the default in-game EFB as a standalone application that you can easily access. The plugin is working the same way as the browser version of the EFB and the Dispatcher found in MSFS 2020. However, this is a much more seamless application, feeling more realistic, especially if you are not running a standalone tablet for your flights.
Feel free to join our Discord server to share your feedback on the article, screenshots from your flights or just chat with the rest of the team and the community. Click here to join the server.