Whether you’re just starting with flight simming, looking to replace or upgrade your old creaky joystick, or hunting for the perfect gift for an avgeek near you, choosing the right flight sim peripherals can make all the difference (especially for your wallet). With this guide, we aim to help you navigate the world of sticks, throttles, tillers, pedals, and more – perfectly suited to your budget and aircraft preference.
How This Guide Works
Before we dive into gear recommendations, we begin with the why: how peripherals influence your flight sim experience and what’s truly essential to get started. We’ll walk you through the minimum hardware required to fly comfortably and explain why certain components make a noticeable difference in realism and immersion.
To give you a practical starting point, we’ve gathered input from the FSNews team’s own personal setups. Based on our collective experience and internal feedback, we’ve put together three example configurations, each designed to fit different needs and budgets:
- A budget-friendly build for newcomers or casual flyers
- A mid-range setup that balances quality and value
- A high-end premium rig for simmers who want the most immersive experience possible
Each setup is just an inspiration, easily customizable, and meant to grow with you as you log more flight hours.
Why Peripherals Matter
Flight simming isn’t just about clicking your mouse and watching dials move – it’s about feeling like you’re flying a real aircraft. The more you have to physically touch, the more you feel like a real aviator. Whether you’re looking to butter an airliner, perform basic flying in your lawnmower with wings (read our top 5 GA aircraft review!), or pull G’s in a fighter jet – your gear should pull you into the cockpit.
But it’s not just about immersion. Peripherals also give you far greater precision and control than your keyboard and mouse ever could. Smooth throttle input, accurate rudder input, and subtle stick movements can make all the difference when lining up that perfect (handflown) approach.
Yokes vs. Sticks – Know Your Flying Style!
Before diving into more specific setups, decide what kind of flying excites you most:
- Yoke setups are great for general aviation and Boeing-style airliners. However, keep in mind: they require lots of space, as they sit in the middle of your table. Unless you have a dedicated computer setup for flight simming, you’ll need to rebuild and possibly rewire every time you switch the use case of your desktop. Also, for the rudder axis, you’ll definitely need additional hardware.
- Joystick setups are not only great for Airbus aircraft or fighters, they also require less space and often include a twisting axis for rudder input (or tiller control).
The initial choice defines the feel of your flights – and often the way your setup evolves (which it will, guaranteed).
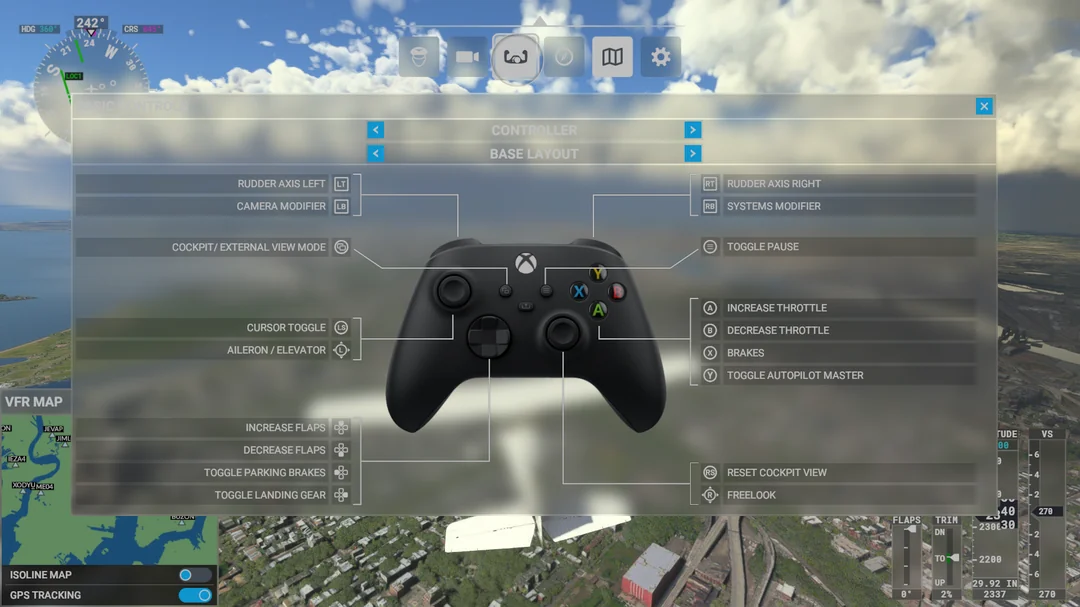
Bonus Option: The Classic Game Controller
Not ready to invest in dedicated flight gear yet, or want to keep it simple? A basic game controller (like an Xbox or PlayStation pad) can surprisingly get you (well) off the ground as some of our FSNews reporters stated.
With physical sticks for pitch, roll, and yaw, and triggers for throttle and brake, it’s a compact solution that works especially well for casual simming or flying on the go – particularly in titles like MSFS on Xbox. While using controllers lacks the realism and fine control of dedicated peripherals, it’s a great way to dip your toes into the skies without breaking the bank.
And here’s a fun bonus: If you have multiple controllers and want to experience the immersion of a shared cockpit with a (real, not simulated) friend sitting next to you, you’re in luck! Simply assign different controls to each connected controller on your PC setup (don’t miss our ultimate PC building guide!), and take on the roles of either the pilot flying or the pilot monitoring the aircraft.
The Essentials of Every Flight Sim Setup
When building a flight simulator setup, it helps to think in terms of control axes. Every maneuver in flight relies on manipulating these axes precisely (more right rudder!). The more axes your peripherals can handle, the more immersive your sim experience becomes.
At the core, every setup needs to address at least four essential axes of control:
- Pitch and Roll (Elevator and Aileron Control): This is typically managed with a yoke or flight stick. A stick is often a great entry point because it usually gives you three axes right out of the box – pitch, roll, and yaw (via twist).
- Throttle Axis (Engine Power): Enter the throttle quadrant. Even a single lever is enough to get flying, but many simmers upgrade to multi-axis quadrants to control mixture, prop pitch, or even multiple engines. Devices like the Honeycomb Bravo are popular because they provide up to six axes – perfect for simming everything from a Cessna to a 747.
- Yaw (Rudder Control): Critical for taxiing, coordinated turns, and crosswind landings. You can control this with dedicated rudder pedals, or with twist functionality on a flight stick as a budget-friendly alternative.
Going Deeper: Sensors and Precision
Advanced users may want to know the technology behind the axes: Many high-end peripherals use Hall-effect sensors, which detect magnetic fields to track movement without physical contact, resulting in smoother, more durable, and precise input. In contrast, budget gear often relies on potentiometers, which use physical contact and are more prone to wear and signal jitter over time.
Durability also varies by build: for example, rubber-band tensioning in budget yokes like the Logitech model can feel mushy and degrade quickly, whereas higher-end yokes often use metal springs that provide better resistance, longevity, and can be replaced or adjusted by the user.
Our Setup Ideas: For Inspiration Or Tested Setups
As mentioned earlier, the following three setups, each at a different price point, were carefully selected by our team. In some cases, we chose alternative products due to significant price variations across regions. All listed prices reflect availability and pricing at the time of writing.
1. Setup: Great for Beginners
If you’re just getting into flight simulation, you don’t need to break the bank to start having fun. At the sub-$80 tier, there are some fantastic, beginner-friendly options that offer real value.
Let’s start from the beginning: if you already have a controller, you technically have everything you need to fly, as already mentioned above. It’s not ideal, but it’s a surprisingly easy way to get started without any extra cost.
You want a dedicated flight controller without spending much? You can step up to the Logitech Extreme 3D Pro – available in the United States for around $33 or about €65 in Europe. It features proper flight sim ergonomics, with a twist rudder axis for the rudder and tiller, a small throttle slider, and plenty of in-game programmable buttons. For the price, it’s a huge jump in immersion and control.
But for just a bit more, you can experience the full feel of a proper HOTAS setup – Hands On Throttle-And-Stick – which offers separate controls for both hands and deeper immersion. In Europe, the Thrustmaster T.Flight HOTAS X (around €70) or the newer HOTAS One X (typically $69/€79) are standout choices in this tier. Both offer:
- A joystick with pitch, roll, and twist axes
- A physically separate throttle lever
- Several programmable buttons for custom mappings
- Plug-and-play experience with most simulators
A NOTAM on durability: Both the 3D Pro and Thrustmaster HOTAS rely on potentiometers for input detection, which can wear out with heavy use, potentially leading to stick drift or input jitter over long time. But for beginners, they still offer excellent performance for the price.
2. Setup: The Mid-Tier – For Serious Beginners and Experienced Simmers
If you have already spent some time in virtual traffic patterns or even on networks like VATSIM and want to upgrade to something more precise and immersive, the mid-tier is where things start to get exciting. Here, you’ll find gear that not only feels better in the hand but also offers better build quality, more realistic layouts, and greater long-term value.
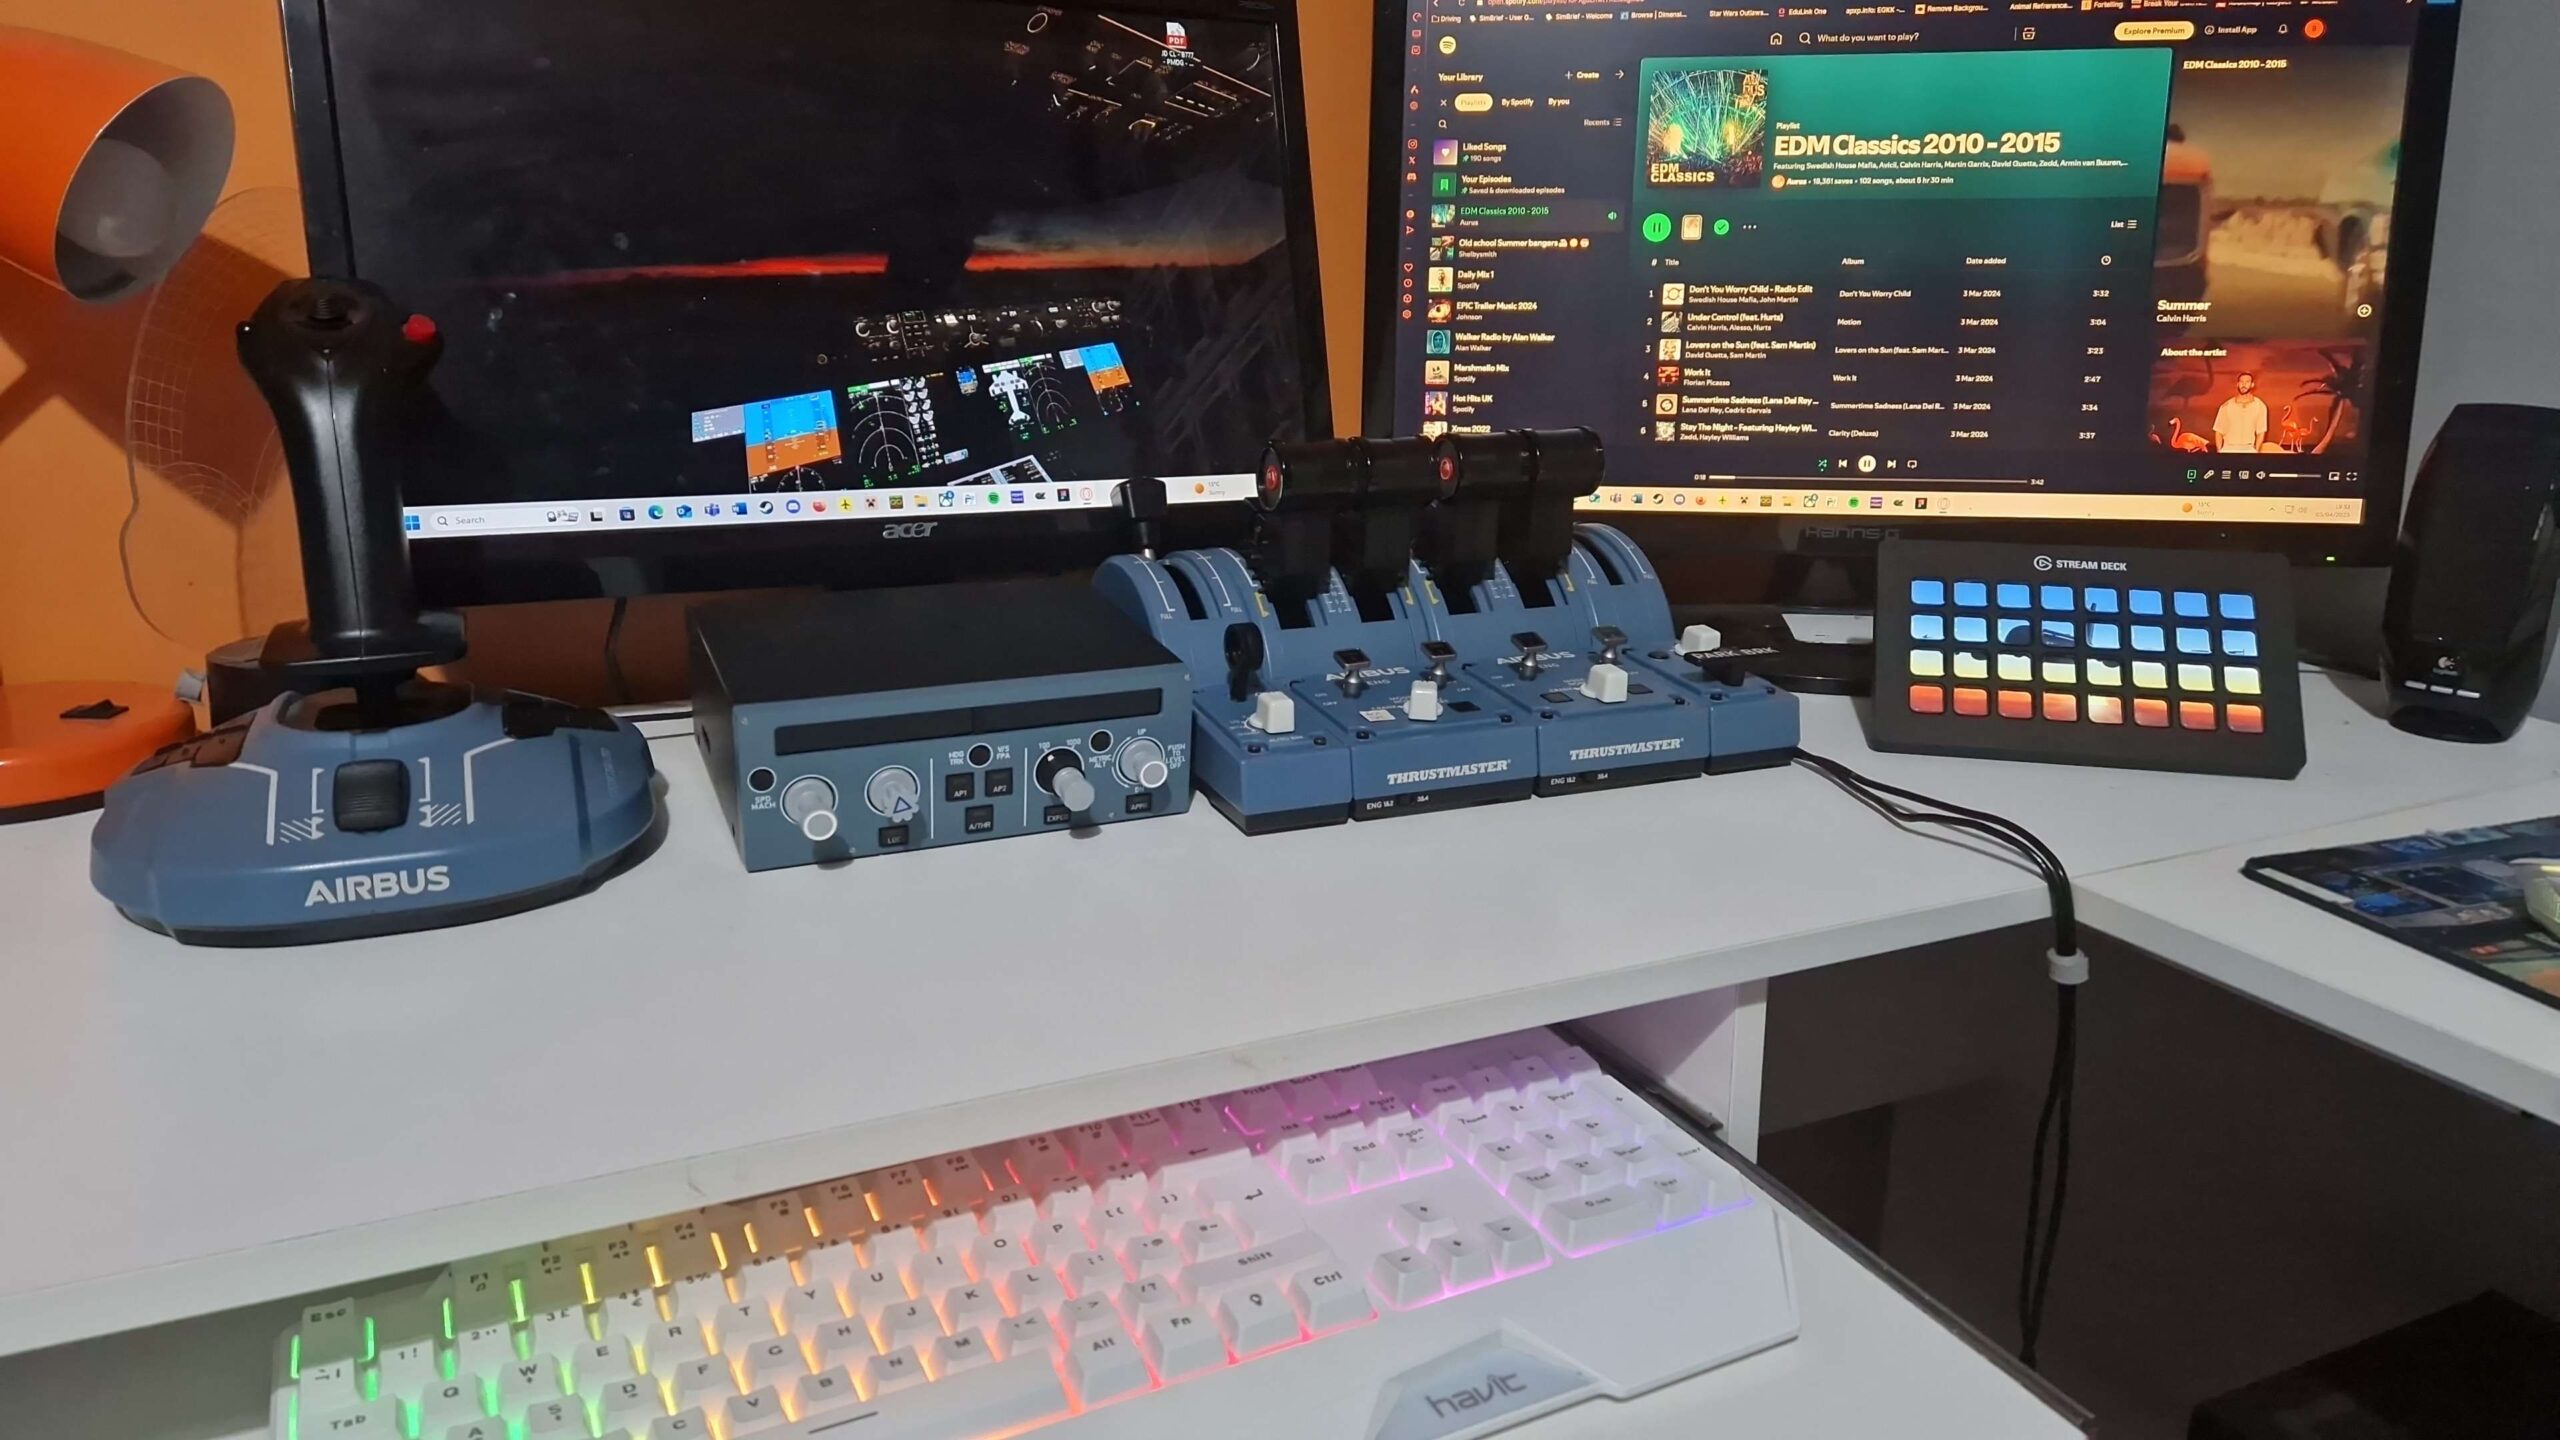
One great option in this range is the “Thrustmaster TCA Airbus Edition Sidestick and Throttle Quadrant combo“. It is priced at around €150/$199 and brings you a modern Airbus-style control scheme with swappable sidestick modules (ideal for left- or right-seat setups), smooth axis control, and a throttle quadrant for up to four separate engines that includes detents for reverse thrust and TO/GA. It is perfect for airliner fans or virtual Executive pilots.
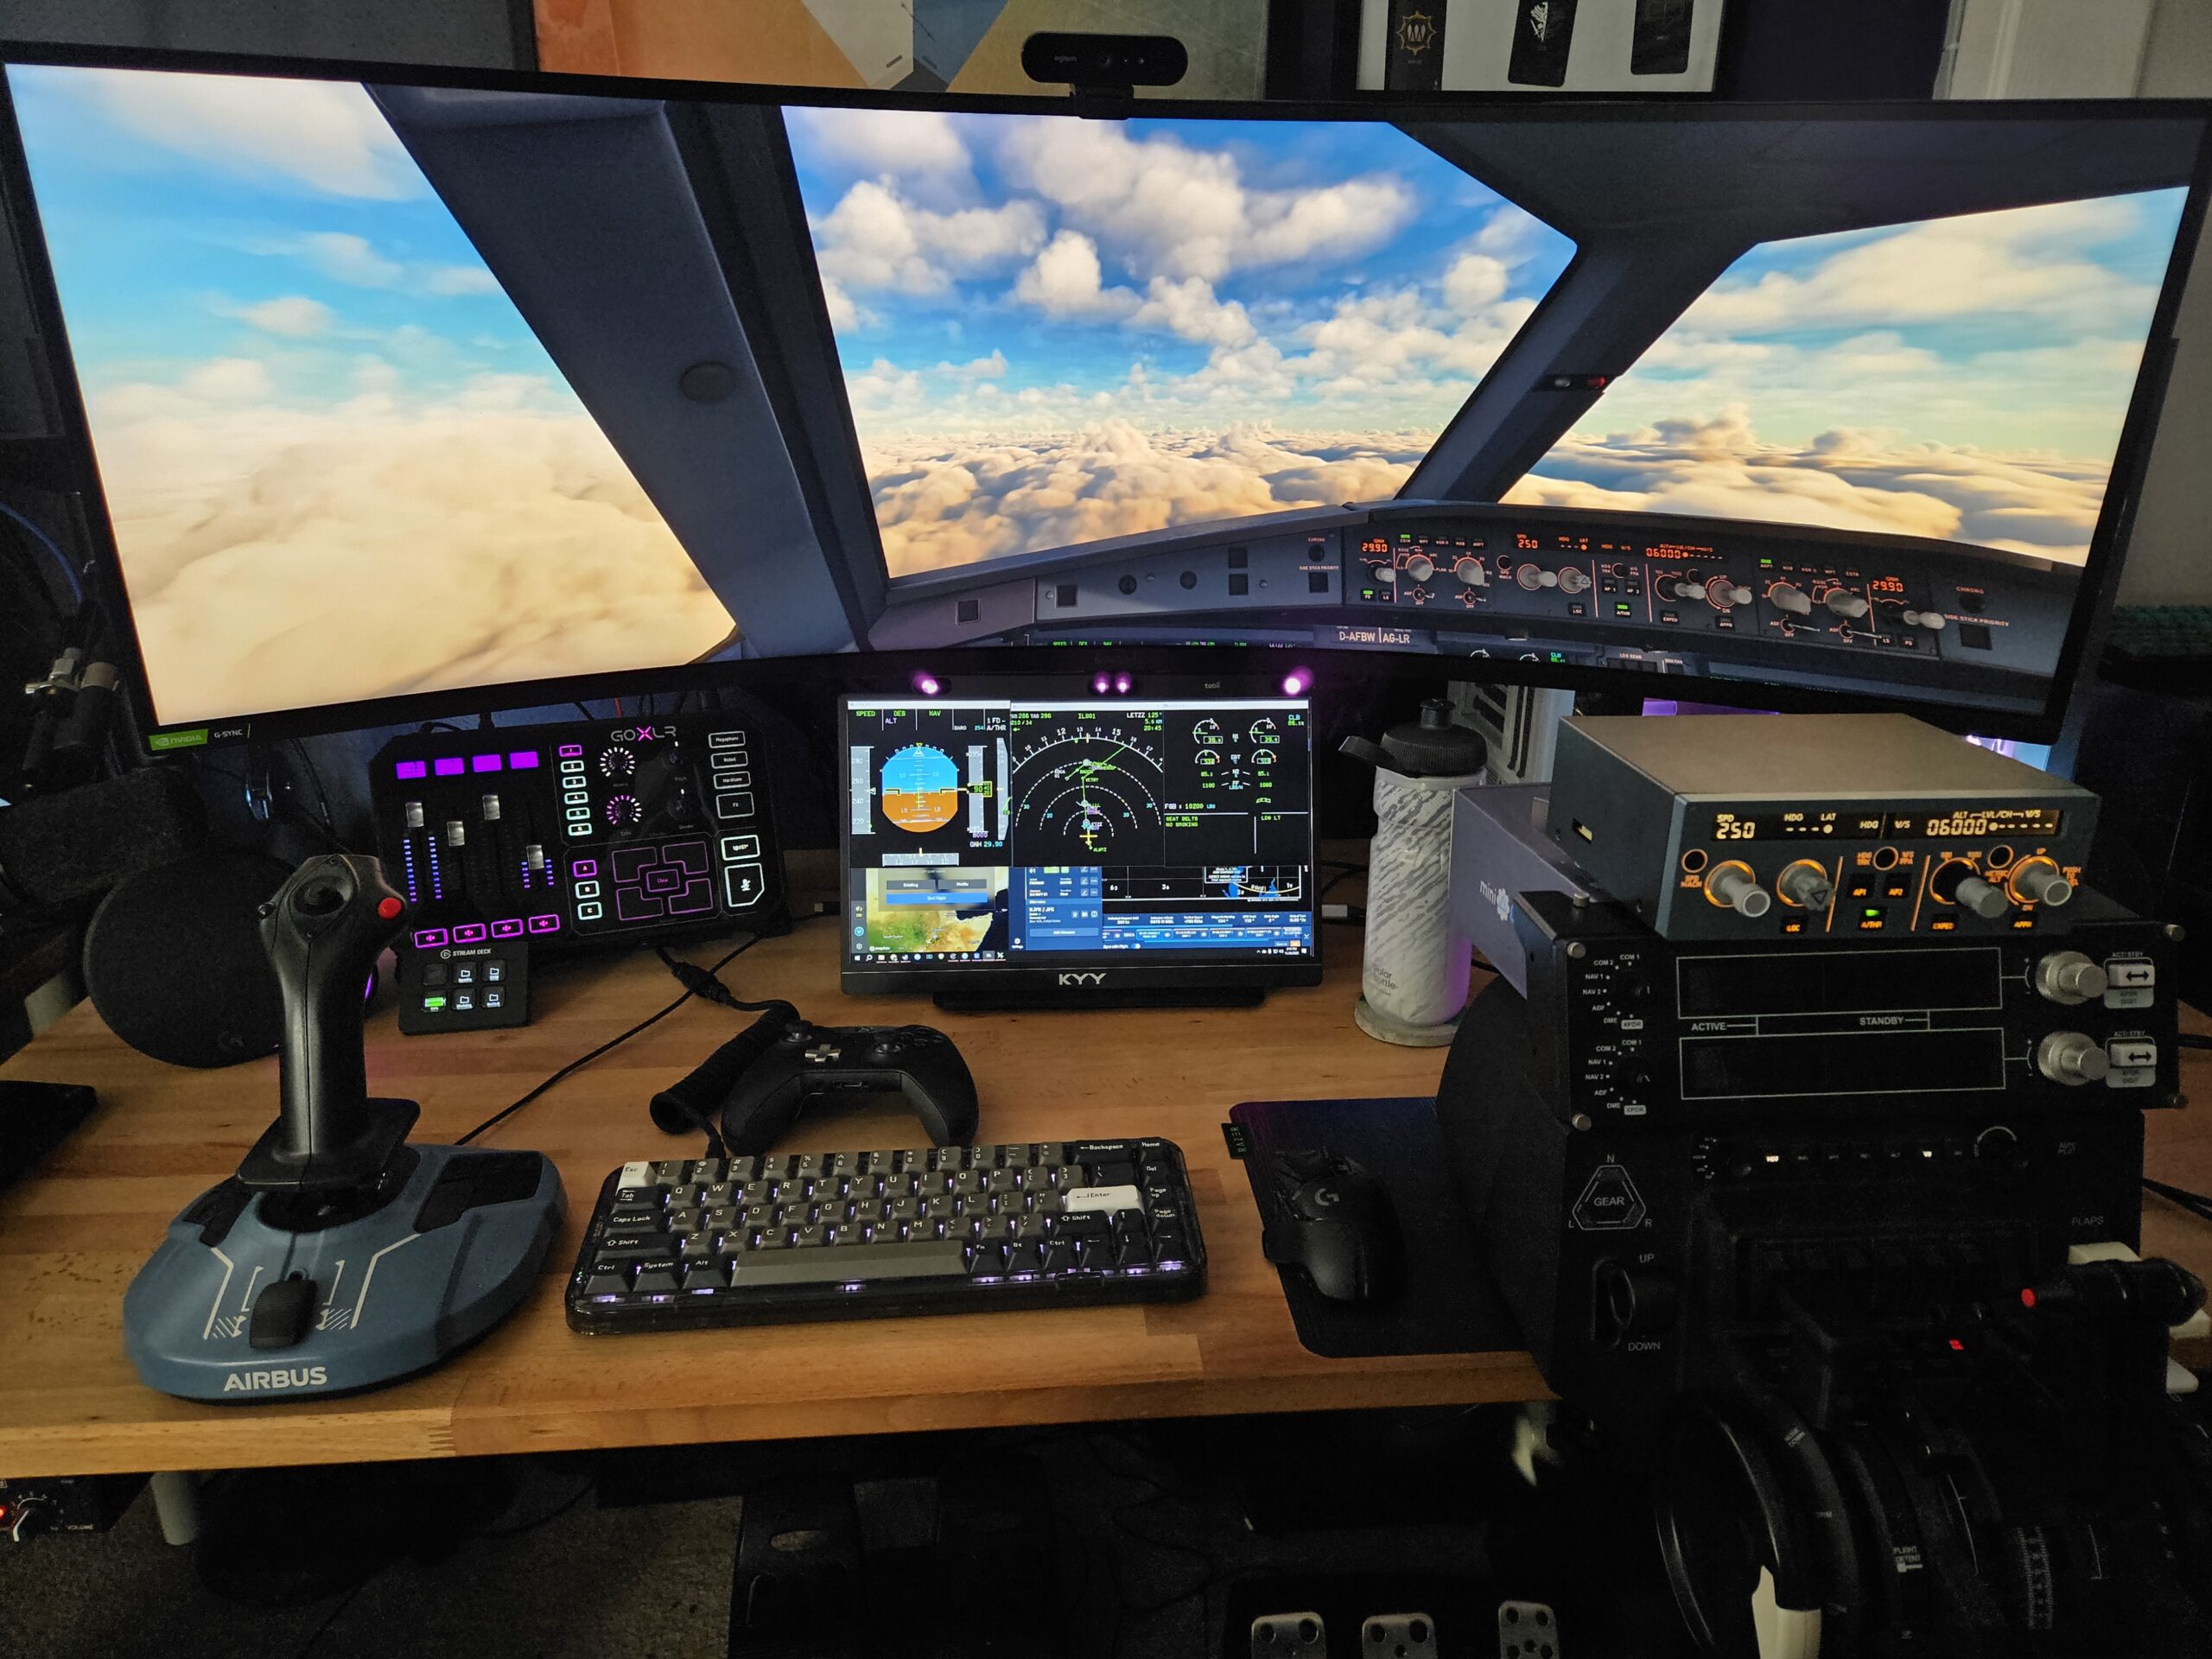
You want to add immersion to the autopilot? Add in a Winwing FCU (Flight Control Unit), which replicates the autopilot panel found in Airbus cockpits. Priced at €140/$154.18, it’s not cheap, but it drastically enhances realism by letting you manipulate heading, speed, altitude, and more without ever touching a mouse. For VATSIM or IVAO flyers, it’s truly a game-changer.
Prefer a GA-style yoke over a sidestick? The Honeycomb Alpha Flight Controls is a fantastic alternative in this price range (usually around €300/$280, depending on your region). It features an exceptionally solid yoke mechanism with 180° rotation, a strong desk mount, and a ton of programmable switches built into the base. If you’re more into GA (General aviation) flying or classic (Boeing) airliners, this might be the better fit.
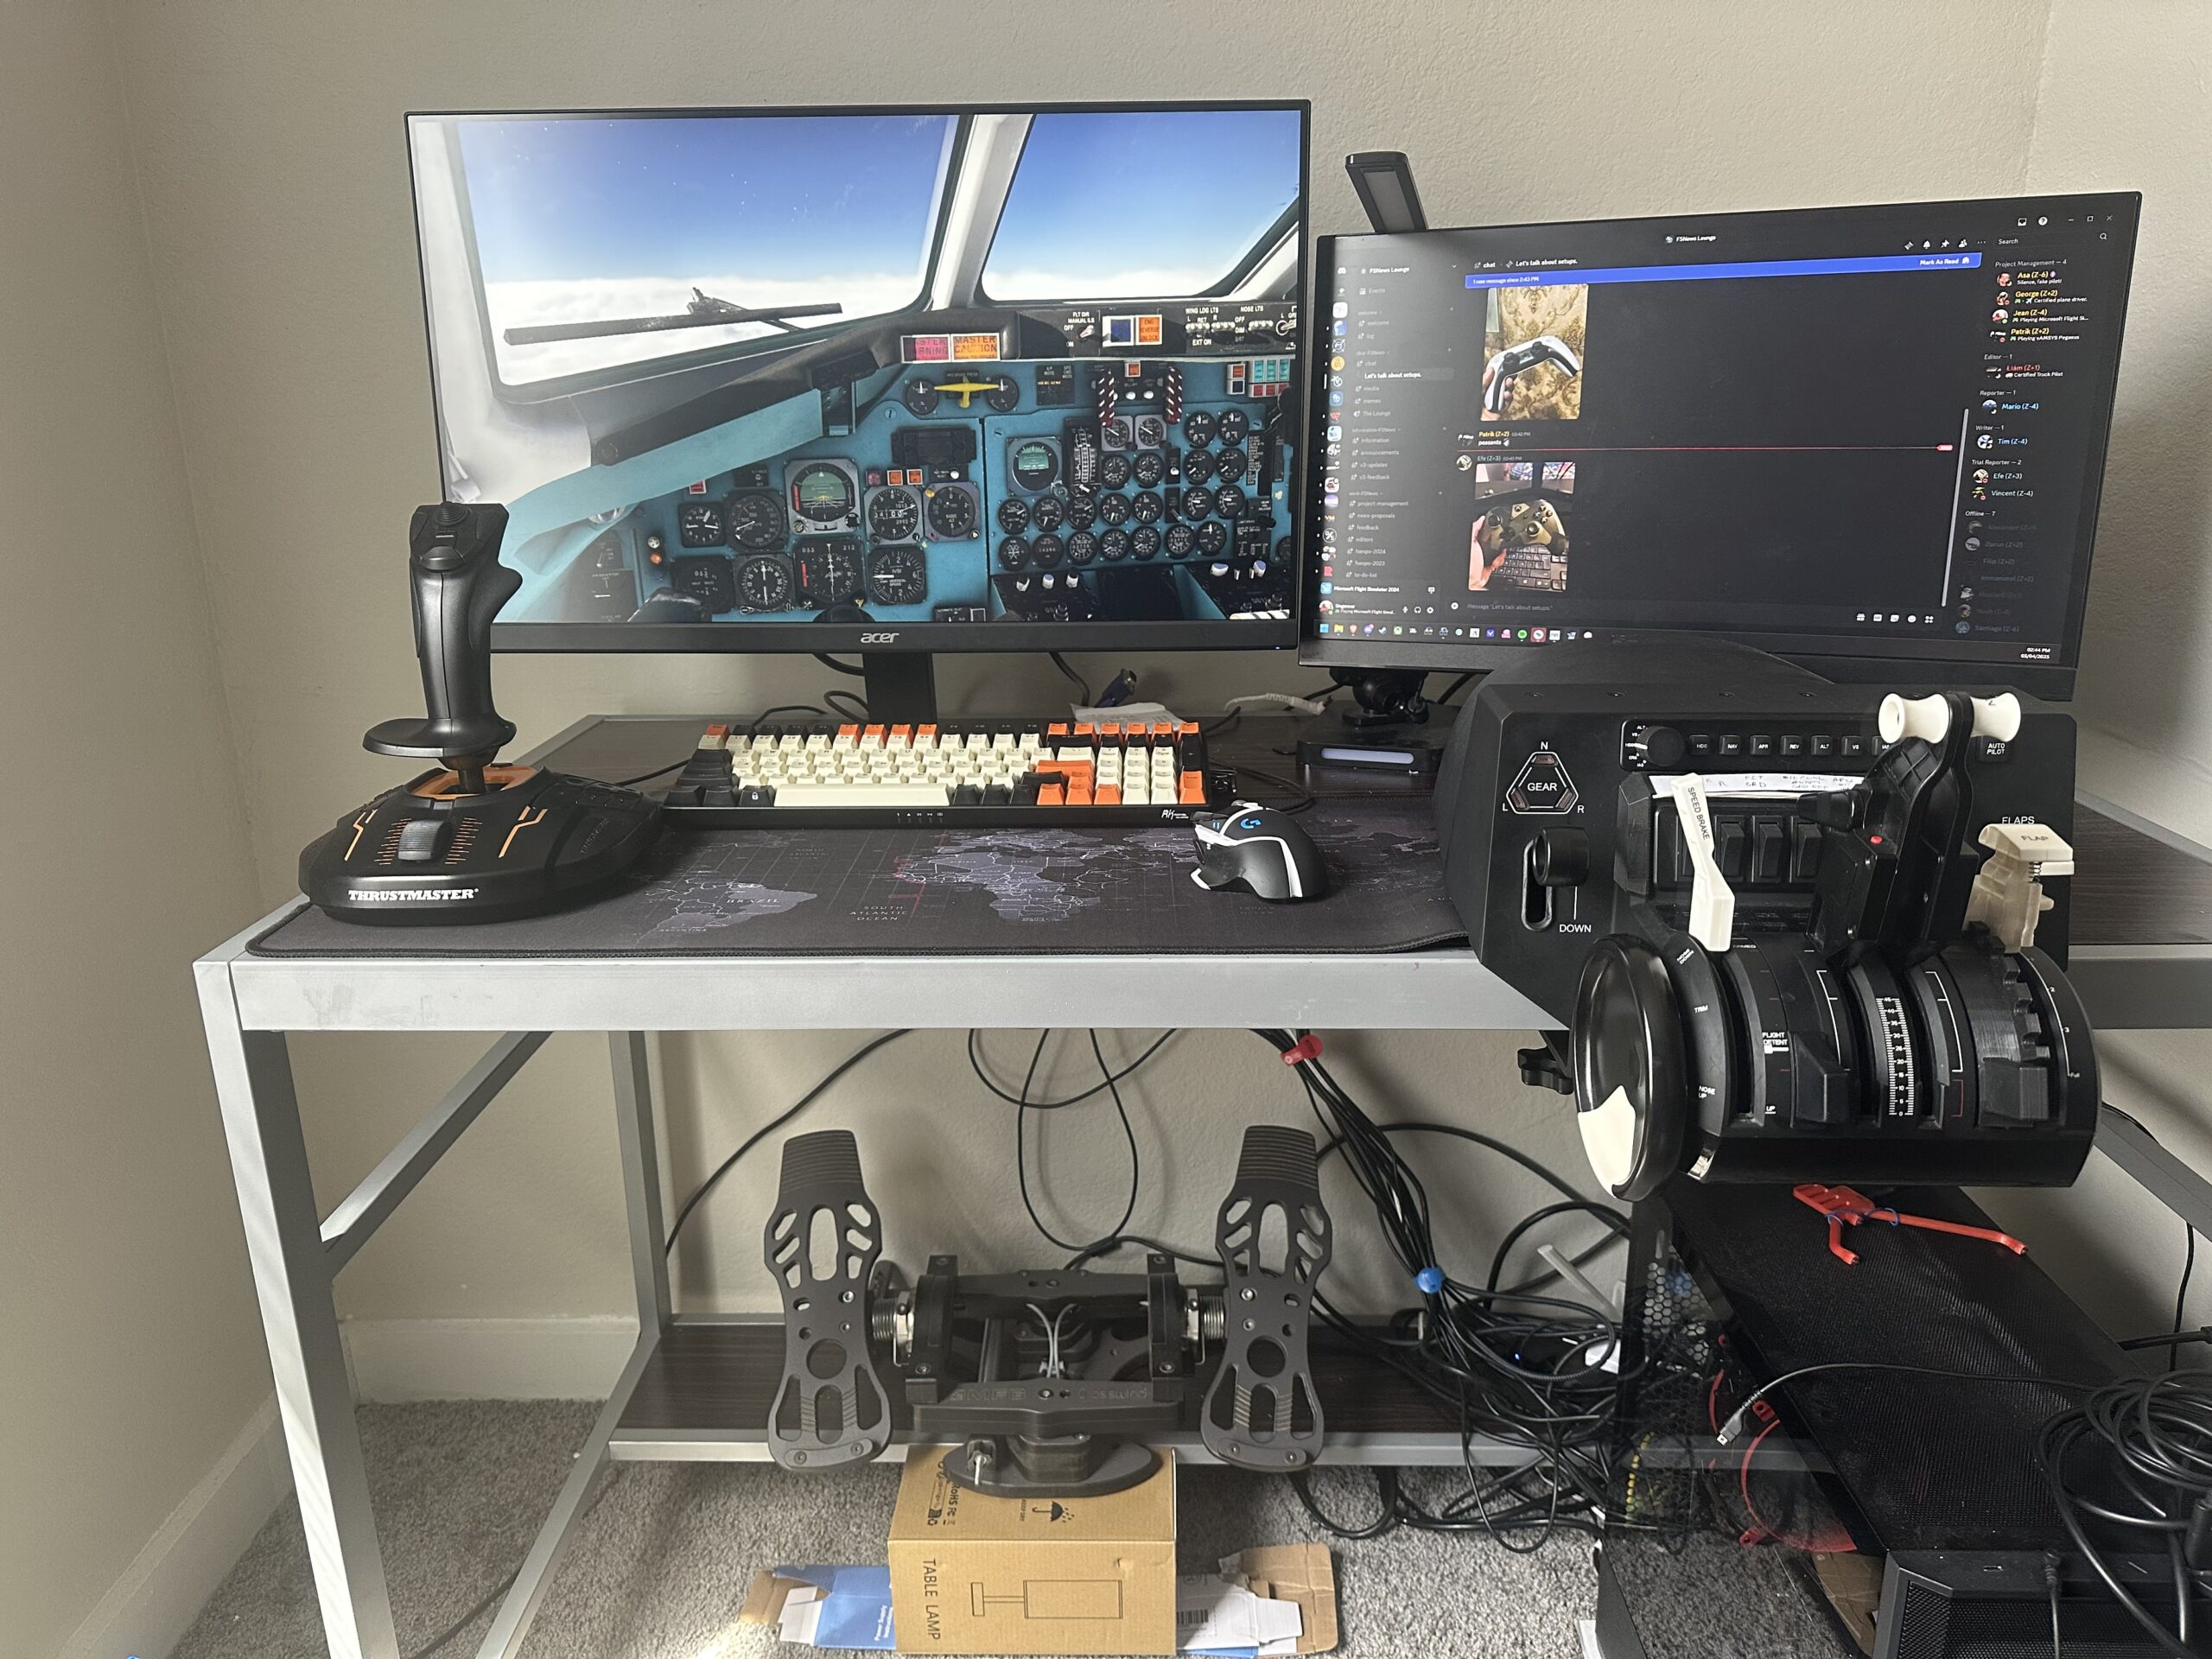
Don’t overlook rudder pedals if you want a complete and realistic flight control setup. This is especially true if you opt for a yoke setup, as rudder pedals are essential. In the midrange segment, the MFG Crosswind V3 pedals are an excellent choice, as proven by our team member, Asa. These typically cost between €250 and €350, but they offer a significant upgrade in realism and durability compared to entry-level equipment. These pedals provide precise yaw control, smooth braking for taxiing and landing, and a sturdy construction that remains stable even during the most aggressive crosswind landings. Whether you’re executing coordinated turns in a Cessna or managing crosswind landings in another aircraft, high-quality rudder pedals make a noticeable difference.
3. Setup: For the Pros – High-End Realism and Serious Cockpit Builders
If you’re already immersed in flight simulation and want to create a setup that not only feels like a real cockpit but also operates like one, this tier is for you (excluding full home cockpit). It’s where budget takes a backseat, and immersion, realism, and build quality take the controls.
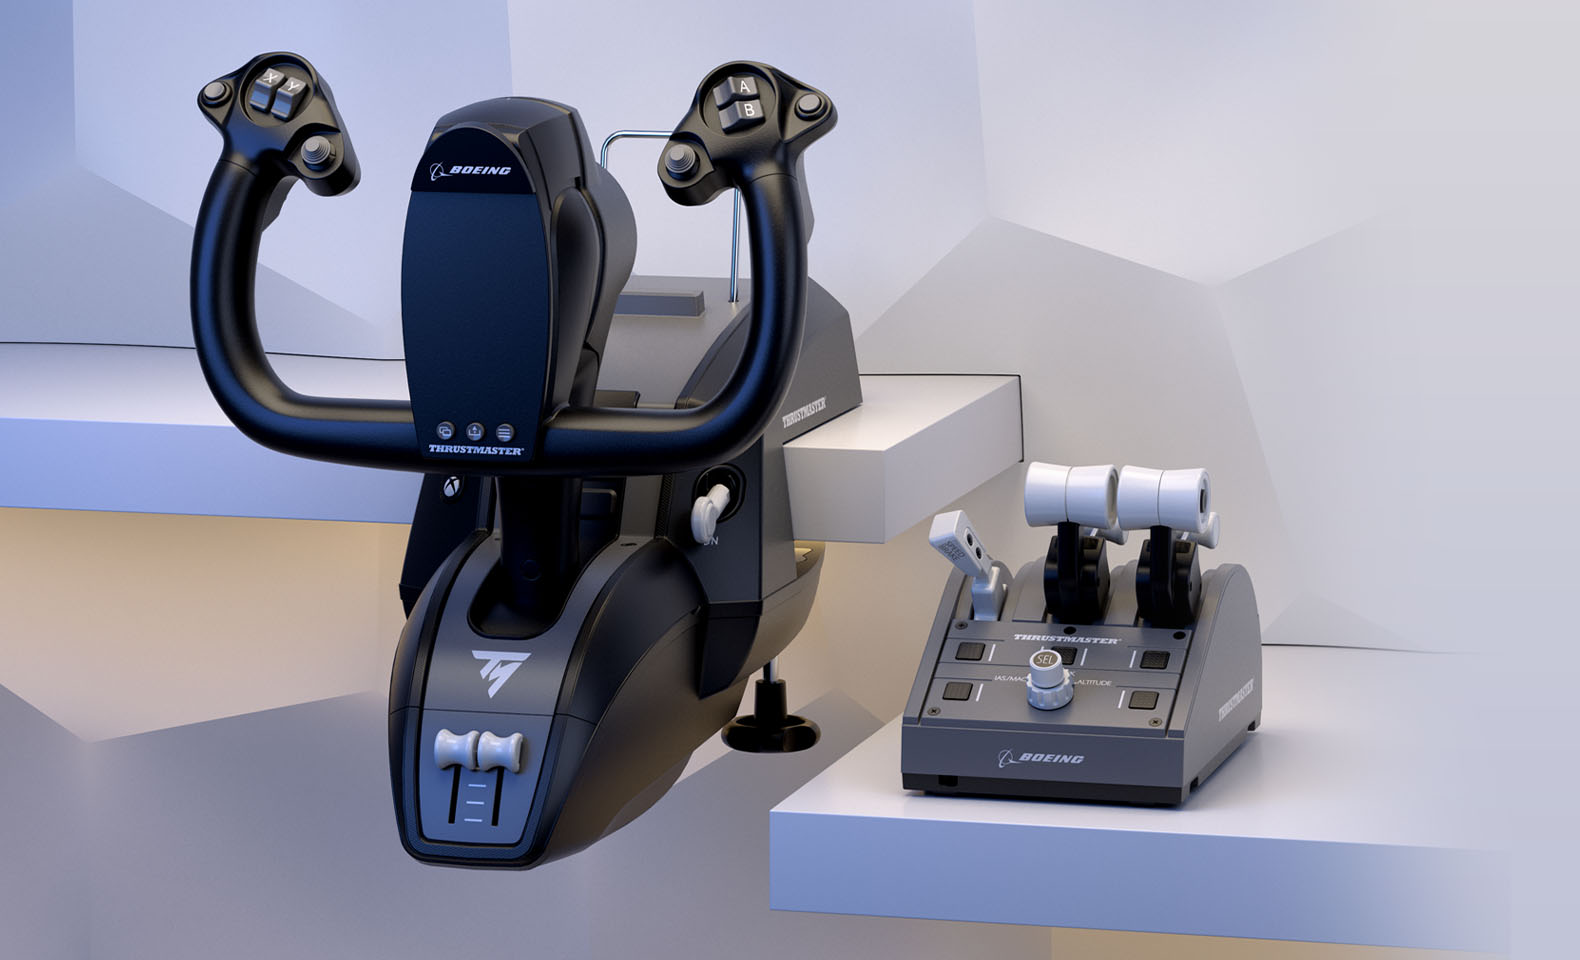
Let’s start with the heavy hitters: For Boeing fans, there’s no better entry point than the „Thrustmaster TCA Yoke Boeing Pack“ (around €500/$500). It’s officially licensed by Boeing and offers a yoke with a realistic pendular movement, dual-axis throttle quadrant, and smooth rudder trim controls. It’s plug-and-play, works great with MSFS and X-Plane, and gives you that iconic 737 feel right out of the box.
Now, rudder control is important: especially during crosswind landings or on tight taxiways. With a pendular motion system and hall-effect sensors, the Thrustmaster TPR Rudder Pedals (~€500/$650) offer unmatched precision and feel. Pilots upgrading from budget pedals will notice an immediate difference in responsiveness and build quality.
For commercial aviation simmers or mixed-fleet flyers, our team recommends – after testing it – to add in a Winwing MCDU. This fully functional CDU (Control Display Unit), coming in different color schemes for every aircraft from an Airbus A320 to a B777, lets you interact with your FMS exactly as you would in the real thing.
And if you’re looking for one of the most modular and high-quality flight control systems on the market, the Honeycomb Bravo Throttle Quadrant deserves a spot in your setup. Designed to accommodate everything from GA aircraft to complex airliners, the Bravo features swappable throttle levers, a built-in trim wheel, autopilot panel, gear lever, and annunciator lights. This peripheral is priced at around 250€. Its versatility allows for seamless configuration whether you’re flying a Cessna 172 or a Boeing 747. Combined with its solid build and smooth mechanics, the Bravo is a favorite among simmers who want realism without sacrificing adaptability, especially when paired with the Honeycomb Alpha Yoke for a fully integrated experience.
Taxiing an Airbus like a pro? That’s where the UFKSim Airbus Tiller comes in. This device is a dedicated tiller that allows nosewheel steering via a separate control axis, just like the real aircraft. It’s a niche product, but for realism junkies who care about immersion during taxi, it’s a must-have.
To look around the cockpit of your aircraft without touching the mouse, add a Tobii Eye Tracker (starting at around €250/$360). It tracks your head and eye movements, letting you look around the cockpit naturally – perfect for monitoring instruments, checking the overhead panels, or spotting traffic in a traffic pattern. It’s a game-changer for immersion and situational awareness.
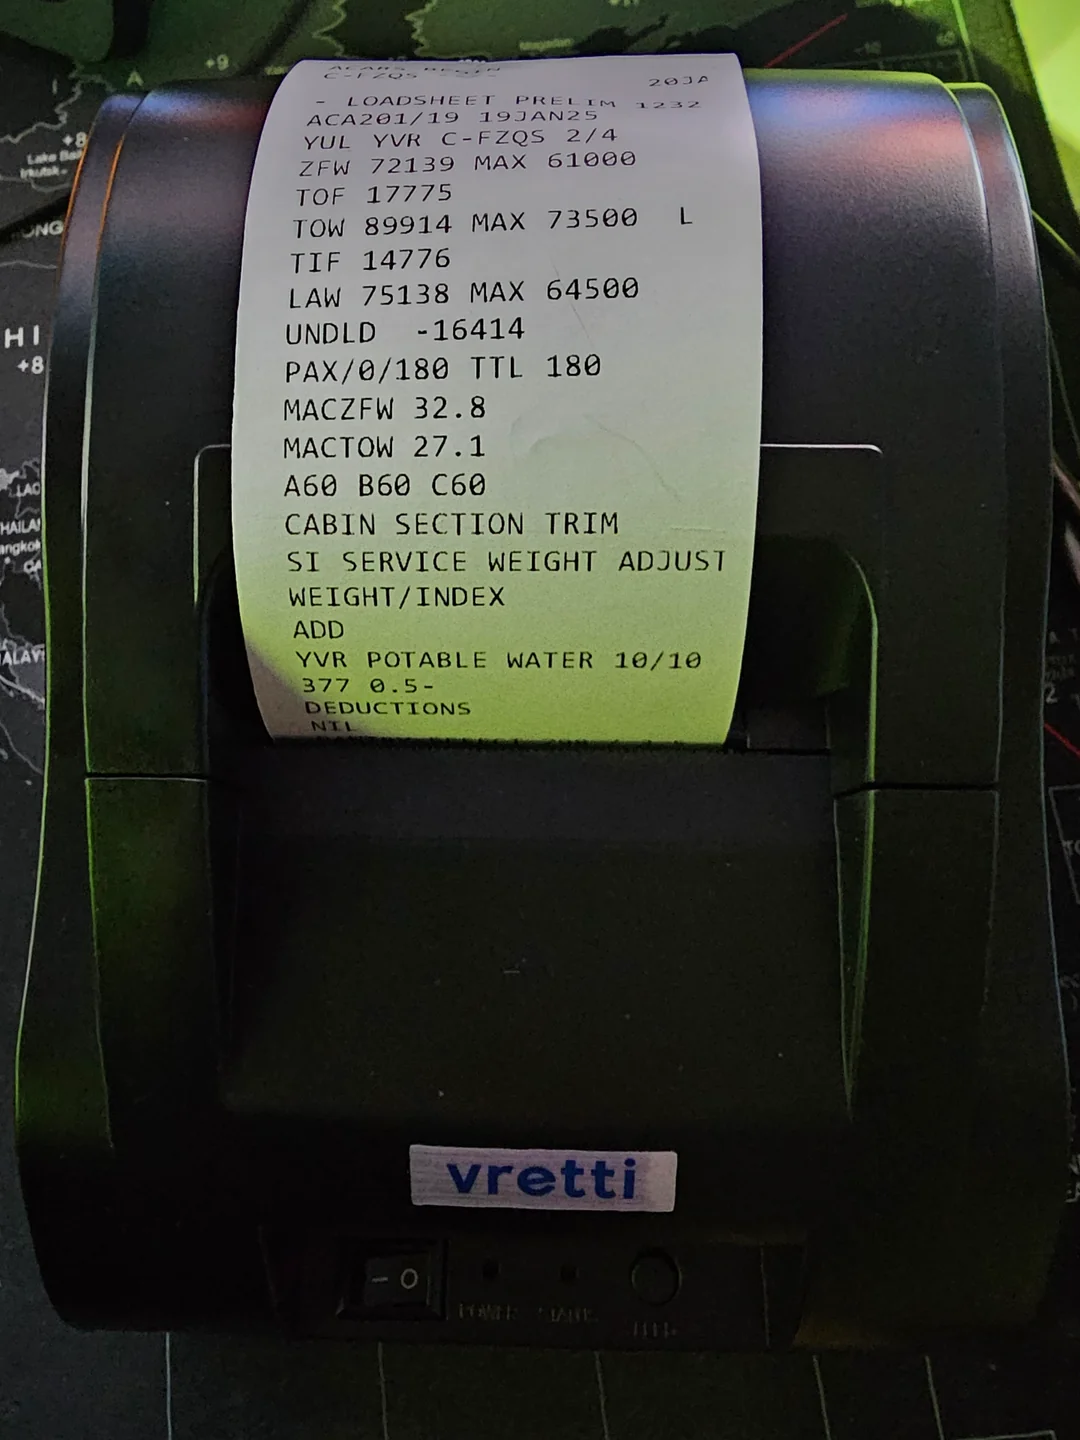
And here’s a hidden gem for the realism enthusiast: thermal receipt printers, available online used for under €50. With multiple supported aircraft like the Fenix A320, these can be configured to print actual MCDU outputs, like ATIS, CPDLC (Controller-Pilot Data Link Communication) messages, or operational flight plans, right into your hand like in the real cockpit. Plus, you can collect these receipts physically so you have something to remember your flights. It’s an inexpensive but deeply immersive addition that brings your virtual airline ops into the physical world.

VR Headsets and More: Additional Hardware for the Ultimate Immersion
To round things off, don’t forget one of the most transformative accessories in flight simming: VR headsets. While they are not required for a great simulation experience, a quality VR headset with proper hardware integration can take immersion to the next (flight)level, putting you inside the cockpit (instead of in front) in a way no monitor can match. Products like the Pimax Crystal, which we wrote about, or the Meta Quest 3 are popular choices among simmers thanks to their sharp visuals, wide field of view, and increasing simulator compatibility. We may be dedicating a follow-up editorial to VR specifically, so stay tuned! Until then, many happy landings!
Feel free to join our Discord server to share your feedback on the article, screenshots from your flights or just chat with the rest of the team and the community. Click here to join the server.